How To Cook A FULL SIZE Turkey In Your Crock Pot !

Today’s post, will hopefully, inform you on “how to cook a full size turkey in your crock pot”. My favorite way to cook a “turkey breast has always been in the crock pot, but this past week I went a step further, I cooked a 15lb turkey in my regular size crock pot! Today I’m going to show you exactly HOW I DID THIS. Please note that you can also cook a turkey breast (without disassembling!) with this same method. For those who love the white meat, this is a great option!


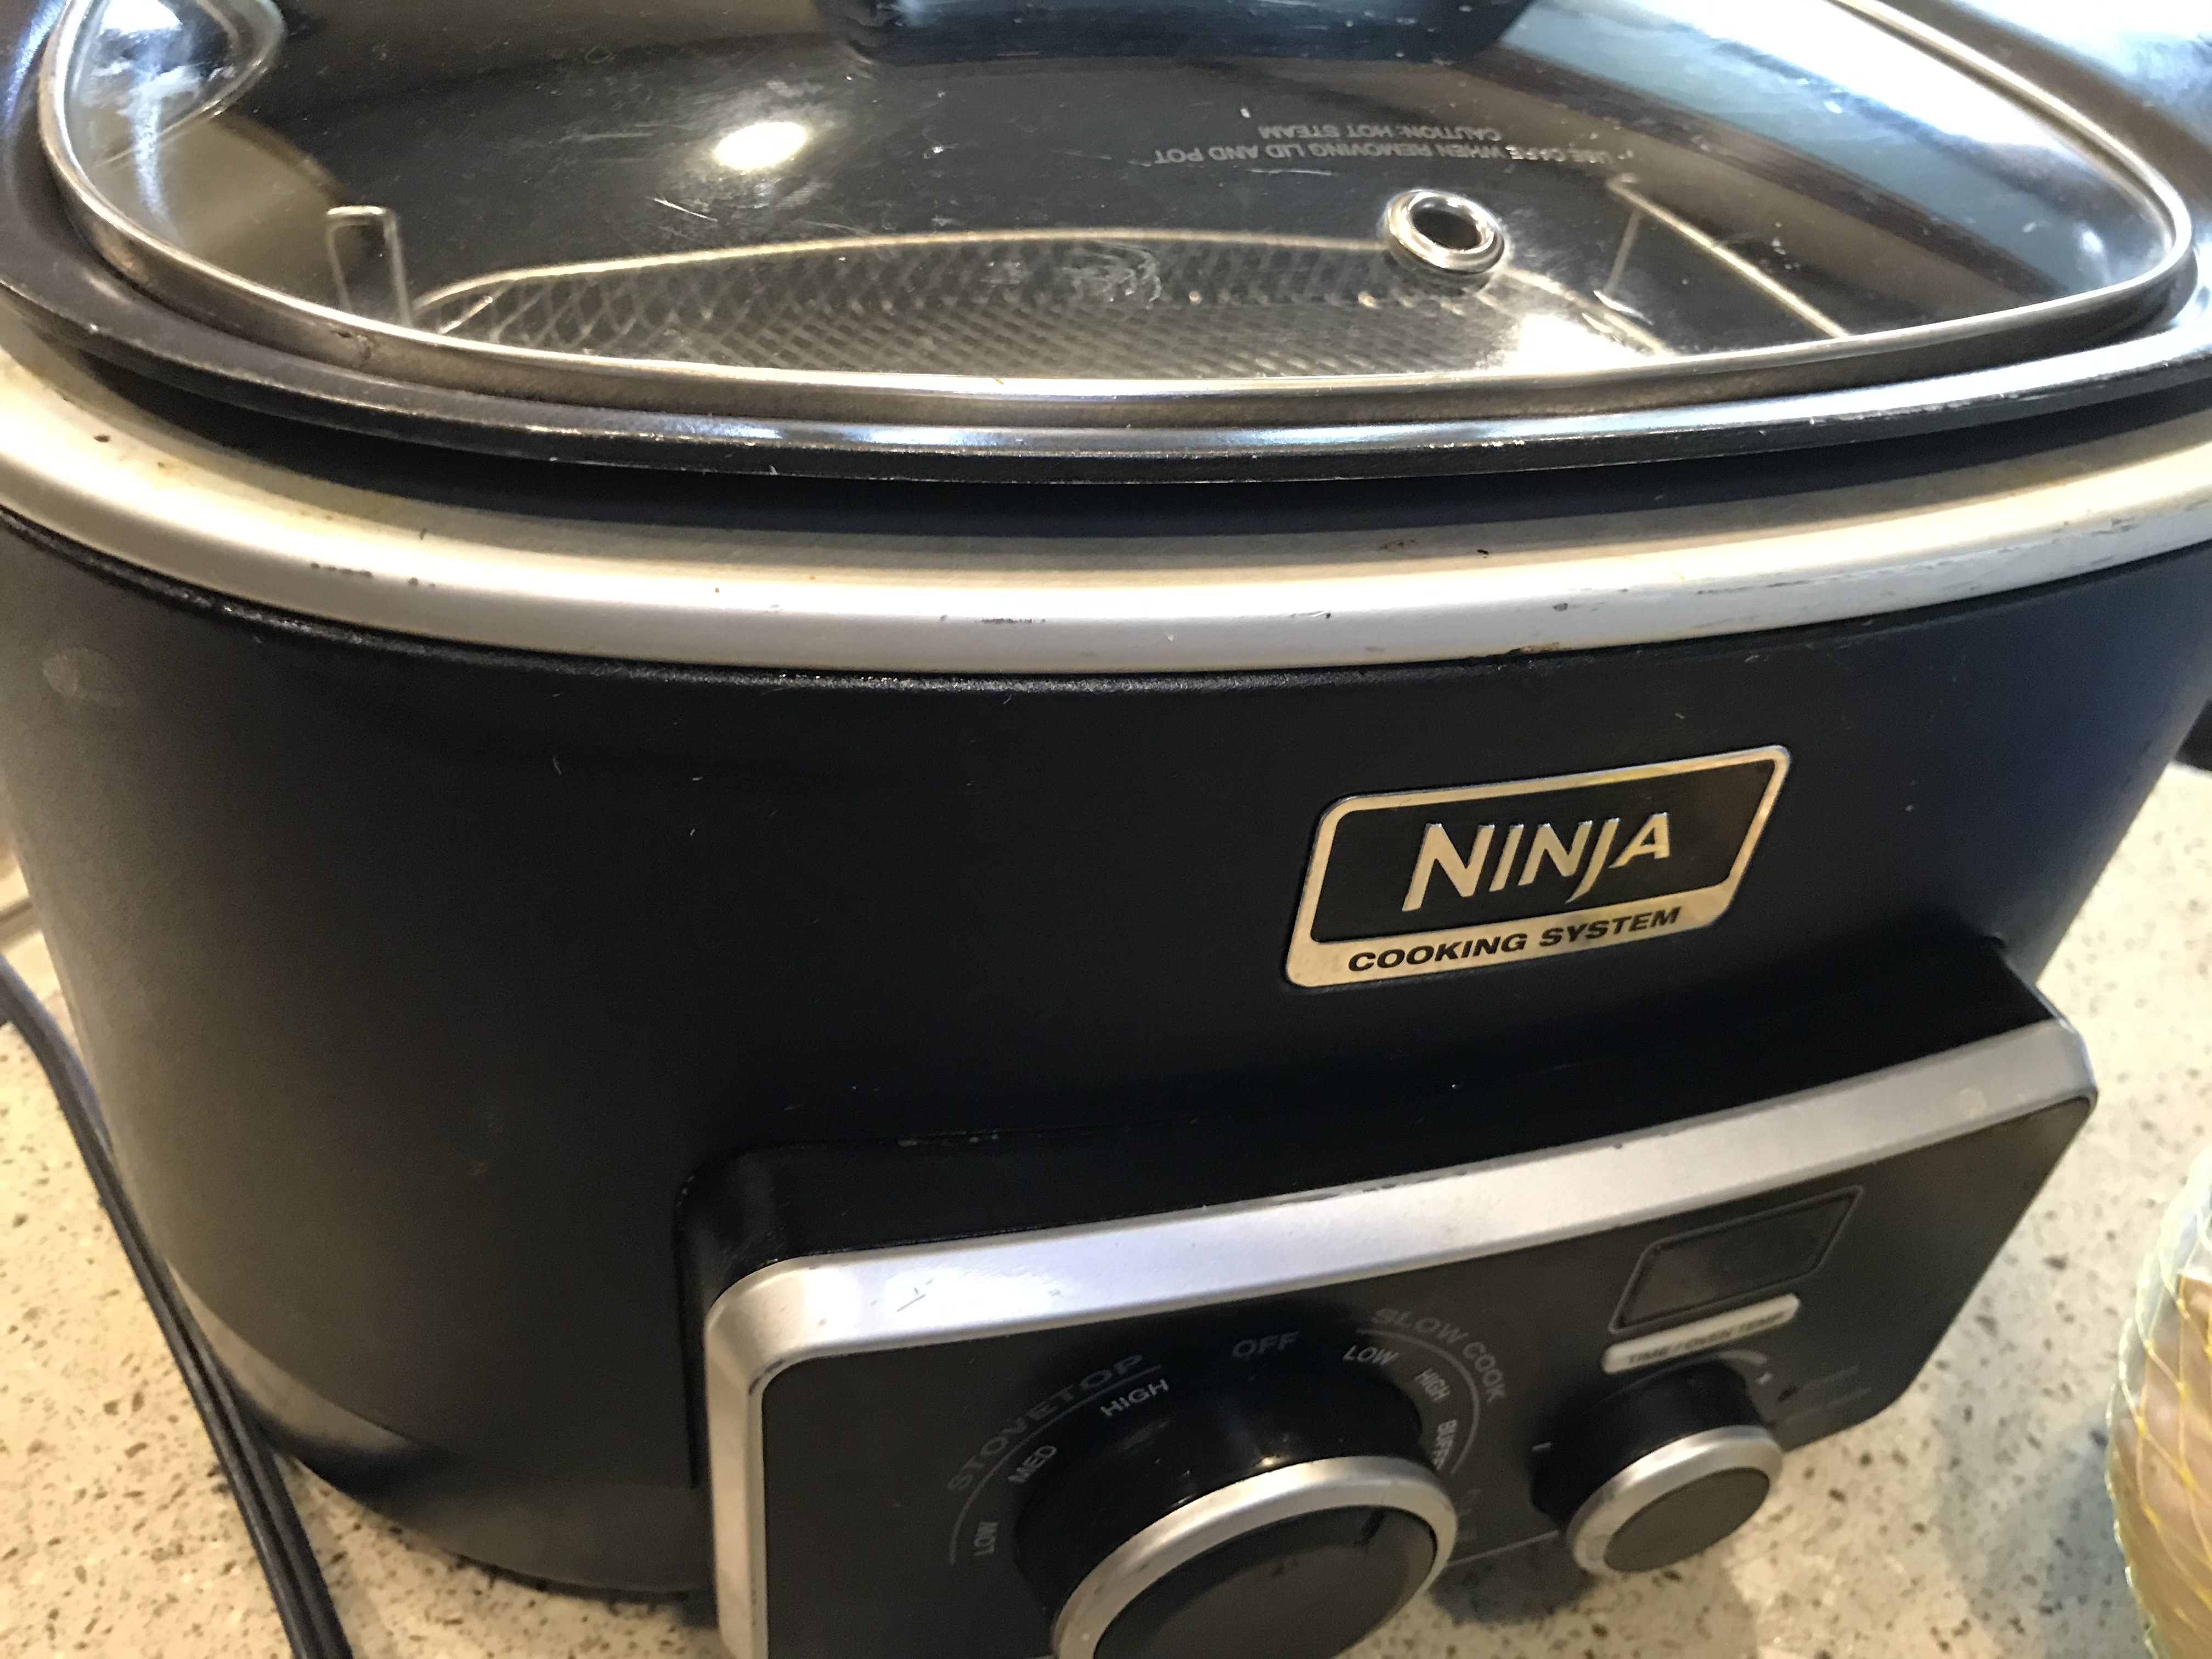
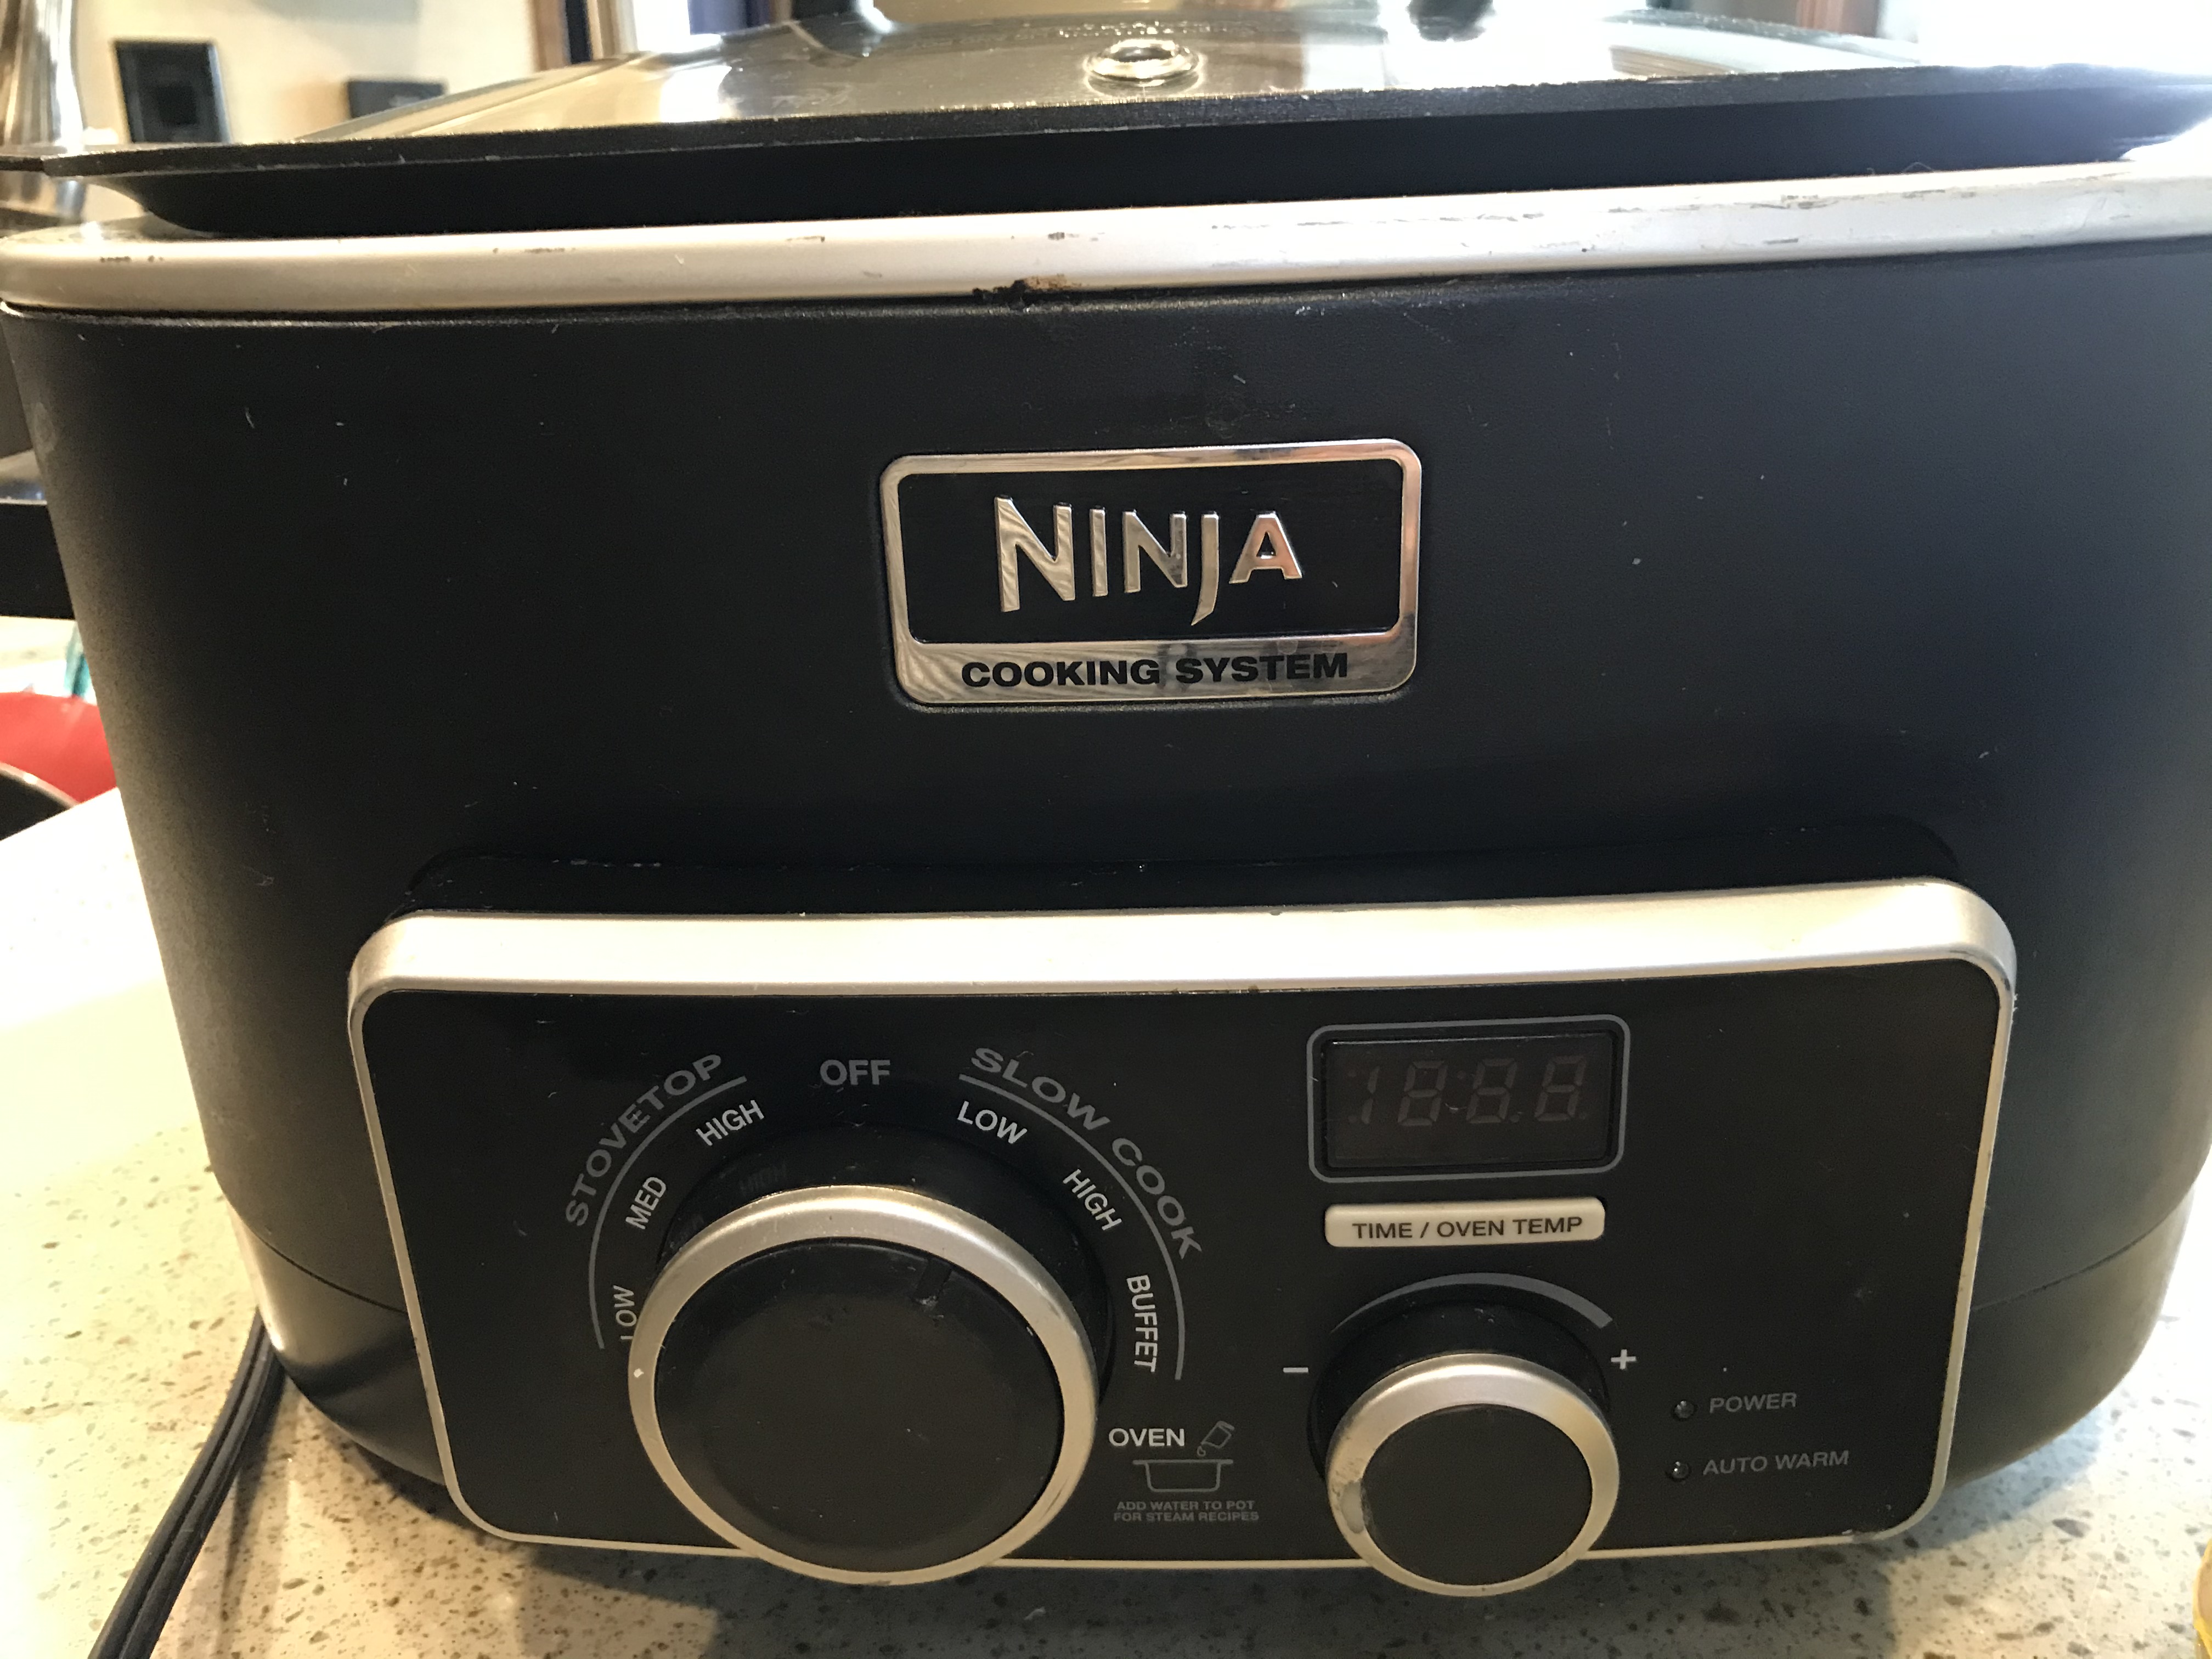
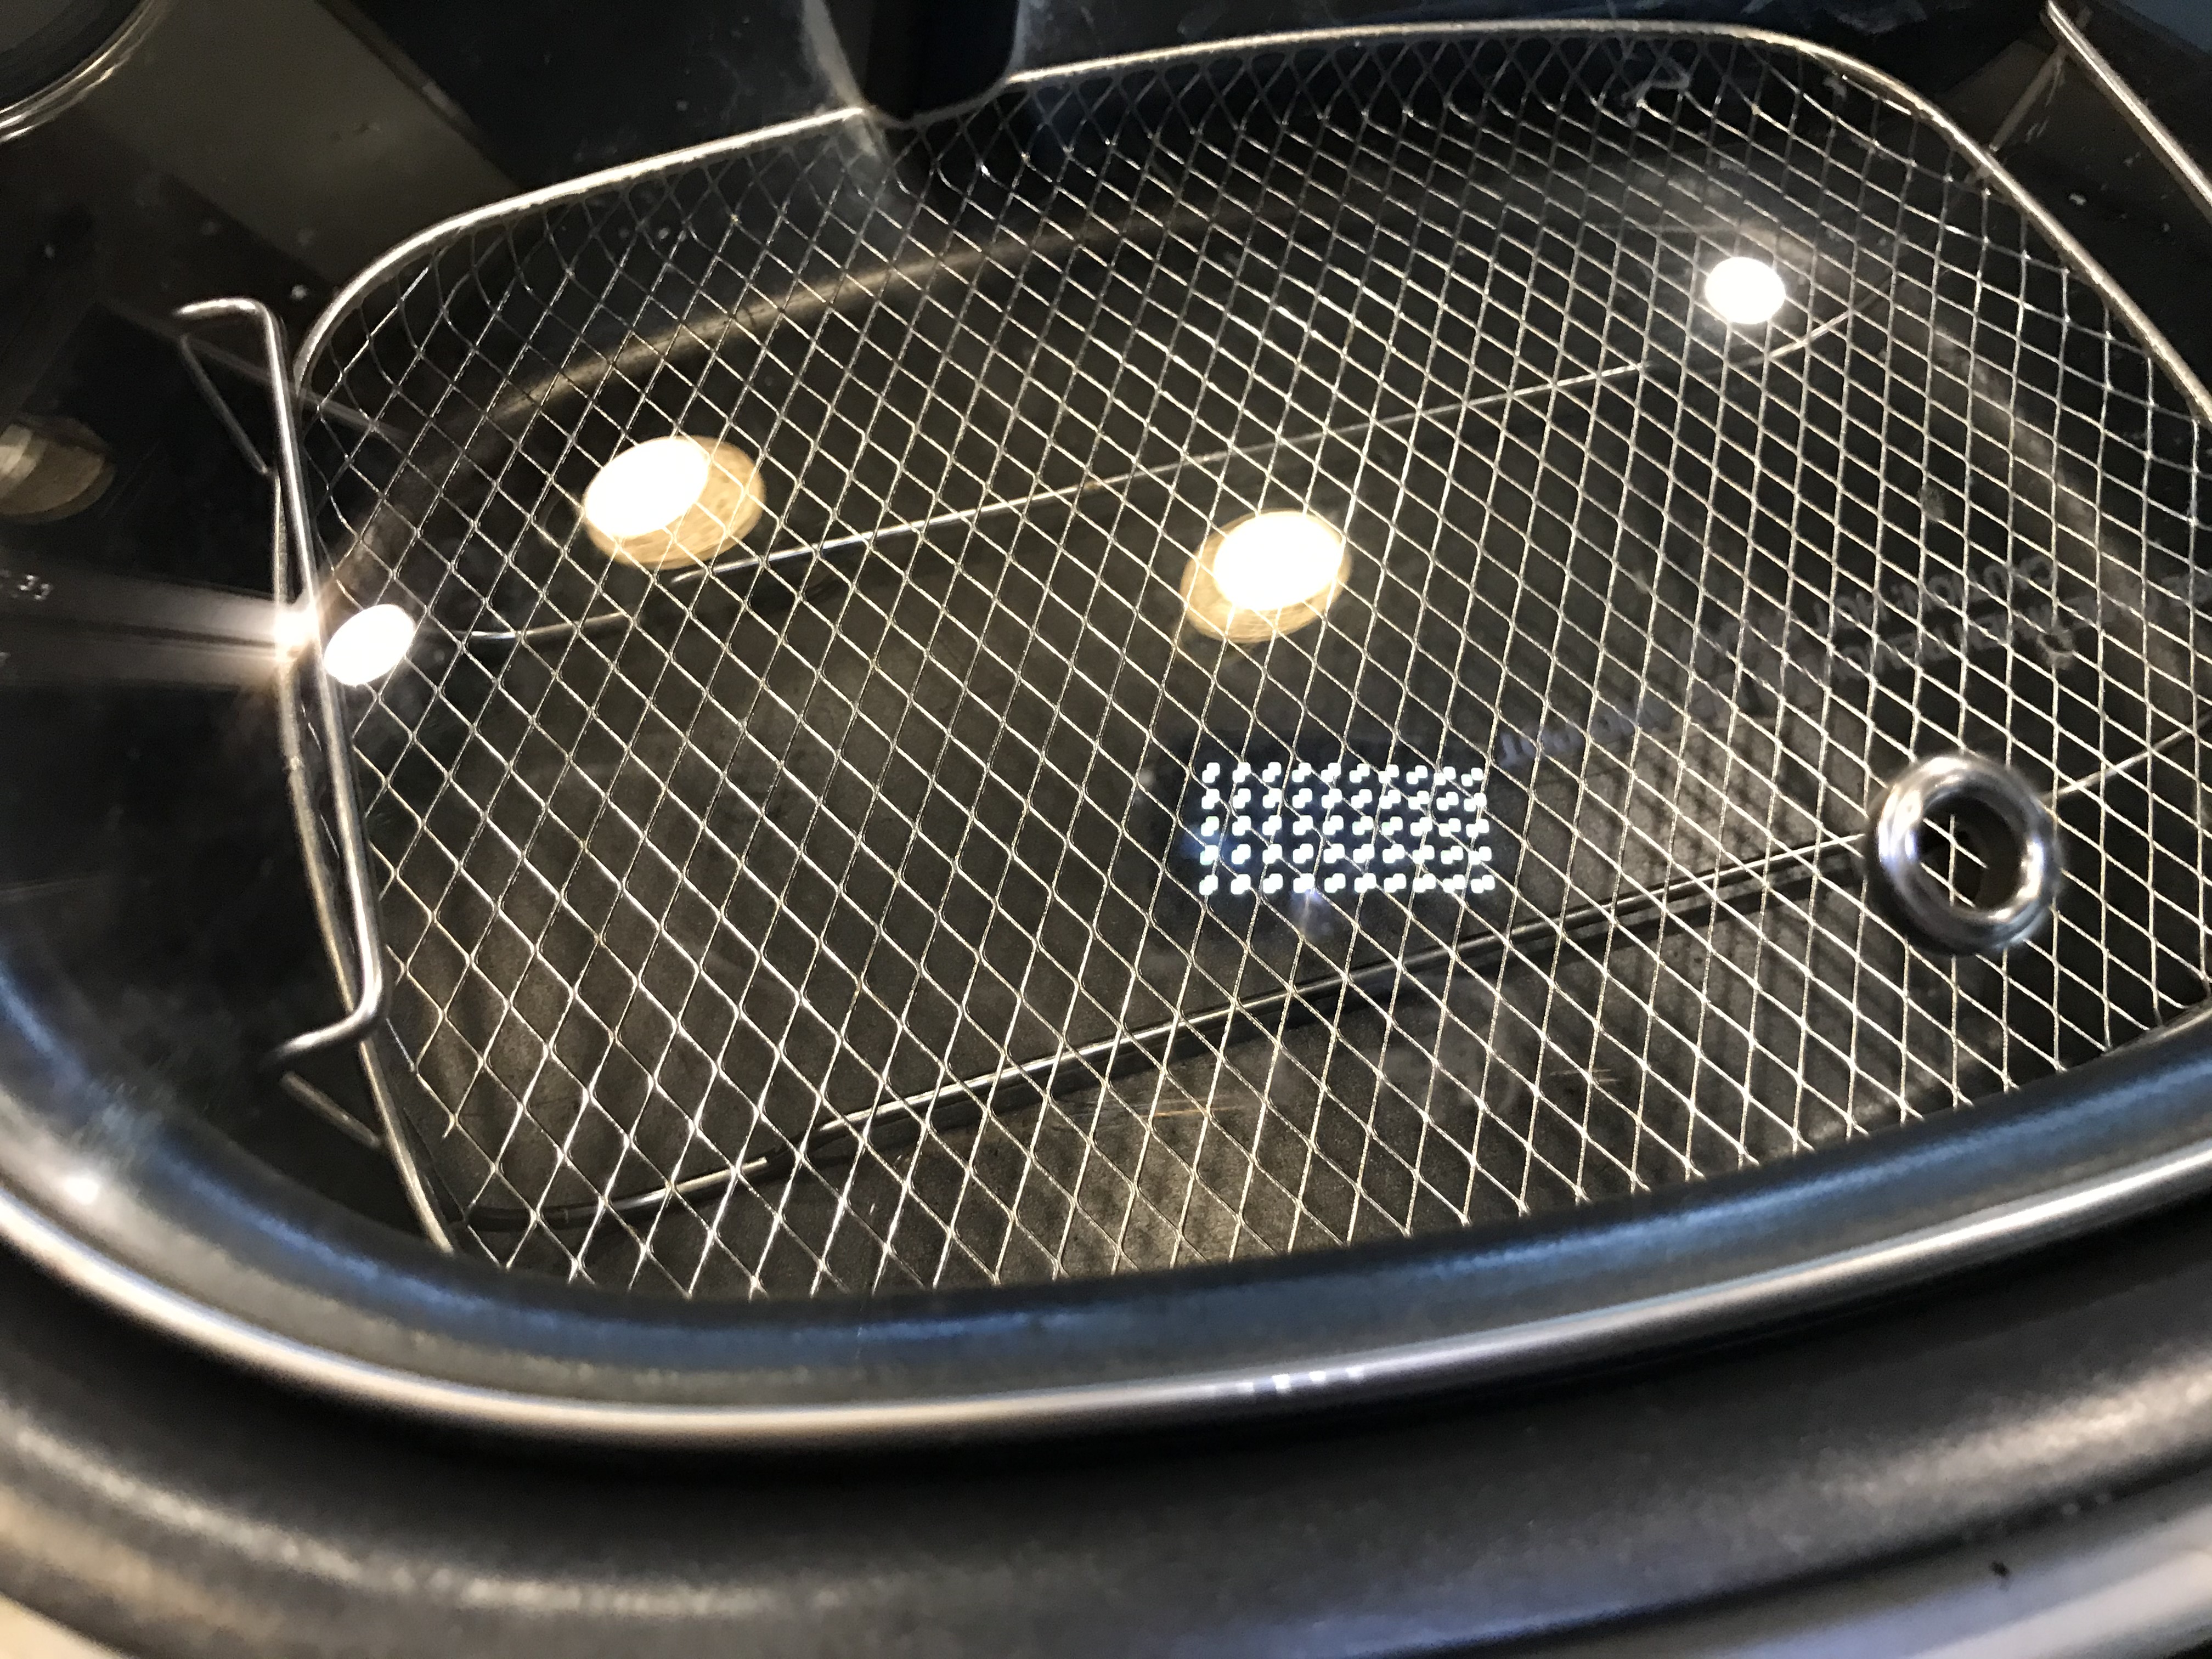
*This is my all time favorite crock pot shown above . I have had this, 4 in 1, Ninja crock pot, for 7 years and it is AMAZING! Unfortunately , I couldn’t find this product anymore to share a link, but I did find a 5 star, 12 in 1 , Ninja instant pot/ slow cooker, which I have linked in its place. If it is anything like my Ninja then you will LOVE it! # Christmas idea!

Why Should I Cook A Full Size Turkey In A Crock pot?

A couple reasons I would consider cooking a turkey in a crock pot instead of the oven, are …

  • To save oven space for cooking casseroles etc.
  • To prevent leaving the oven on overnight or while away
  • For the juicy turkey it produces!

How To Cook A Full Size Turkey In The Crock Pot

Preparation

If you have dealt with cleaning game in any way, then this step should be a breeze!

You are going to begin by thawing your entire turkey per the instructions on the turkey packaging. (This usually takes a few days!)

Next, you are going to “quarter” your thawed turkey . This just means you will disassemble each section of the turkey. Similar to how you would do your rotisserie chicken before serving it.

Before you quarter your turkey, you will want to lay your thawed turkey on a cutting board. (I like to lay a towel under my board to keep juice from spreading).

Then you will remove any internal organs or bags.
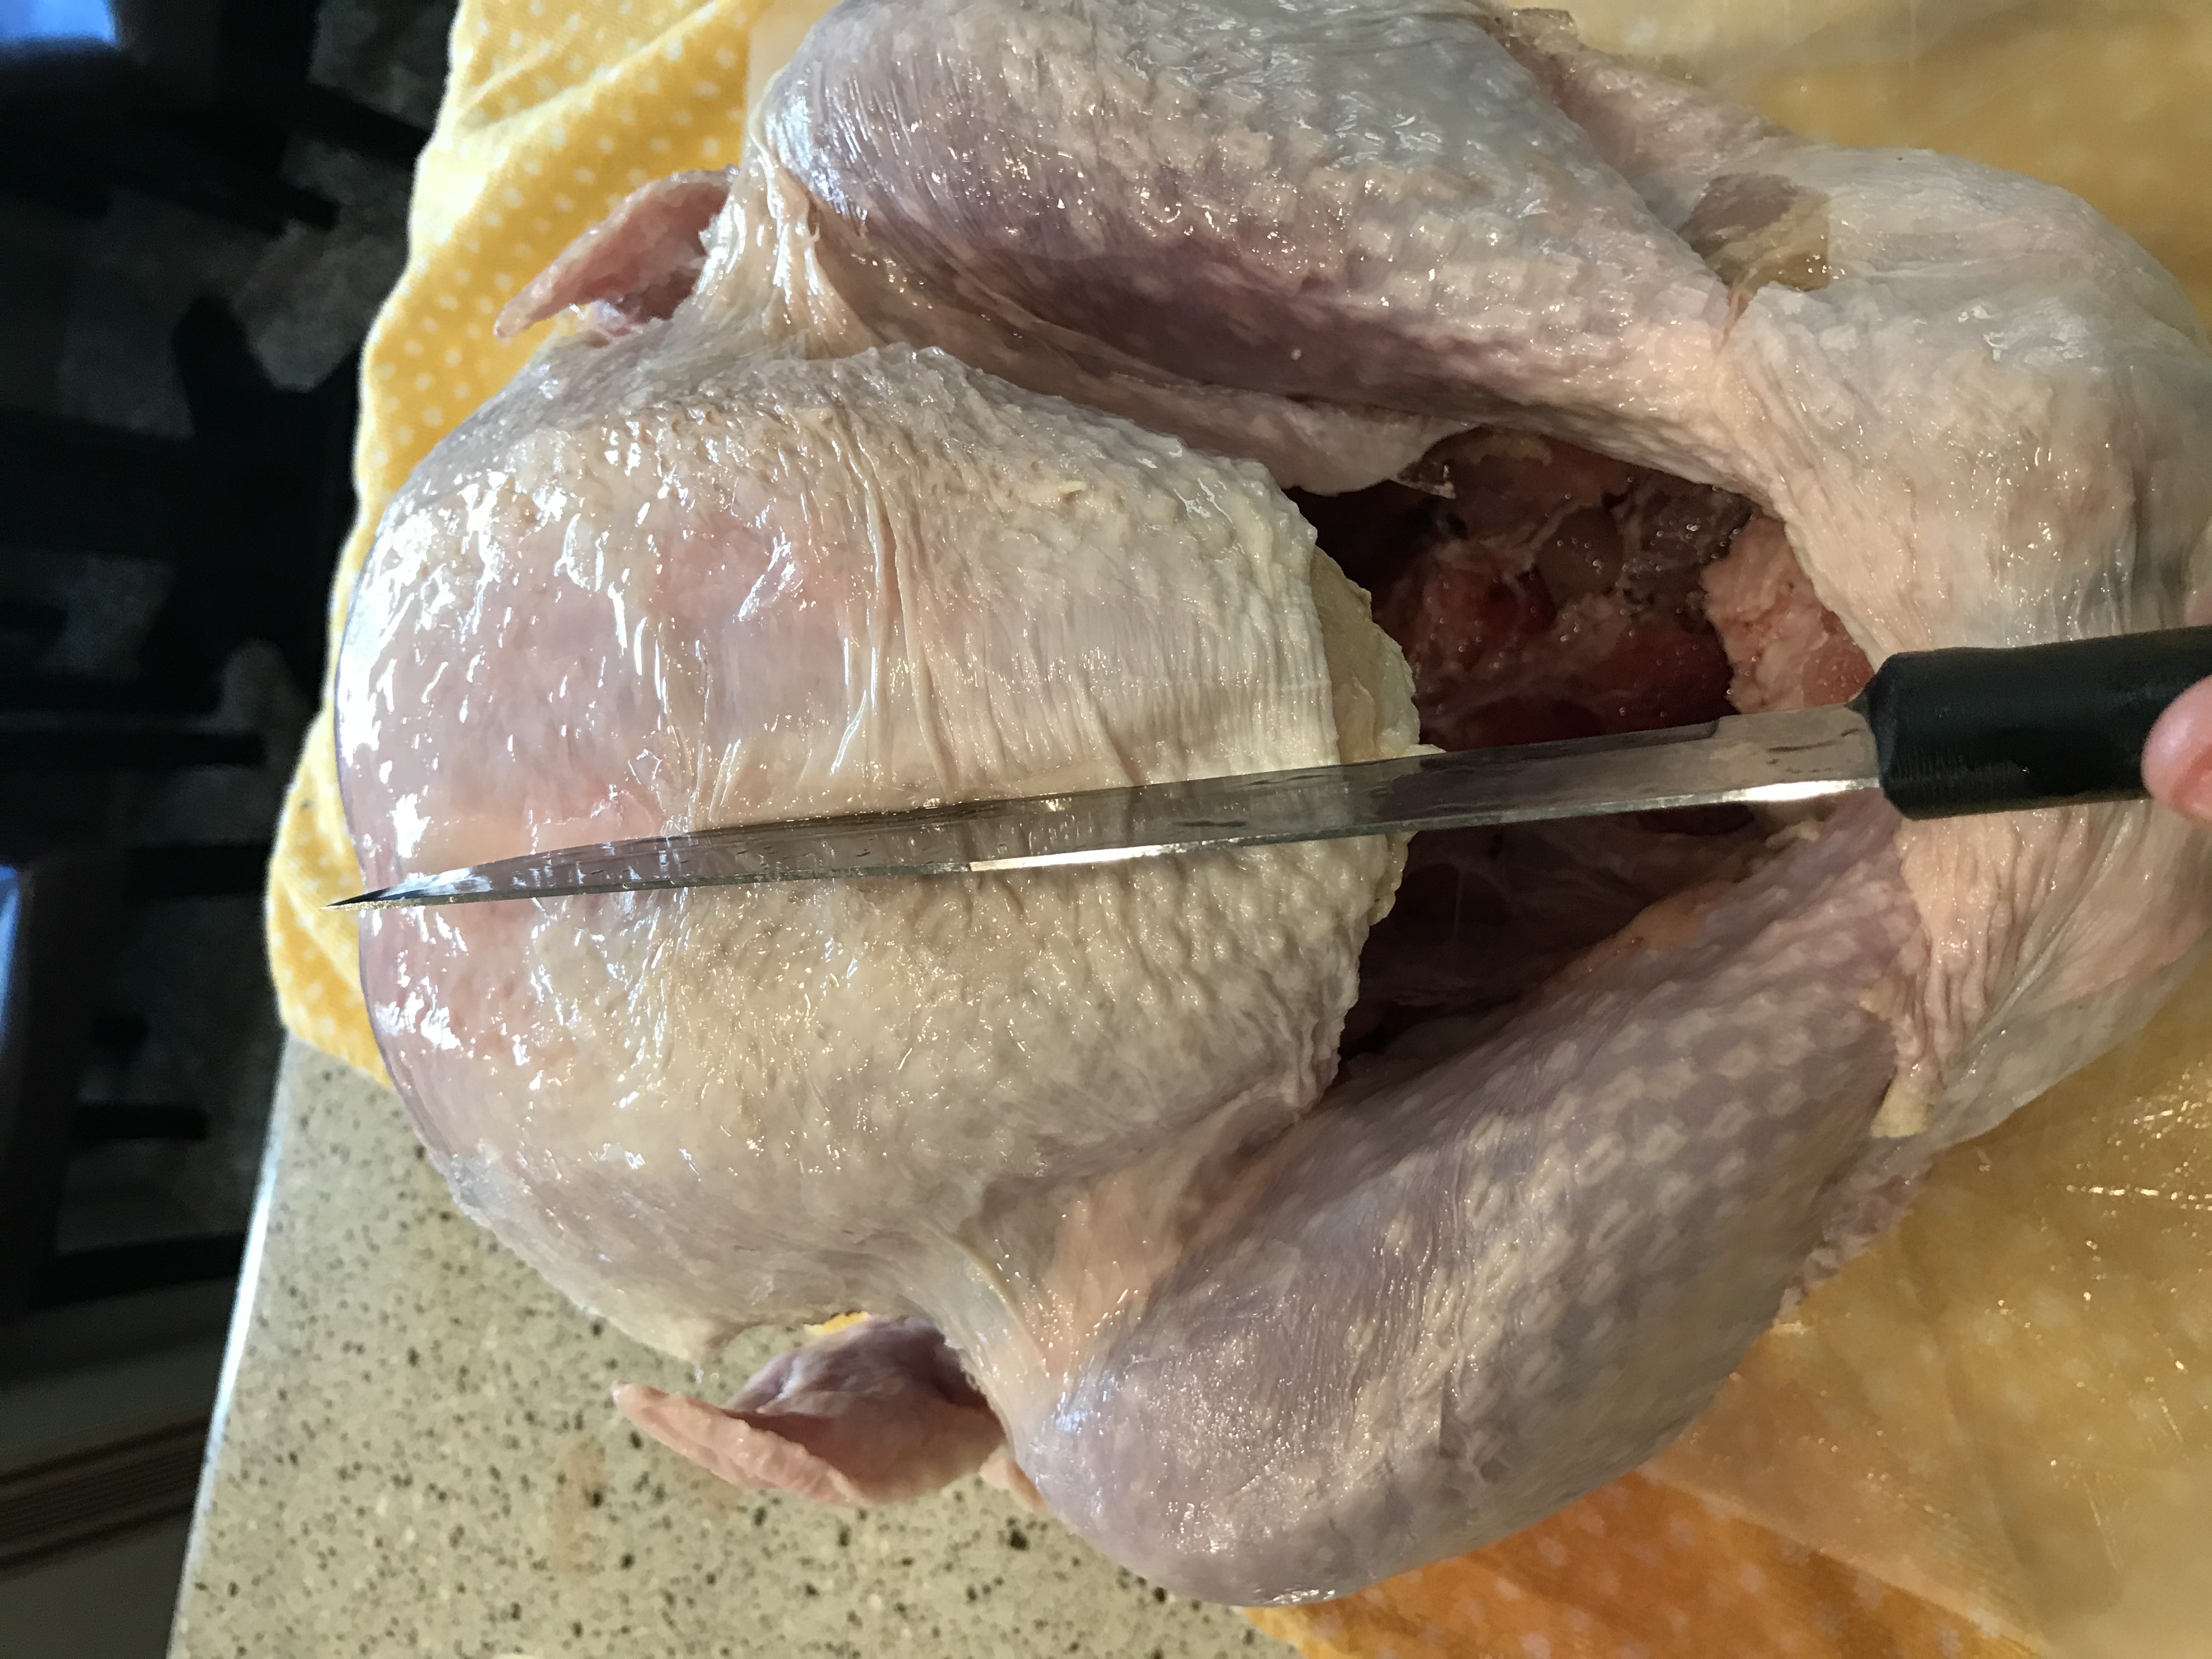
Quartering

You could begin at any part of the turkey, but I began by cutting along the back bone on each side.

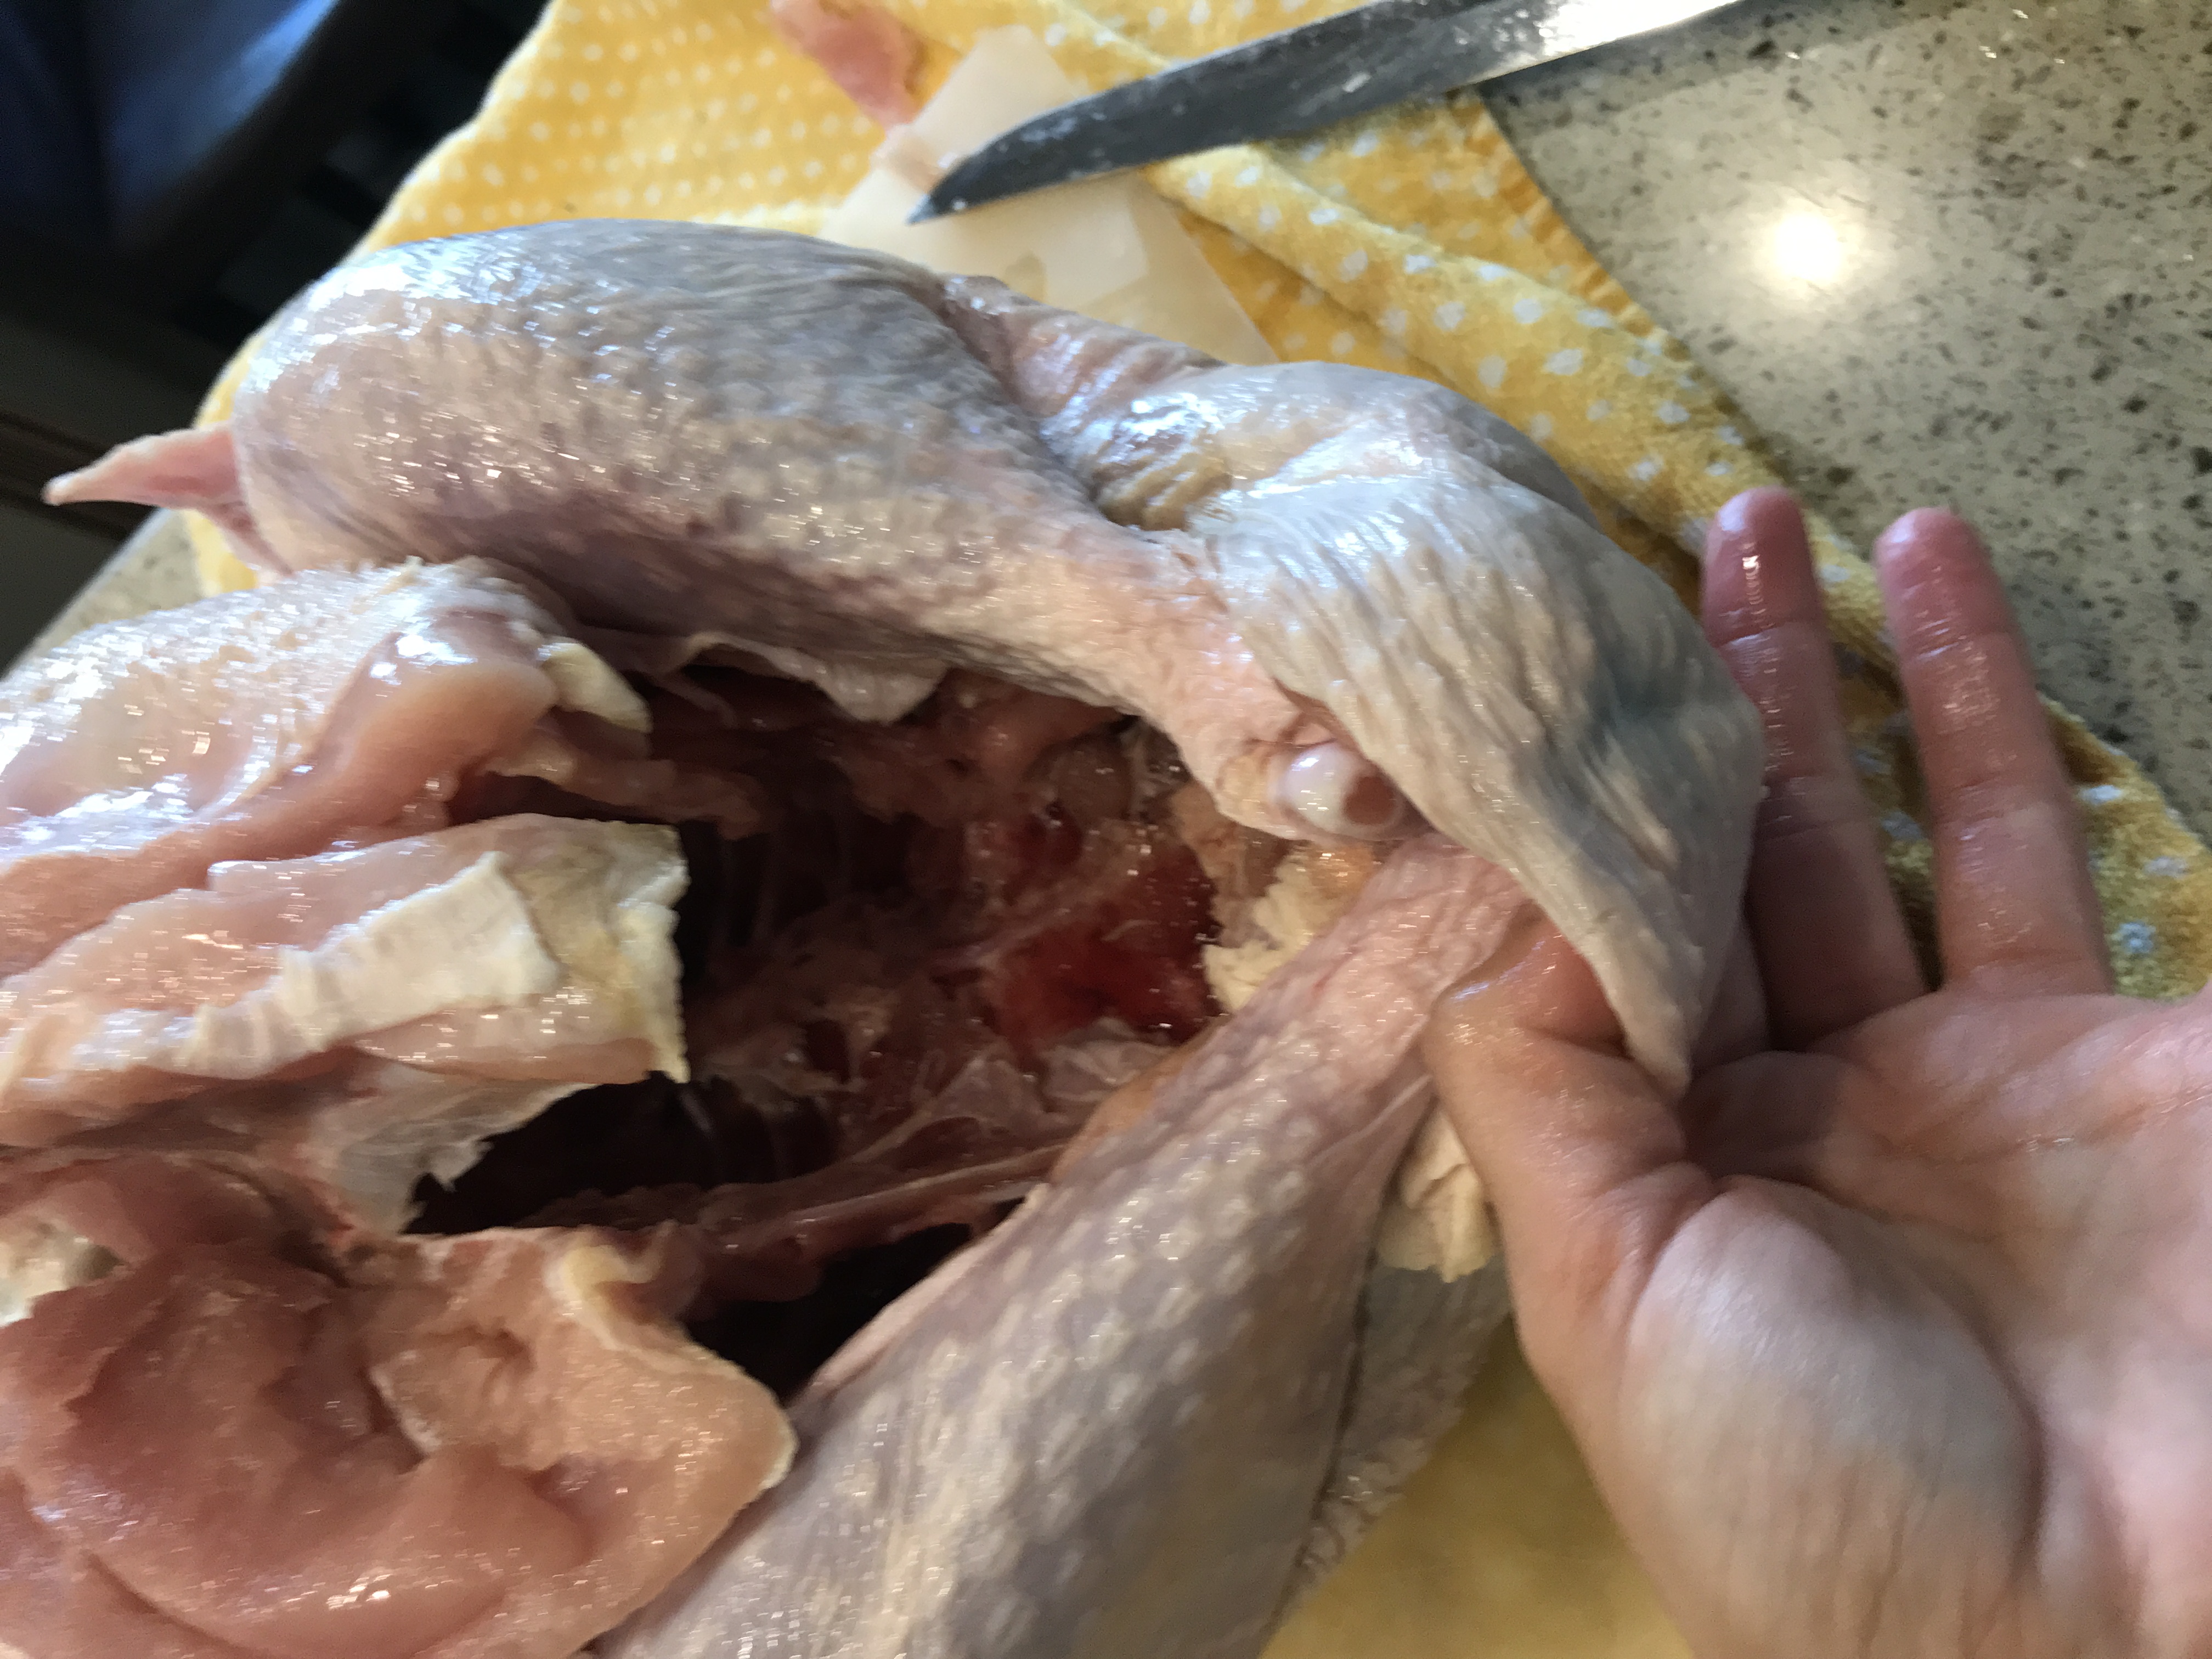
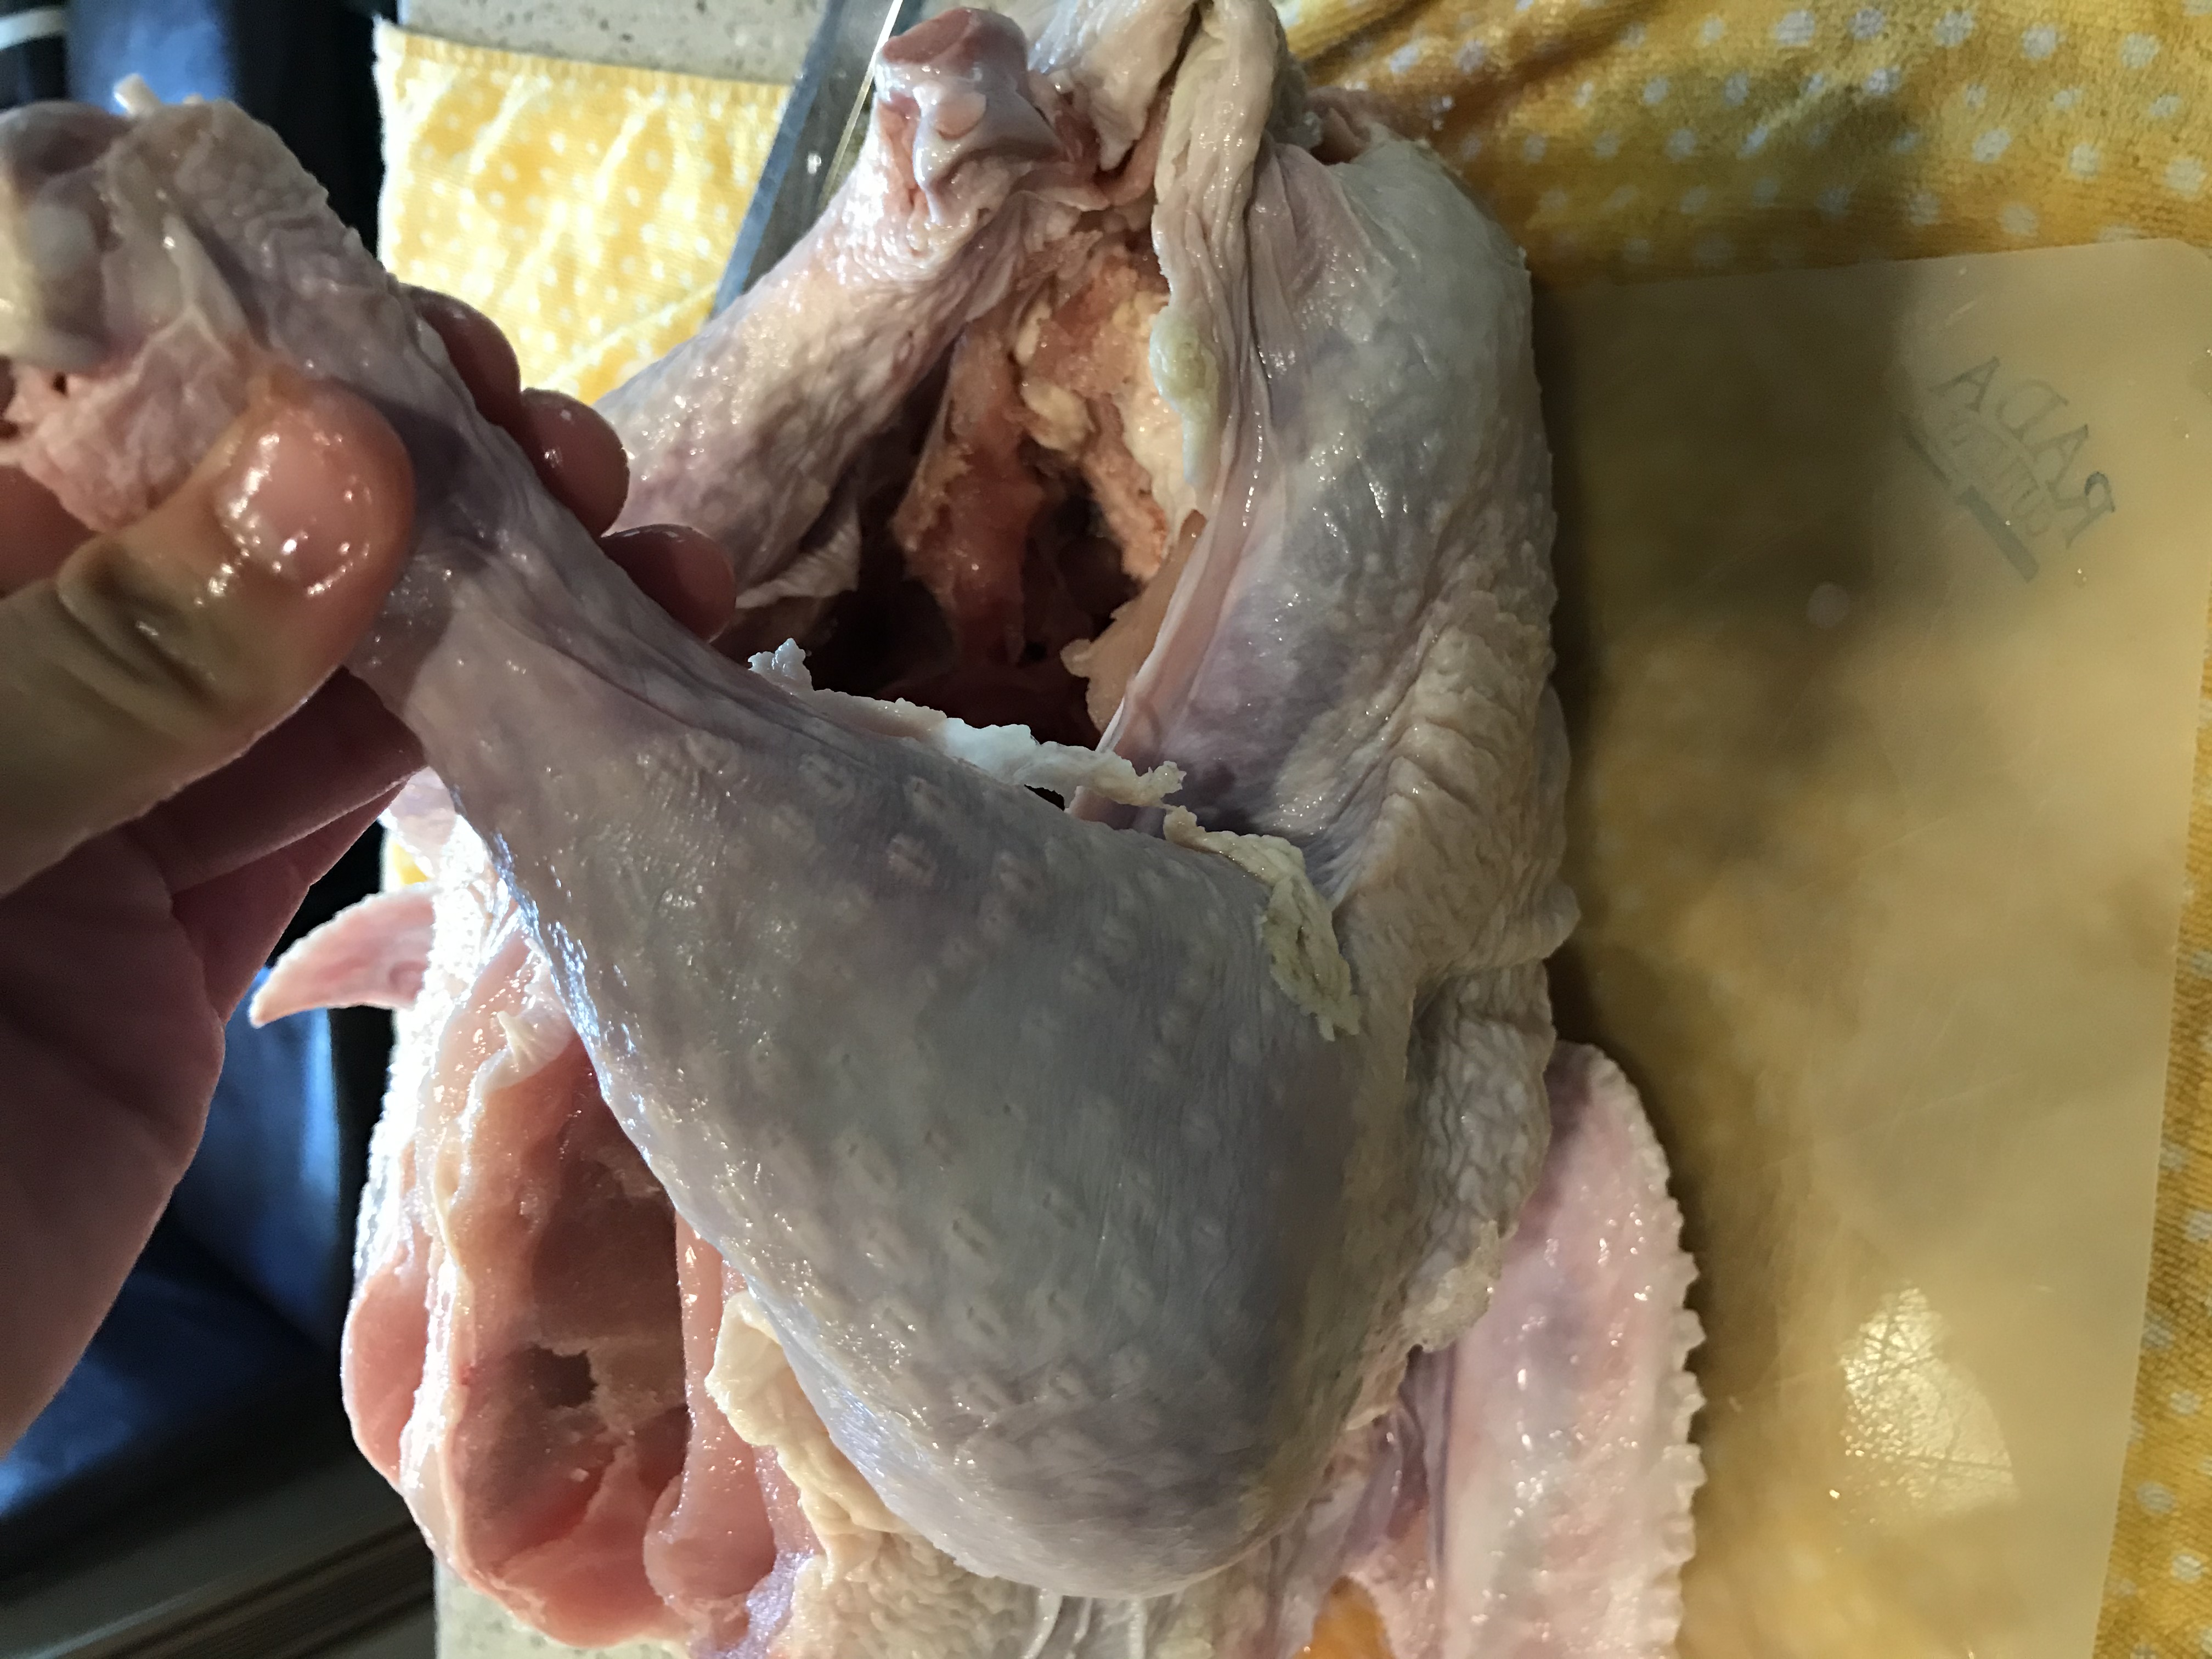
I then cut around each leg joint, once cut to the bone you can twist until disconnected. Finish by cutting off any remaining skin attaching the leg to the body. The same process is used for all bones attached. You should not have to cut through any bones with a knife.

Remove each section one by one then go back and make sure you didn’t miss any meat.

Once your done you should have all of the meat (on bone) in sections, with the biggest part of the turkey carcass out of the way and ready to be discarded. This is the key to fitting that turkey into the crock pot.

quartered turkey in crock pot
This 15lb turkey (pictured above) fit easily in my crock pot once quartered!

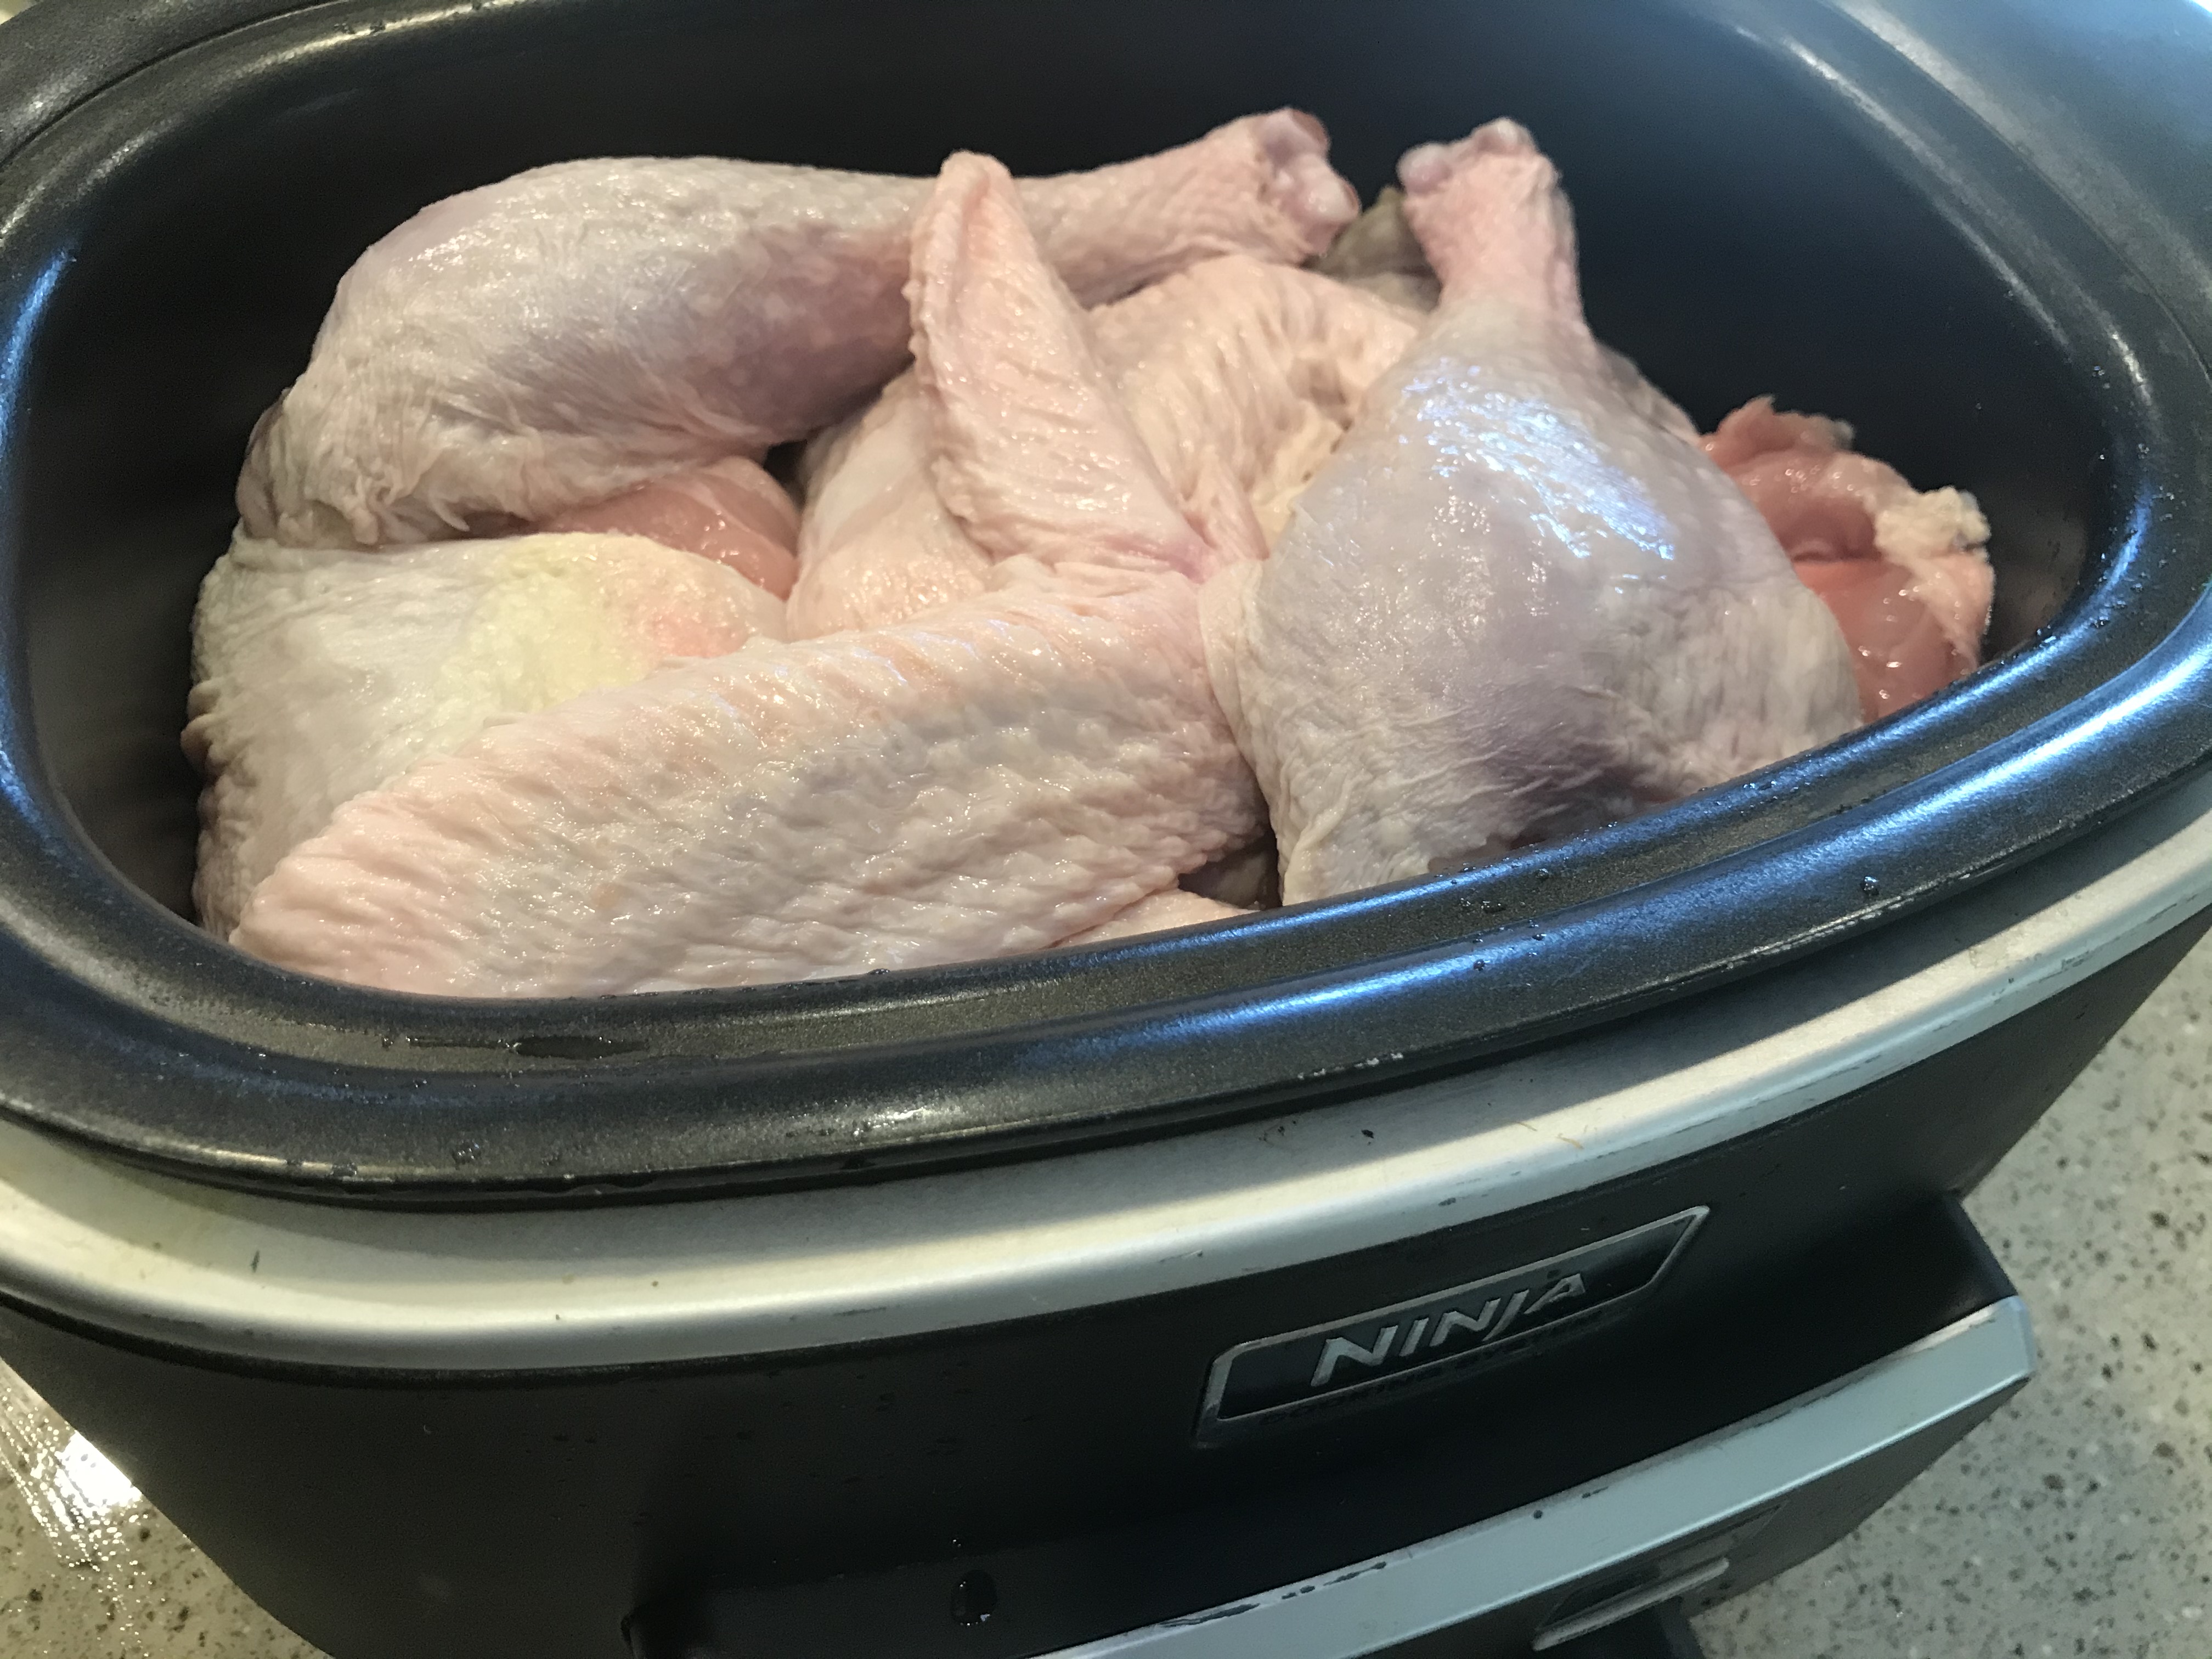
Ready For The Crock!

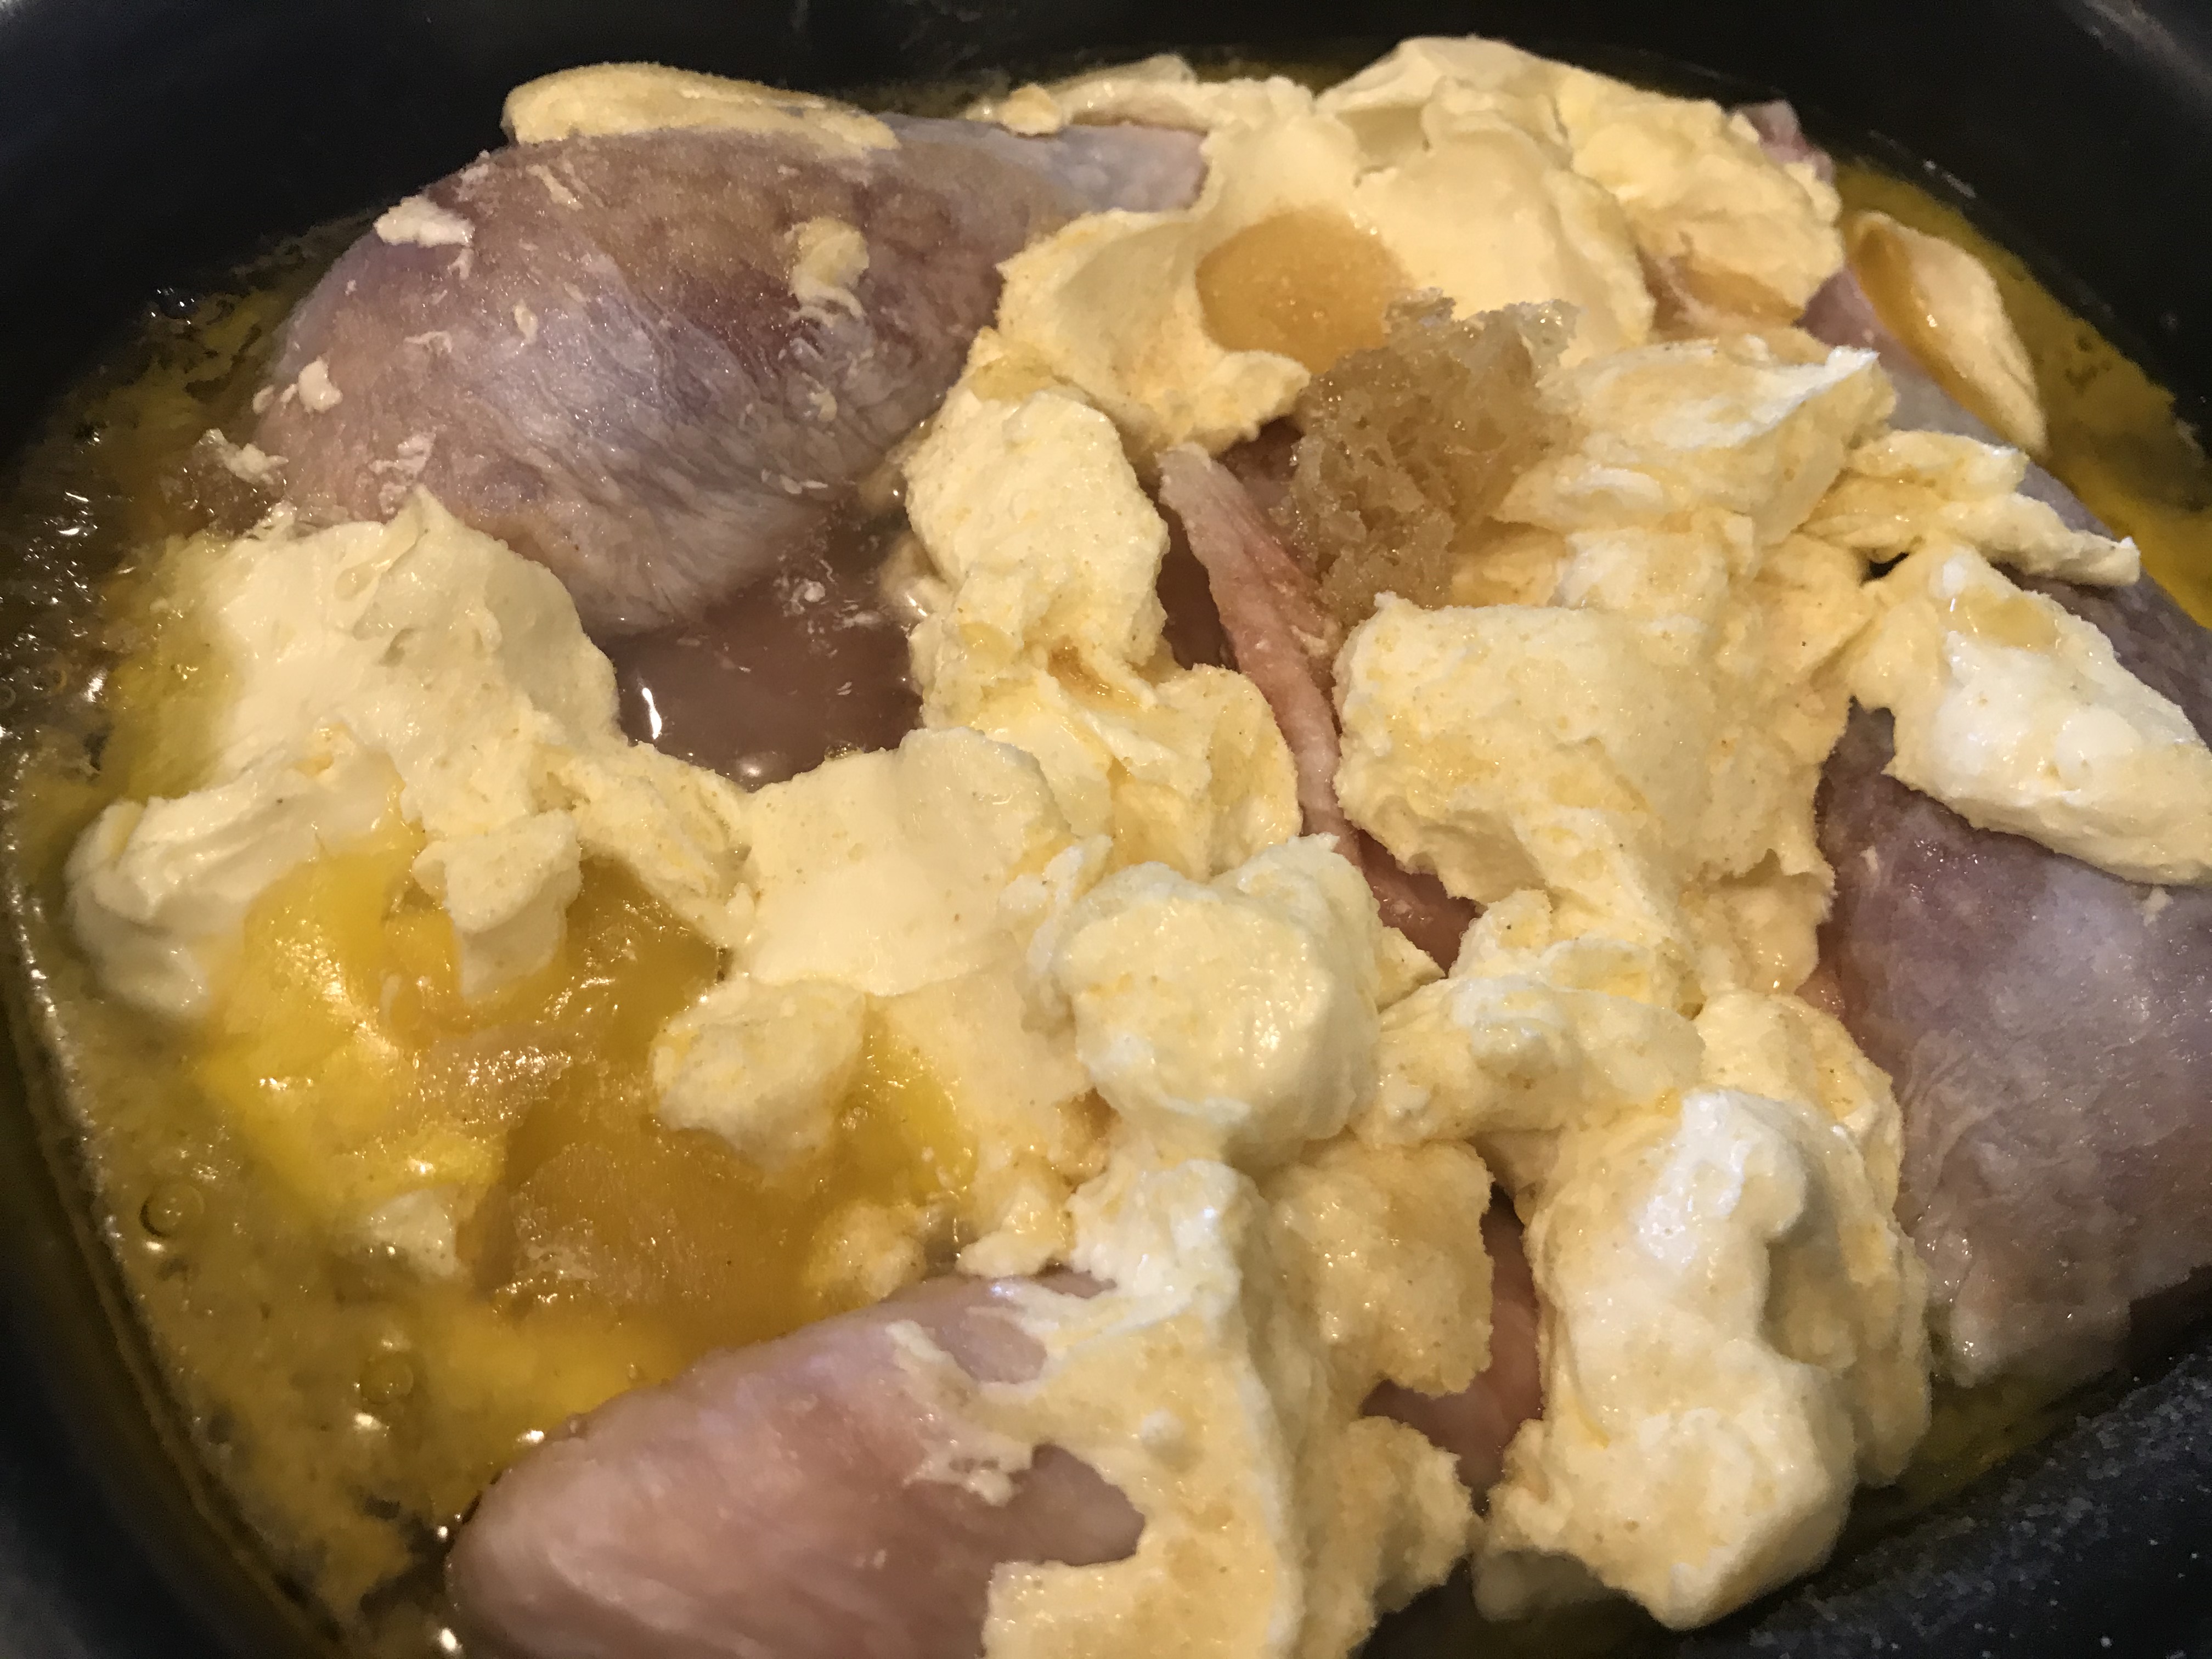
Stack your turkey sections into your crock pot.

You are now ready to season or marinade as you wish!

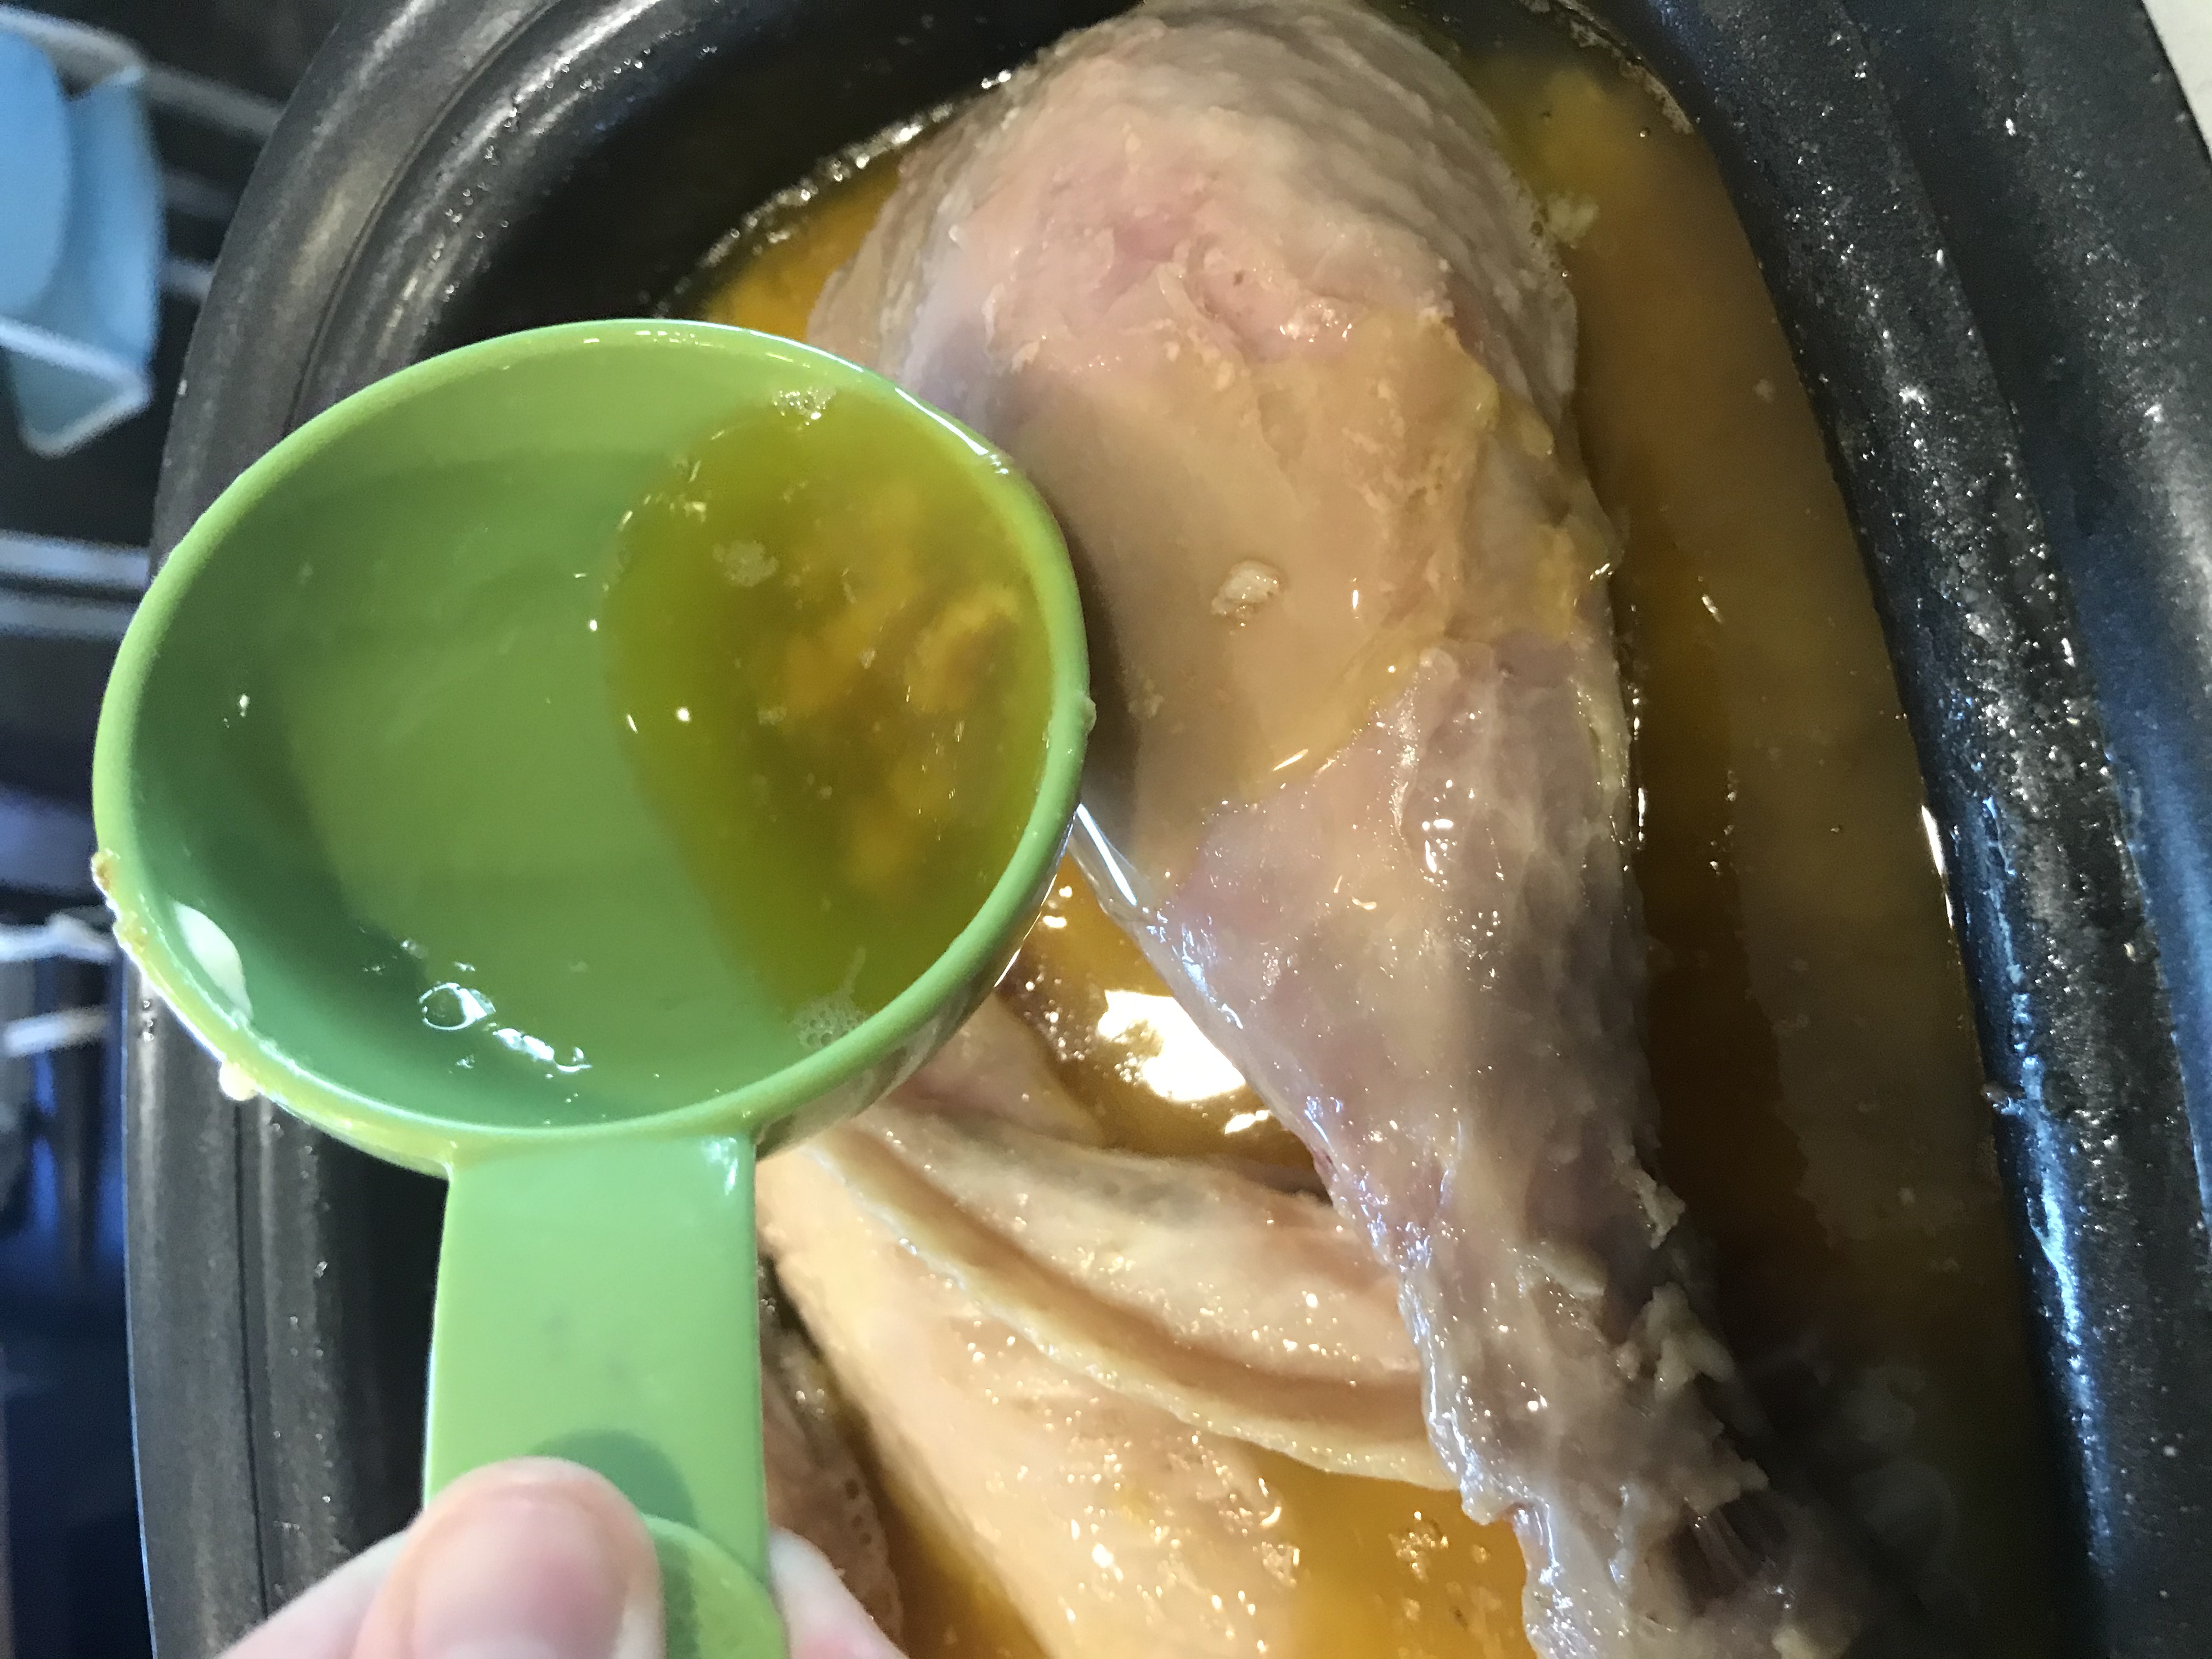
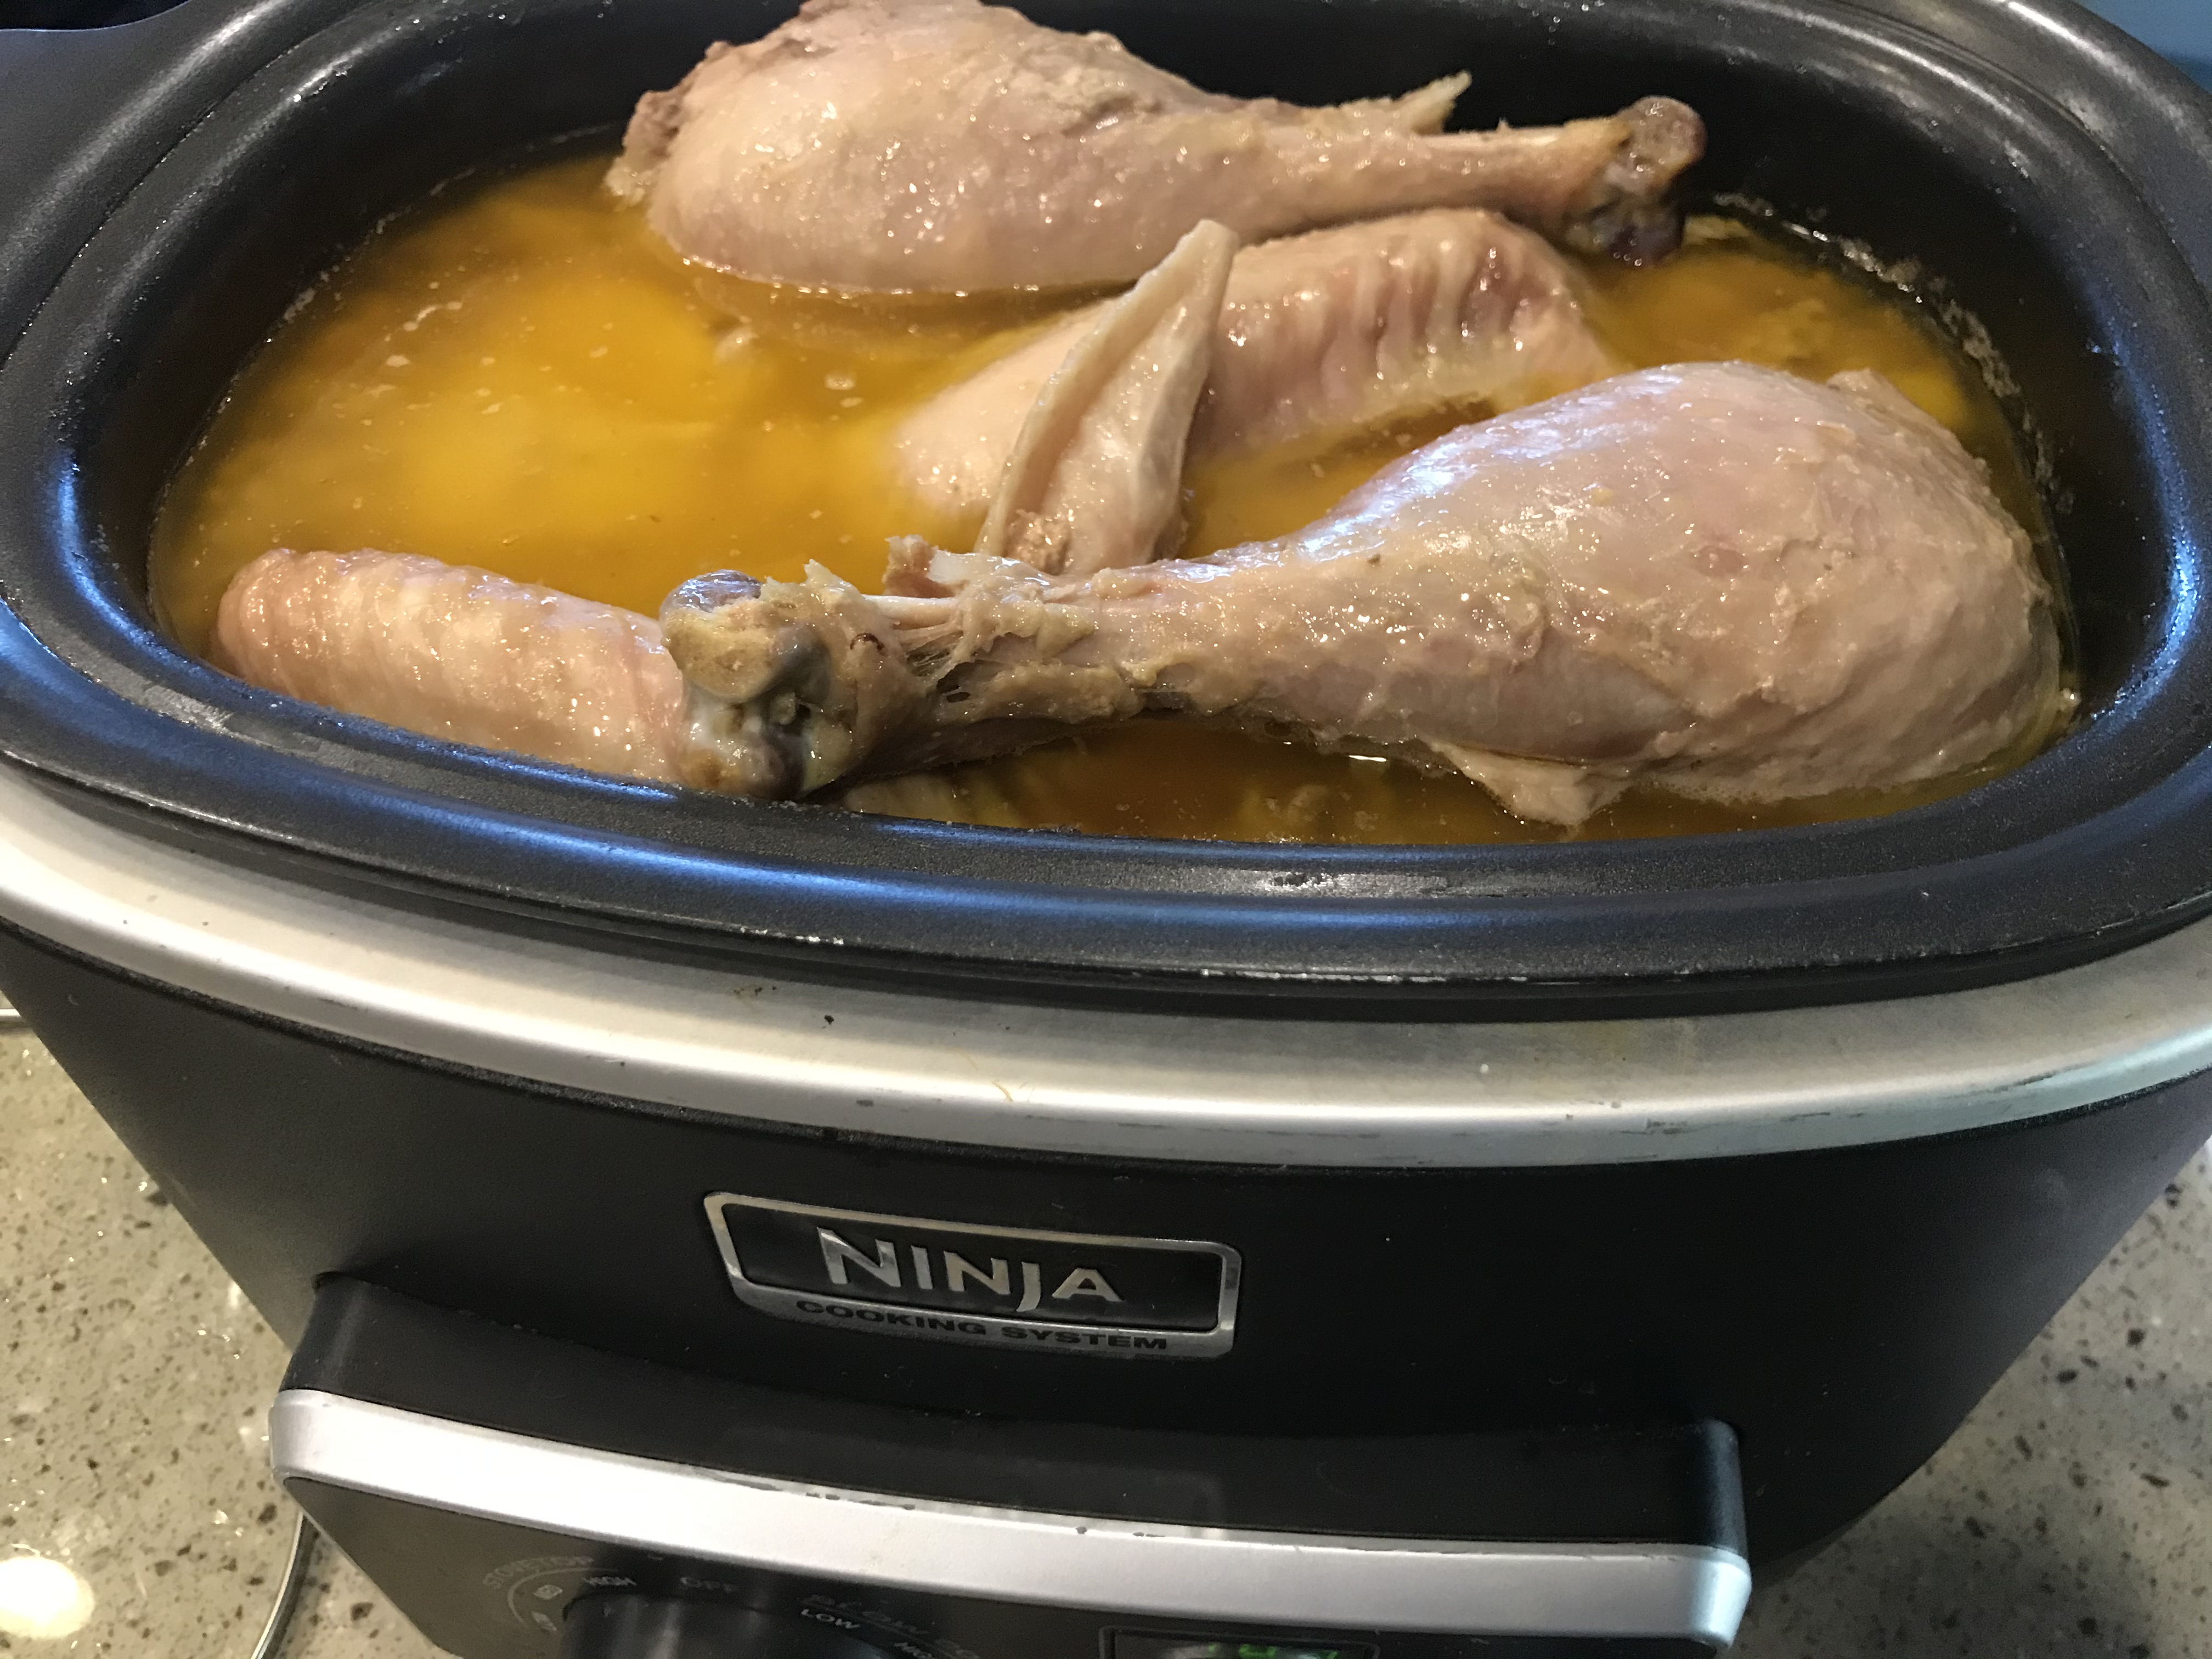
I cooked my turkey on low for twice the time listed on the turkeys package.The packaging recommended baking for 3-3.5 hrs for my 15lb turkey. Therefore, I cooked the turkey in my crock pot for a total of 5hrs on low and 1hr on high for a total of 6hrs. It was well done after 6 hrs but next time, I will probably cook it a little longer or overnight.

Every hour I dip[ed the broth over any meat that was not fully covered. You can also turn any meat that isn’t covered, in rotation.

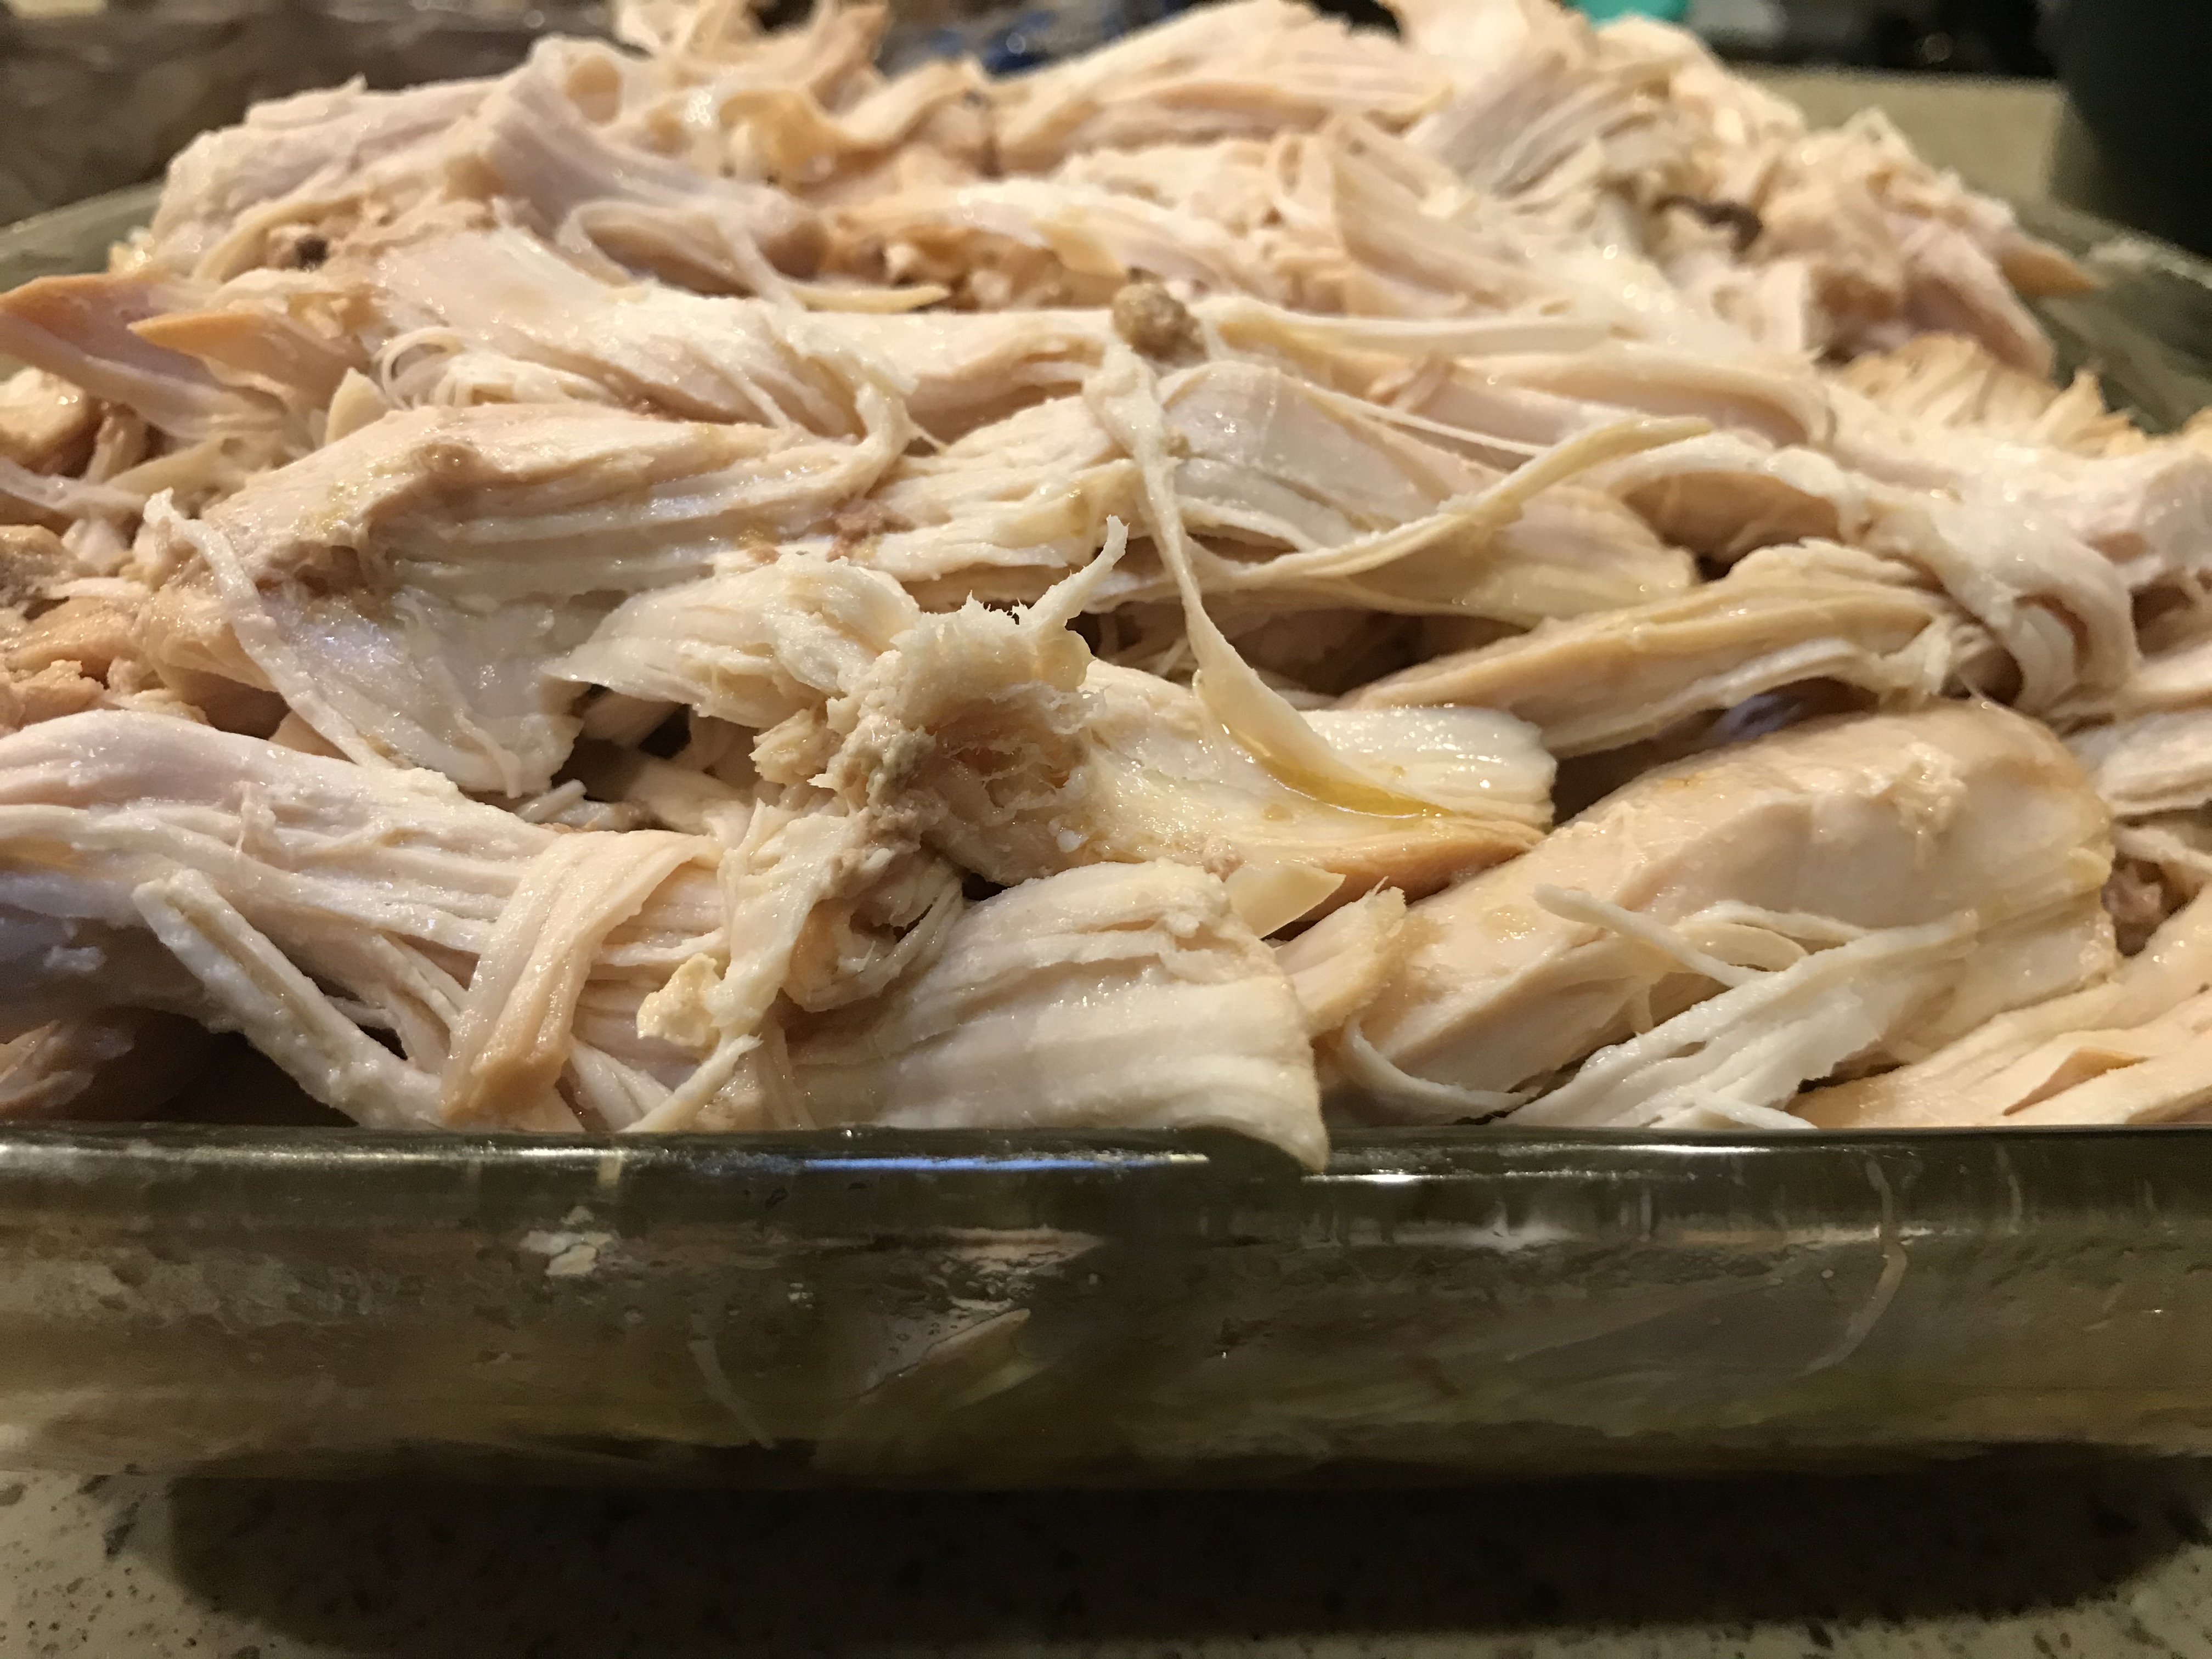
After The Turkey Cooks

This step is crucial for a super moist, crock pot turkey. You will want to debone & skin your turkey. ( The skin will not have a crisp texture as with baking).

Clean your crock pot broth by using a slotted spoon to remove any skin pieces etc.

Now you can add your meat (no skin or bone) back into your clean broth. Hopefully, you have enough broth to cover all of your meat. If not, you could add some melted butter.

Turn your crock pot on warm or low, depending on your crock pots heat, and let the meat soak up its broth for a good hour or more.

Time To Serve!

Now your ready to serve your “very juicy” turkey! I personally like to serve my turkey right out of the crock pot with a set of tongs, but you could remove it from the broth into a dish if you like.

cooked turkey

What About The Left Overs?

I do recommend placing the turkey back into the broth inside a covered or sealed container or pan before storing leftovers. Turkey kept like this, taste AMAZING reheated!

Cooking Alternatives

Cooking A Turkey Breast In The Crock Pot

If your family prefers white meat or you don’t need that much, you can cook a TURKEY BREAST this same way by skipping the quartering process. Just try to purchase a turkey that will fit into your crock pot.

What If My Lid Won’t Close?

That’s ok! You can take aluminum foil and tightly clamp it around the edge of your crock pot lid and the edge of your crock pot. you shouldn’t be able to see any cracks for air to enter.

How long Should I Cook It?

Personally I always Cook my whole turkey breast over night in the crock pot (a good 8hrs). Be sure to keep the last steps I listed for best results. (debone and putting back into broth)

Frequently Asked Questions On “How To Cook A Full Time Turkey”

What Seasonings Do I Use?

To be honest, the only “seasoning” or “flavoring” I ever used is butter. A LOT of butter lol… try to stuff/line the butter underneath the skin as much as possible then rub butter lol over the outside! I love the taste of a buttery turkey!

seasoned crock pot turkey

Subscribe

YES! I Want to receive post alerts & password protected content as a “Subscribed Homemaker”!

We don’t spam! Read more in our privacy policy

In Closing

I’m curious how you cook your turkey or how you plan to this Thanksgiving. Feel free to share in the comments below!

If you have any questions about “how to cook your turkey in a crock pot” please contact be via contact form on my home page and as always please Like Subscribe and Share! Happy Thanksgiving Planning!

Simple Peanut butter cookies with low carb option!

These super simple peanut butter cookies are SO easy & SO good!

With only 3 ingredients, that you probably have on hand.. you can whip up a batch of these in a matter of no time. Be sure to make extra of these simple peanut butter cookies for later! (PS they freeze well too!)

Did I mention the low carb option? Yes! Yes! Whoop! You can eat REAL peanut butter cookies, LOW CARB by substituting only one ingredient! They taste very similar to the original recipe with just a tad different texture (they are a bit softer) and a tad different taste. But seriously, my husband who detest all low carb foods 😂, he even likes them!

Now that you’re excited (or at least I am)😂. Let’s make some simple peanut butter cookies!

You will need

  • 1 cup peanut butter (I use great value creamy)
  • 1 large egg
  • 1 cup brown sugar

Substitute for low carb simple peanut butter cookies

  • Stevia brown sugar (you will use the Stevia 100 percent brown sugar substitute to replace your regular brown sugar. (Substitute in equal amounts.) All other ingredients remain the same.

How to make super simple peanut butter cookies

  • Dump ingredients in bowl (starting with egg to avoid losing egg shells)
  • Mix together with whisk, fork, or spoon until combined.
  • Scoop onto pre-greased or lined panned with heaping teaspoon full or roll each heaping teaspoon into a smooth ball for neater looking cookie. Should yield approximately 19 cookies.
  • Mash with flat side of fork twice crisscrossed, to make the well known “peanut butter cookie” markings
  • Bake! I bake my cookies around 400 until edges are starting to golden. (Usually 15min or so) BUT I have a RV oven with no top burners. Therefore, my cooking time and temperature may be MUCH different than yours! I would suggest starting at a temperature of 375 and watch for golden edges. If there not getting any where after 10min, consider increasing temperature. Don’t leave the cookies for long! They may get done much quicker in a regular household oven probably closer to 8-10min! Don’t forget to write down your oven time & temp for future references.
  • Allow cookies to cool on pan for 10min then carefully move to a cookie sheet for quicker cooling or leave on pan until completely cool. These cookies will break VERY easy while warm. Use a very thin spatula to move them and if one breaks, let cool longer.

NOTE- I like the taste of these cookies best cooled at room temperature.

Comment

I’d love to hear if you make these simple peanut butter cookies and how long it took your oven and at what temperature. Also, let me know if you tried the low carb version and what you think.

Nutrition Value

Yield- 19 cookies

Serving size- 1 cookie

Calories- 80 calories per cookie

Net carbs- 3.5 net carbs per cookie


In case you want to make different size cookies or your batch turns out different than mine, here is the “total calories & net carbs”!

Calories for ENTIRE batch of batter- 1,518

Net Carbs for ENTIRE batch of batter- 64.5

* Simply divide the total amount of calories (or net carbs) by the amount of cookies in your batch for the exact nutrition of your cookie!


Love this recipe? Consider subscribing to my blog! You will receive alerts to more post like this! Plus access to a entire page of FREE Printables (Adding new one regularly!)😜

Subscribe

YES! I Want to receive post alerts & password protected content as a “Subscribed Homemaker”!

We don’t spam! Read more in our privacy policy

How to Hand dip Ginger Snap cookies

How to hand dip Ginger Snap cookies

How to hand dip Ginger Snap cookies for Christmas…If you need a quick but easy, adorable but cheap, and homemade but simple treat for Christmas parties & gifts this year then…

I’ve got you covered!!! Today we are going to talk about how to hand dip Ginger Snap cookies for Christmas.

These hand dipped Ginger Snaps are store bought then hand dipped for a personal touch. This is a super easy process and will have you ready for Christmas in a snap! (Pun intended) 😂

I’ve hand dipped my own batch and made notes of a few details that you may be asking yourself. Let’s go over these before we get started on exactly how to hand dip Ginger Snap cookies for yourself.

Just a few details

Are these hand dipped Ginger Snaps affordable to make?

Yes, I think so.  I purchased my Ginger Snaps from Dollar Tree and my almond bark from Aldis. With one of each of these items, you can make a batch of dipped Ginger Snaps for just under $4 

How many cookies does one batch or one bag make?

Although all brands will vary, my Dollar Tree bag of Ginger Snaps consisted of approximately 43 cookies, keep in mind this my very or change. Also note that the Dollar Tree brand are small Ginger Snaps.

Do hand dipped Ginger Snaps make a good gift?
I think so!

These hand dipped Ginger Snaps make adorable gifts, especially when packed in little jars. (Preferably recycled jars for price efficiency)

How many jars will one batch fill?

My Dollar Tree bag of 43 cookies filled 6 jelly jars full or 2.5 pint jars full.

You can also package these in 3’s  in individual clear snack bags . One bag will make approximately 14 favor bags to pass out.

Lastly, you can easily display the cookies on a Christmas plate for a beautiful dish at your next party 

hand dip ginger snap cookies in jar

How to hand dip Ginger Snap cookies

Now that we got some of the details out of the way let’s get started on exactly how to hand dip Ginger Snap cookies for yourself! 

You will need

-One pack of white almond bark

-One back of Ginger Snaps

Directions

  1. Melt your almond bark SLOWLY in a microwave save bowl in 30sec increments. Be sure to stir between each 30seconds to insure not to burn. 
  2. Once almond bark is smooth and complexity melted, your are ready to dip your cookies! 
  3. Lay out some wax or parchment paper on the counter and dip your cookies one at a time, half a cookie deep, into the almond bark. 
  4. Carefully lay cookies on wax paper to dry/harden 
  5. Every 5-10 cookies dipped, I like to stop and add Christmas sprinkles before the almond bark dries. (This is completely optional, the cookies are adorable with or without the sprinkles.) 
  6. Once all your cookies are dipped, check the first cookies to see if they are dry. If they are re not m, they should be very close. Once your cookies are dry they are ready to be packed or eaten! Yep, it is that easy! And just in case your wondering… these DO taste amazing! Much better then a plain ole Ginger Snap, matter of fact, this is about the only way I eat them.


Trouble shooting – 

Why is my almond bark crumbly, brown, or clumpy ?

You either burnt it or it got water mixed in. Make sure to stir frequently when heating and do not continue heating once melted. 

Also make sure your microwave safe bowl and utensils are completely dry. Water mixed in almond bark can and often will ruin it. 

Can I use chocolate almond bark instead of white?

Yes! I just prefer the white almond bark flavor.

Can I use candy melts in place of almond bark?

Yes! 

Can I use chocolate chips in place of almond bark?

You can, but you would want to research adding “wax” to it first for best results. Candy melts and almond bark do not need this additive. 

Can I dip other cookies besides Ginger Snaps?

Yes! I currently have not done this but I have friends who have dipped many types of cookies. (Oreo’s taste amazing dipped)

What do I do if my almond bark begins to harden?

Carefully remelt it as many times as needed

Can I save the remaining almond bark for later?

Sure can! Line a saucer, bowl, cupcake pan, or ice tray, loosely with plastic wrap then pour the remaining almond bark into it. Allow to harden, then peel away from plastic wrap and store in a zip lock bag or air tight container.

Now you know how to hand dip Ginger Snap cookies for Christmas! Don’t forget to subscribe to my blog for post updates and FREE printable’s like these adorable goodie tags I made especially for you! After you subscribe you will receive the password for my homemakers page where you can download/save/print these tags for yourself!

Subscribe

YES! I Want to receive post alerts & password protected content as a “Subscribed Homemaker”!

We don’t spam! Read more in our privacy policy

How to make a low carb cheesy omelet

Today I want to share with you a recipe to make a delicious EASY low carb cheesy omelet!
you may be wondering …

Why should I learn to make A omelet when I like eggs just fine..

Here are just a few reasons you may want to stick around to try my low carb cheesy omelet recipe and consider adding it to your cook book 😜.

  •Omelets are very budget friendly 

  •Cheesy omelets are low carb 

  •Omelets get rid of the plain egg rut 

  •They can be very filling 

  •Omelets are very versatile 

  •Eggs are good for you

•They are just so yummy!

What you need to make this low carb cheesy omelet

2 large Eggs 

Jar of powdered parmesan cheese

1/3 – 1/2 cup Mozzarella cheese (shredded)

Parsley flakes (optional)

Frying oil of your choice (I used canola)

7 in skillet

Directions to make your low carb cheesy omelet

  1. Heat oil in a 7in skillet on medium to low heat until hot (I used non stick pan) You want just enough oil to cover your pan but not so deep that your omelet is soaking. Tip- add drops of oil as needed between omelets.
  2. While oil is heating, whisk 2 large eggs together in a bowl
  3. Completely cover whisked eggs with powdered Parmesan cheese then add just a touch of parsley flakes for color.
  4. Whisk all together well
  5. Pour egg & parmesan mixture into oiled/heated skillet
  6. Cook until egg is cooked on bottom and almost set on top (a tad runny) . If you wait until the top is thoroughly cooked, your omelet will break when folding but if the top has a lot of runny then your cheese will run out with the egg.
  7. Add desired amount of shredded mozzarella cheese to one side of the omelet and fold the other side over top of the cheese, in half with a rubber spatula.
  8. Continue to cook until the mozzarella cheese is melting and the top of the egg is complexity cooked. This should only be a minute or two. 
  9. Carefully remove cooked omelet from the pan by lifting the edge with a rubber spatula, then sliding a traditional spatula or tongs carefully under the omelet. 
  10. Serve alone or with “toppings”

(Yes there are 2 eggs under all that Parmesan 😂)

Topping ideas to serve with your low carb cheese omelet are…

•Salsa
•Sour Cream
•Guacamole
•Pico
•Hot Sauce
•White Gravy
• Or for my husband…ketchup 😂

They are so customizable!

These cheesy omelets have so much more flavor then you can imagine!  I really like the simplicity of the cheese flavor but keep in mind, these omelets can be customized so easily by adding things like cooked bacon, sausage, greens, onion, or you name it!   

Questions & Answers

Why is the outside of my omelet so brown? 

 The parmesan in the egg browns very prettily and taste amazing. It may look a little different then the omelet colors you are used too. 

Can I used different types of cheese?

  Of course! Just note, the more cheese you use, the more greasy the omelet may be. 

Do I have to use a 7 in skillet? 

Probably not but the 7in skillet fits the exact size of the omelet, therefore it produces a perfect shape and even thickness for the cheesy omelet. 

Can I use egg beaters instead of whole eggs?
Yes! Just be sure to use 2 large eggs worth. 

Can I freeze my omelets? 

 Sure can! I personally have not froze any (yet) but I definitely plan to by using the recommendation of other wonderful cooks! How to Make an Omelet Recipe | The Recipe Critic says you can freeze omelets up to 3 months! Reheating the omelets is super easy. Heat on microwave safe plate for 1-1.5 min and flip half way between. After that, heat in 30second increments until omelet is fully heated. 

Tips for makings your low carb cheesy omelet taste & serve amazing!

•Cut omelets in half to go farther or when serving children 

•Get creative with dips or toppings to appeal to different appetites 

•Pre cook all meats before folding into omelet

•Try serving omelets with an evening meal , where I’m from breakfast is always better of the evening.

•Get creative with dips or toppings to appeal to different appetites 

•Make sure oil is heated well before poring egg into pan. a good way to check is to sprinkle a drop if water on pan, if it sizzles its ready.

If your stove usually over heats things or if you are using a iron skillet, try lowering your heat to prevent burning your cheesy omelet.

Add a couple pieces of bacon on the side and a glass of almond milk for a filling low carb breakfast!


In closing

I hope you have enjoyed this recipe for a low carb cheesy omelet. feel free to check out some of my other recipe and cooking post linked here below and don’t forget to like and subscribe for regular post updates and special content! Happy Homemaking 😊

Subscribe

YES! I Want to receive post alerts & password protected content as a “Subscribed Homemaker”!

We don’t spam! Read more in our privacy policy

Best things to freeze

7 Dinner Tips

Chocolate gravy

Three ingredient apple crisp

My “sweet” diet coffee

My mom’s ORIGINIAL homemade encheladas

Quick & Easy 5 Minute Bacon Ranch Cheese Ball

5 minute cheese ball snow man

Is a 5 minute cheese ball possible with all of that shredding and chopping to do? Wait.. this recipe doesn’t have any shredding or chopping, it’s a mix only cheese ball! You heard it, a true 5 minute cheese ball with nothing but a bowl to clean up. ❤️

This quick & easy cheese ball is perfect solution to your holiday rush and for those ‘in between’ Christmas events that seem to sneak up on you.

Ingredients For Quick & Easy Bacon Ranch Cheese Ball

2 Packs Of (16 oz) Cream Cheese

One half-one whole (1oz) pack of ranch dressing powder mix (start with half of the pack then add more to taste)

1 pack (2.5 oz or similar) of real bacon bits

1 (16 oz) bag of cheddar cheese (I like sharp best)

5 minute cheese ball ingredients
Use two of the cream cheese shown above

Quick & Easy Preparation

Allow cream cheese to soften (optional but best)

Mix all ingredients in a bowl until evenly mixed.

Shape cheese ball into a smooth ball

Wrap in plastic wrap

Store in refrigerator

Serve with Ritz style crackers! So yummy 😋

FAQ

How long will my cheese ball stay good?

A long time! Check the dates on your cream cheese and shredded cheese before you make it to give you a better idea . Keep in mind, the ingredients you are using usually last a good while in the refrigerator. Just be sure to wrap the cheese ball good after each use to keep air off of it. I’ve yet to have this cheese ball go bad on me and I’ve had one up to 2-3 weeks in my fridge!

How many crackers should I bye ?

I usually purchase 2 boxes of generic “Ritz” crackers to take along with my cheese ball. Yes, I often bring some home but you will still serve them with the leftover cheese ball anyway.

Can I substitute the bacon bits?

Yes! I like to use bacon bits for convenience (no shredding etc) and I like the “bacon ranch” thing . But any kind of meat would work. Just remember that changing ingredients may affect the “stay good” date.

Can I use generic products to make this cheese ball?

5 Minute Cheese Ball Tips For Success

Use disposable rubber gloves to skip the gooey mess! You can also substitute for sandwiches bags, or plastic disposable gloves, they are just a little more tricky to keep on. If you really love making cheese balls, “invest” in a reusable pair of rubber gloves that can be used for cheese ball, meat loaf and anything else you might dig your hands into in your kitchen.

Display your cheese ball on a cute platter with crackers around it to add attractiveness.

Shape your cheese ball into a adorable little snowman with a few extras from the veggie tray.

Do not store your left over crackers in the refrigerator , this makes them soft. Put them in a ziplock baggie before wrapping your cheese ball for the fridge.

Serve your cheese ball pre spread on crackers by making cheese ball cracker sandwiches.

In Closing

If you have enjoyed reading this recipe and would like to see more like it, please Like, subscribe, and share below!

If you have made a cheese ball similar to this one, feel free to comment below on it !

Merry Christmas!

How To Frost Cupcakes Like A Pro For The Holidays!

“ How To Frost Cupcakes Like A Pro” is full for instruction and tips for DIY basic “store bought” style cupcakes. If you are looking for special designs and fancy icing techniques, this post does not include that.

Basic Instructions

1.Prepare Icing bag.

2.Add coupler & icing tip , screw together according to directions on package.

3.Add icing to prepared bag

4.Remove excess air from bag, AKA

5. “burp bag”

6.Frost your cupcakes …

Pipe icing on the outer edge of the top of cupcake, continuously squeeze icing slowly while rotating around the cupcake in a circular motion, working your way from the outside to the center while overlapping just enough to build height in the middle.

7. Add cupcake toppers (optional) and that’s it!

For MORE detailed instructions, photos, & tips for success, on how to frost cupcakes like a pro, keep reading !

Detailed Instructions

1. Prepare Icing bag. Place coupler into icing bag, add tip and screw together according to directions on package. You can use a gallon zip lock bag in place of icing bag.

*If using a gallon zip lock bag, cut one corner of the bag with scissors just large enough to fit plastic coupler snugly into hole. Continue on as with pastry bag.

2. Add icing to prepared bag. I recommend using a rubber spatula or butter knife for this part. Drape bag over your hand to prevent getting icing on the edges and outside of your bag. Fill bag about 3/4 full.

how to hold icing bad while filling

3. Remove excess air from top of bag ,AKA “burp your bag”. To do this, simply squeeze out as much air as possible from top of bag before closing off with a twist. Holding bag close at the twist, use your second hand to help support & squeeze out several inches of icing to remove any air bubbles trapped at the tip. Keep squeezing until your icing comes out smoothly with no air pockets. Now you are ready to frost those cupcakes!

4. To frost your cupcake Continue holding your icing bag closed at the twist, begin frosting your first cupcake by piping icing on the outer edge of the cupcake, continuously squeeze icing slowly while rotating around the outer edge of the cupcake in a circular motion working your way to the center. You will want to overlap icing just enough to build height all the way in to the center.

How To Add “Theme” To My Basic Frosted Cupcakes?

Frosting cupcakes like a pro is more then just adding icing!

Add Color

I like to start out with choosing matching or contrasting icing color & cupcake liners to match my specific theme or holiday.

If you want to color your own icing simply mix in a few drops or dabs of gel icing color. Start out slow and keep adding until you reach your desired color.

Use gel colors found in cake decorating section to prevent possible texture change and to achieve rich colors . I have used liquid food coloring in canned icing but make note that you do take a chance with the texture and darker colors will be hard to achieve.

Adding The Perfect Topper

Cupcake toppers come in endless options. Buy them, make them, repurposed them, but however you do it, a cute cupcake topper will add HUGE personality to your cupcake.

Here are a few of my favorite types of toppers.

1.Sprinkles

Sprinkles are cheap and have came a long way since my child hood days!

2.Fondant Figures

Like to play with play-dough ? Here’s your excuse lol. But really, fondant may require a little bit of Google research but the toppers you can make are so worth it! Check out my sons first birthday cupcakes I made on my first fondant adventure!

I made these little monkeys, with googles help, the very first time using fondant!

3.Chocolate figures

Pipe melted almond bark onto wax paper by cutting a tiny peep hole in a zip lock bag. Now you’ve got yourself a dainty little topper! I had so much fun making these!

I piped these little fall leaf toppers out of almond bark using a Ziploc bag with the end barley snipped.

Pipe them on wax paper and let them dry!

4.Candies

Who doesn’t love picking candies off of cupcakes?

5.Little toys or figurines

Make sure they are big enough to not be mistaken as edible! This is a great option for children’s birthday parties! Think Hot Wheels, Barbie accessories, etc.

6. Traditional cupcake toppers

You can purchase these from many stores with the sprinkles etc. They are so cute and easy to use. You can also make your own Thanksgiving ones by printing my FREE printable HERE! All you need is a printer, a sheet of laminate ,scissors, and a few minutes.

  • Print the sheet below.
  • Laminate front and back of paper with self laminate (link below)
  • Cut out pictures just outside of photo,leaving a laminate clear edge for best sealing. Don’t kill yourself over the details when cutting.
  • Stick laminated toppers directly into cupcakes!
https://www.canva.com/design/DAEuK61WQWw/share/preview?token=2P71WeYy03cYzbFuXtU3sA&role=EDITOR&utm_content=DAEuK61WQWw&utm_campaign=designshare&utm_medium=link&utm_source=sharebutton

Tips For Success

*Try using the large star tip for a real professional “store bought” look verses the small star. This does use more icing but it looks amazing and makes frosting cupcakes a much quicker process.

*Try using Wilton’s decorating icing recipes for good, stable, icing that won’t slip. Keep reading for my personal favorite.

*Making icing can also save you a lot of money, if you don’t need the large amount the recipe makes, try freezing half of it in freezer bags. According to Wilton, their Icing freezes up to 6 weeks (I’ve found it to taste great for 6 months, though lol 😜).

*Don’t want to make icing?

Blend powdered sugar into canned icing to thicken it for better piping or you can purchase decorating icing by the tub at most local Walmart’s now.

*Hate icing clean up?

*The gallon size disposable zip lock bag is the piping bag for you!

*Don’t icing all the way to the edge, begin about 1/4 inch in leaving a little cup cake showing on the edges. This leaves room for icing to settle without slipping over the edges. It also allows people to see what flavor cake they are choosing & it just looks neat and professional.

*Stay away from white or pastel cupcake liners, their color seems to disappear after baking. Dark colors or foil liners look best.

*Bake your cupcakes ahead of time. Make sure they are completely cool before frosting. I prefer to cook mine the day before, cool, and cover, until ready to icing.

*Another option (my favorite) is to make them up to 3 months ahead, cool, and place carefully into gallon zip lock bags then freeze. Thaw at room temperature for a hr or two before frosting and about 3 hours before serving.

*Be sure to remove cupcakes from cupcake pan before frosting. I like to arrange mine on a platter or plate before decorating for easy maneuvering.

What cupcake recipe do I use?

I personally like to use generic box cake mix. It’s quick & easy, leaving me time to focus on the decorating.

There are a few ways to spruce up box mixes, here are a few to try!

  • You can exchange the water in the recipe for milk , soda, or extra oil
  • Exchange the oil listed for any other fat you enjoy cooking with such as melted/ cooled unsalted butter or coconut oil.
  • Some people say to add a dab of sour cream to cake mixes
  • I love to add chocolate chips to chocolate cake

What icing do I recommend For Frosting Cupcakes Like A Pro?

My favorite cupcake icing is Walmart bakery’s which they often sell by the tub. However, this can get a bit pricey so I often make my own from this Wilton recipe shown below. If you need a lot of icing, this can really save you some money!

A third alternative for quick jobs is small canned icing off the shelf. You will need to “stiffen” it by adding powdered sugar to get a good stiff frosting.

Easy Vanilla Buttercream Icing,By Wilton (original post linked below)

You will need

-1/2 cup solid vegetable shortening*

-1/2 cup (1 stick) unsalted butter, softened

-4 cups sifted powdered sugar (confectioners’ sugar)

-2 tablespoons milk or water

(I usually use more)

-1 teaspoon vanilla extract

(pure or imitation)

-food coloring or icing color (optional)

Directions

1. Mix butter and shortening on medium speed until light and fluffy.

2. Beat in the vanilla extract

3. Gradually add the powdered sugar, one cup at a time with mixer on lowest speed. Once sugar is somewhat incorporated, turn speed up to medium. Continue this process while scraping sides until all sugar is added. Frosting will be dry and stiff. (If icing becomes too stiff for your mixer, you can add a Tablespoon of milk, otherwise wait until the next step to add milk)

4. Gradually add 1 Tablespoon of of milk at a time until the desired consistency is reached while still mixing on medium speed. Icing should be light and fluffy but still stiff enough to hold very firm form.

5. Make sure all the ingredients are incorporated by scraping sides of the bowl once again.

6. Once you have the desired icing consistency & taste add desired food coloring in small amounts until you reach the color you want . (Use gel colors found in cake decorating section to prevent possible texture change and to achieve rich colors)

Frosting should be stored in an airtight container and can be frozen for up to 6 weeks.

Wiltons Troubleshooting Suggestions

• Air bubbles: To avoid creating air bubbles, make sure to use the paddle attachment instead of the whisk attachment on your electric stand mixer.

• Too stiff or too thin: If your frosting is too thin, add small amounts of powdered sugar until you reach the desired consistency. If too thick, add small amounts of liquid until the desired consistency is reached.

• Grainy consistency: Make sure your ingredients are all room temperature to avoid a grainy or gritty consistency.

• To preserve while in use: Depending on the weather and humidity, your buttercream may start to crust over. To avoid this, cover your frosting bowl with plastic wrap.

Link to original recipe hereEasy Vanilla Buttercream Frosting | Wilton

Don’t Disregard The Display !

Now that you know how to frost cupcakes like a pro, don’t forget to plan a cute way to display your cupcakes. Here are a few tips!

  • Dollar stores have many cute food platters that work great.
  • You could purchase or make your own cupcake stand out of household items.
  • cover a piece of cardboard or ugly platter with foil. For a quick silver “platter”
  • Google cupcake display ideas
  • Set cupcakes directly on table in a pretty shape. A Heart, related number, or even Christmas tree would be cute!
  • Set cupcakes directly on table and tuck some decor around them you won’t even be able to tell there is no platter present.
  • Don’t forget to use your imagination! The options are endless when you are the creator. ❤️

Related Links

If you have amazon prime you can these items below well before thanksgiving! Want to try it? Here is a FREE trial! get in some Christmas shipping real fast with Amazon Prime’s TWO DAY shipping! plus many other benefits.

https://www.amazon.com/amazonprime

Large Wilton Icing Coupler I Use For Cupcakes https://amzn.to/3kZ3nYz

Brown Wilton Fondant I Used For Monkey Toppershttps://amzn.to/325oFwX

Self Laminate (no machine needed) for my printable cupcake toppers. Click on quantity 2piece for a lower price!https://amzn.to/30n4jhK

If you have enjoyed this post, please

like, subscribe. and share, below!

How To Cook Dry Red Beans QUICK, In your Instant pot/ Pressure Cooker

How To Cook Dry Red Beans And Why Should I?

If you cook with beans very often dry beans are your cheapest option.

one lb of red beans will make approximately 5cups of cooked bean for about $1.42

currently, at my location, a 15.5 can of red beans at Walmarts value price will get you about 9oz of beans for .69

the comparison

$2.75 for about 5 cups of canned beans

verses $1.42 for 5 cups cooked from dry.

Ok, I realize that isn’t enough savings to pros-wade most of you. So, here are my other reasons.

-You can control sodium intake

-You can cook them how you like them

-You know what’s in them

-Many will agree, they just taste better

Cooking dry beans isn’t near as hard as you may have it worked up to be! Keep reading for my QUICK pressure power cooker, AKA “instant pot” version.

You will need

1lb bag of dry red beans

4 cups water

seasoning of choice (optional)pressure Cooker

Directions

•Wash and rinse beans in water, removing

any bad beans or stones. Drain.

•Add beans to empty pressure cooker

•Cover with any desired seasonings or

leave out. (I used 1 chicken bullion cube)

•Cover with approximately 4 cups of water •Close vent and lock lid

•Cook on 20 lbs pressure for 30min

Results

This should result in approximately 5cups of cooked but somewhat firm red beans with very little juice.

Drain juice and add to desired meal

Store remaining beans in airtight container in the refrigerator or freeze in freezer bags for future meals.

Note-

If you are interested in more instant pot or Dry bean Recipes please leave in comments below!

Disclaimer

This does not make soup. This recipe is intended to cook dry red beans for additives to recipes & meals.

Great Ways To Use Red Beans

-Chili (my favorite!)

-Taco topping

-Enchilada protein stuffer

-Add to most Mexican recipes or

casseroles!

-Bean dip

-Add to cheese dips

-Homemade humus recipes

-Amazing in Jumbo lei

-Red beans & rice


Grow Where You Are Planted

This past week I had a red bean that didn’t get washed good down my kitchen sink drain. A few evenings later, I allowed some dishes to dry overnight and when I went to put them away the next day, behold, I had a red bean plant sprouting from my sink!

I found this quite funny, so I removed it and put it in some water and to my amazement, within a week, it had doubled its size!

Now any gardener would tell you a sink drain is not the ideal place for a plant to blossom… but this plant didn’t care, it was willing to bloom and prosper wherever it was planted, as long as the water was present.

If you are currently planted in a place that seems impossible to blossom in? Remember, when God (our living water) is present with you, you can prosper anywhere!

He will supply your needs and give you strength beyond all measure.

It’s time we check our words, change our mindset, follow God’s word and become willing to grow in every situation.

If we are willing to grow now, whatever the situation may be , the time will come that we will be transplanted to “better” places. We will never lack the nutrients we need to grow when we are in God’s will. He always provides.

As one dear sister said so well,

“You Are Fit For The Task!

Because of Him.”

Philippians 4:13 (KJV)

I can do all things through Christ which strengtheneth me.

When you feel like a failure, inadequate , unable, or unworthy as a mother or wife, remember the key to your success is always Jesus.

Turn to Him and He will not fail you. It’s in Jesus you will find more then your heart ever desired. If your desires are toward Him, He will truly give you the desires of your heart.

Psalm 37:4 (KJV)

Delight thyself also in the LORD; and he shall give thee the desires of thine heart.

Psalm 146:5 (KJV)

Happy [is he] that [hath] the God of Jacob for his help, whose hope [is] in the LORD his God:

Are You Fighting Discontentment ?

Wikipedia-

Contentment is an emotional state of satisfaction that can be seen as a mental state, maybe drawn from being at ease in one’s situation, body and mind. Colloquially speaking, contentment could be a state of having accepted one’s situation and is a milder and more tentative form of happiness.[1]

Ask yourself these questions.

-Are you in God’s will?

-Is there anything between you and God that could be breaking your relationship with God given contentment?

-Are you trusting in God or man with your problems ?

-Does your conversation promote contentment

-Are your thoughts dwelling on the things of God ?

-Recognizing the problem is the first step to getting it fixed. But you must not stop there!

If you are constantly feeling down, depressed, unsettled, sad, and discontent, or wanting realize that you are living way below your privilege as a a Child Of God.

Satan wants to attack your mind and have you constantly intertaining a defeated spirit. Don’t fall for his tricks. Fight for your peace of mind, you do not have to continually live with a defeated mindset.

Philippians 4:13 (KJV)

I can do all things through Christ which strengtheneth me.

1 Corinthians 15:57 (KJV)

But thanks [be] to God, which giveth us the victory through our Lord Jesus Christ.

Let’s fight For Contentment!

You have the victory through Jesus! Now it is time to fight for it and claim it through the power of our Lord Jesus Christ!

As Christians, we know that true contentment only comes from God.

But do notice, in these verses that our contentment is contingent on our actions.

We MUST do our part and THEN God will always fulfill His promises.

(Note- all of these verses have a contingent underlined.)

Isaiah 26:3 (KJV)

Thou wilt keep [him] in perfect peace, [whose] mind [is] stayed [on thee]: because he trusteth in thee.

Psalm 146:5 (KJV)

Happy [is he] that [hath] the God of Jacob for his help, whose hope [is] in the LORD his God:

Hebrews 13:5 (KJV)

[Let your] conversation [be] without covetousness; [and be] content with such things as ye have: for he hath said, I will never leave thee, nor forsake thee.

In Closing

If you are content your family is more likely to be content . If you are discontent often times, so are they.

No one wants to dwell with a discontent woman or person as far as that goes.

Pro 21:9 (KJV) — It is better to dwell in a corner of the housetop, than with a brawling woman in a wide house.

On the other hand, a woman that is content brings blessings upon herself and her home.

Have you ever wondered how the proverbs 31 lady seems to accomplish so much ?

Contentment makes responsibilities enjoyable and for filling, whereas discontentment makes each task at had a dreaded chore.

Notice highlighted, the blessings and benefits the proverbs 31 lady experiences through her contentment.

10 Who can find a virtuous woman? for her price is far above rubies.

11 The heart of her husband doth safely trust in her, so that he shall have no need of spoil.

23 Her husband is known in the gates, when he sitteth among the elders of the land.

25 Strength and honour are her clothing; and she shall rejoice in time to come.

28 Her children arise up, and call her blessed; her husband also, and he praiseth her.

31 Give her of the fruit of her hands; and let her own works praise her in the gates.

True contentment is a special gift from God. Let us take advantage of it , live in it, be a example of it to our children, and reap the benefits as a family.

1 Timothy 6:6-7 (KJV)

But godliness with contentment is great gain.

For we brought nothing into [this] world, [and it is] certain we can carry nothing out.

Learn To Be Content.


If you have enjoyed this post please

like, subscribe & share

and leave questions or suggestions In comments below!

God bless!

A SIMPLER LIFE


Other Post You May Like https://www.asimplerlife.net/post/best-things-to-freeze & how to cook/prep/freeze chicken in pressure Cooker.

struggling to stay in your grocery budget?

https://www.asimplerlife.net/post/how-to-declutter-lower-you-re-grocery-budget

Dinner Tips For A Simpler Preparation!

https://www.asimplerlife.net/post/7x-dinner-tips

Related Links

Creamy Orange Breakfast Smoothie

This recipe may fool you.. sorry, it is NOT a bit healthy but it is sooo good!!

If you have the occasional sweet tooth and wish for something to sip it away, this recipe has you covered! And yes,

IT IS SO EASY!


You Will Need

*1 (6oz) can of frozen orange juice

concentrate

*1 cup of milk

*1/3 cup of sugar

*1/2 teaspoon of vanilla extract

*10 regular sized ice cubes.

How To-

1.Pour all ingredients into blender

2.Begin blending on low speed, slowly turn up to high until fine and frothy

3.Serve right away!

Yields- 4

(my portions yielded more like 2)????


Credits for this recipe go to my high school cooking classes taken through Abeka Academy . ❤️

Enjoy!

And check out my other recipes via links below!

Easiest Chip Dip Ever

http://wix.to/_kByCHI?ref=2_cl

Simple Peanut Butter Fudge, Only 2 Ingredients!

http://wix.to/aEBzCHI?ref=2_cl

A Simple Honey Barbecue Sauce

http://wix.to/X0B0CHI?ref=2_cl

Strawberry‘s On A Cloud

http://wix.to/4EB0CHI?ref=2_cl

If you enjoy these recipes please,

Like❤️Subscribe❤️ Share

Thanks!

A Simpler Life

A Simple Honey Barbecue Sauce

A TUESDAY TIDBIT

This recipe is so easy!

I invented this recipe myself and was surprised when my family actually liked it! lol (more like loved it). This one is definitely a keeper for our home!

The great thing is you probably have most of the ingredients sitting in your pantry.

The only “odd” ingredient I used is the coconut palm sugar . Once you purchase a small tub of it, it will last forever.

Also, if you need any other ideas to “justify” the extra grocery expense, then head on over to

(New Mercies) http://wix.to/LcCrDOE?ref=2_m_cl ..and try out Tiphanie’s AMAZING pepper chicken! Can I vouch for it?? Yes! That’s actually why I had the ‘palm sugar’ in the first place ????.

Enjoy!


INGREDIENTS-

1/3 Cup of ketchup

1 T. (Tablespoon) of honey

1/4 t. (teaspoon) of white vinegar

2x heaping T. (Tablespoons) of coconut palm sugar

1/4 t. (teaspoon) of onion powder

DIRECTIONS-

-Mix together wet ingredients, then add in

dry ingredients.

-Microwave in 30sec intervals until no

longer grainy. Be sure to stir in between.

-Use then or allow to cool then refrigerate

for later.


YIELDS-

This recipe yields a very small cereal bowl amount if made as stated. I did it this way for people to “try”.

It is super easy to double, triple,or even 5x.

I usually double when making as a dipping sauce for grilled chicken etc. for my family of 2 adults & 2 children.

I make it 5x for the “family” size bag of great value meat balls from Walmart.

Healthy To-Go Snack Hack

Is that even possible?!

I’ll haft-a admit, traveling a lot has been a serious challenge to my ‘very slow’ postpartum weight loss plan.

Since I was a little girl, I’ve always loved long road trips. There was just something exciting about seeing new sights, playing road games, listening to stories and snacking on, well… everything really. ????

To me, road trips were a fun excuse to splurge and that was perfectly fine when traveling only a handful of times per year.

But now, traveling every 1-2 weeks regularly, I knew I must find a new action plan.

Some people can travel and not snack at all, I tried that and it wasn’t for me.

My next solution was to pack several healthy snack options along with a couple ‘single portions’ of splurge snacks.

Unfortunately, I do not like too many healthy snacks but one thing I do love is cantaloupe.

That’s when I remembered seeing a YouTuber use thermoses for her children’s hot school lunches such as quesadillas etc.

If she could break the soup & hot cocoa thermos tradition, why couldn’t I?

As we prepared for our next road trip, I pulled out this tiny child size thermos my son received as a gift. I filled it with my diced fruit, grabbed a plastic fork, and Wa-La! I had cooled (very delicious) cantaloupe on the road!

The next time, our trip was a little longer, so I filled my large thermos with half of an entire cantaloupe. (And yes I ate it all!) but just imagine all of the junk food it replaced!

If you have never tried fruit in a thermos, I’m recommending it!

It’s a great way to pack a healthy snack or side to work, school , in your diaper bag, or yes, even for travel ????.

What untraditional items do you use your thermos for?

Feel free to share in comments below!

If you enjoyed this tid-bit post then don’t forget to

like ❤️subscribe ❤️share

And keep watching for more travel tips in the near future!

Mom’s Mexican Enchiladas

No joke, most anyone who has tried my Mom’s cooking will tell you, she has

‘the touch’ and that she LOVES Mexican food. Like seriously, I’m pretty sure she would forfeit all other types if we let her. No, Mom, don’t try it! ????

So Today, in honor of Mother’s Day I’m going to share my Mom’s famous enchilada recipe at the end of this post!

This recipe was revised by my Mother many years ago from an original recipe of an unknown source .

And… it has never been shared online since! It’s soooo good!!

(Skip to bottom for recipe!)


COOKING UP CHARACTER

I give my mother all credit to any head start I had on the basics of homemaking.

From cleaning, and cooking to organizing and planning, she can do it all and she can do it profoundly well.

I’m still amazed at all she can do and I am so proud to call her Mom.

Although I do admire my Mother’s many talents greatly, her talent is not where my admiration lies most.

What I admire most is the heart she has while doing all of these things. No matter what she’s doing, she does it to the best of her ability and to the Glory Of God.

whether you’re a “super mom” like my mom, or just the “average joe” like me,

always remember that elaboration is nothing without effectiveness.

Let us never forget, no matter how mundane the motherly task, we should be performing it to the best of our ability and with the joy of the Lord shining from our hearts.

I hope you enjoyed this post! Comments welcome below!

❤️ don’t forget to subscribe❤️


Mom’s Mexican Enchiladas

(revised by Patrina Stidham- AKA Mom )

Mexican is my Mother’s favorite food of all times. Hope you enjoy her famous enchilada recipe. A old unknown source original that she has completely revised.

You will need:

  • 1.25 lb finely ground burger (you could easily substitute for shredded chicken)
  • 1x family size can of ‘cream of chicken soup’ (or 3 small regular size)
  • 1x can of mild enchilada red sauce
  • 1/3 box of Velvetta block cheese
  • 1x small can rotel tomatos
  • 2x packs of regular size flour tortillas
  • 4x tablespoons of milk
  • 1.5 -2 packs of medium size tortillas
  • Optional toppings: sour cream, shredded lettuce, salsa, rotel tomatos, guacamole, extra enchilada sauce.

Directions:

  • Cook burger until finely ground and we’ll done.
  • Combine cream of chicken, half of enchilada sauce, and ground burger.
  • Heat open pack of tortillas in microwave to soften for approximately 30sec.
  • Fill each tortilla with one heaping tablespoon of hamburger mixture. (It will feel like way to little of an amount but it is plenty!
  • Roll tortilla tightly, line in a 9×13 glass baking dish . Tortilla should be about the same width as dish. Keep rolling and adding them in until pan is full and tight with filled tortillas.
  • Cut 1/3 block of velveta into about one inch cubes. Place in microwave safe dish with a approximately 4 tablespoons of milk. Microwave slowly in 30 second intervals, stirring between as needed. Add more milk if needed.
  • Once cheese is melted and smooth.

Pour over pan of enchiladas

covering all of tortillas .

  • Add as many drained rotel tomatoes as desired (leave off for less spice)
  • Cover with foil very careful not to touch the cheese with foil.
  • Bake @ 375 degrees on the middle or bottom wrack until thoroughly heated. Approximately 20min, give or take. Check frequently to make sure cheese does not burn.
  • Remove foil, place back in oven until cheese is golden .
  • Serve with optional toppings!

* recipe makes about two pans worth of filling but only one pan of enchilada. You will need to use a extra 1/3 of your velveta block to make a second pan . (Just make the cheese melt again) you will also need more tortillas. (I myself like to freeze the extra filling for a easy batch later or use it for quick quasidias later on in the week.)

*use a rubber spatula to spread a few tablespoons of the extra enchilada sauce on the bottom of glass pan. This causes much less sticking and cleanup to be much easier!


Hope you enjoy!

have a wonderful time planning for Mother’s Day this year!

Any questions related to recipe please post in the comment section below!

❤️ And don’t forget to like and ❤️subscribe & share by bar below!