“ How To Frost Cupcakes Like A Pro” is full for instruction and tips for DIY basic “store bought” style cupcakes. If you are looking for special designs and fancy icing techniques, this post does not include that.
Basic Instructions
1.Prepare Icing bag.
2.Add coupler & icing tip , screw together according to directions on package.
3.Add icing to prepared bag
4.Remove excess air from bag, AKA
5. “burp bag”
6.Frost your cupcakes …
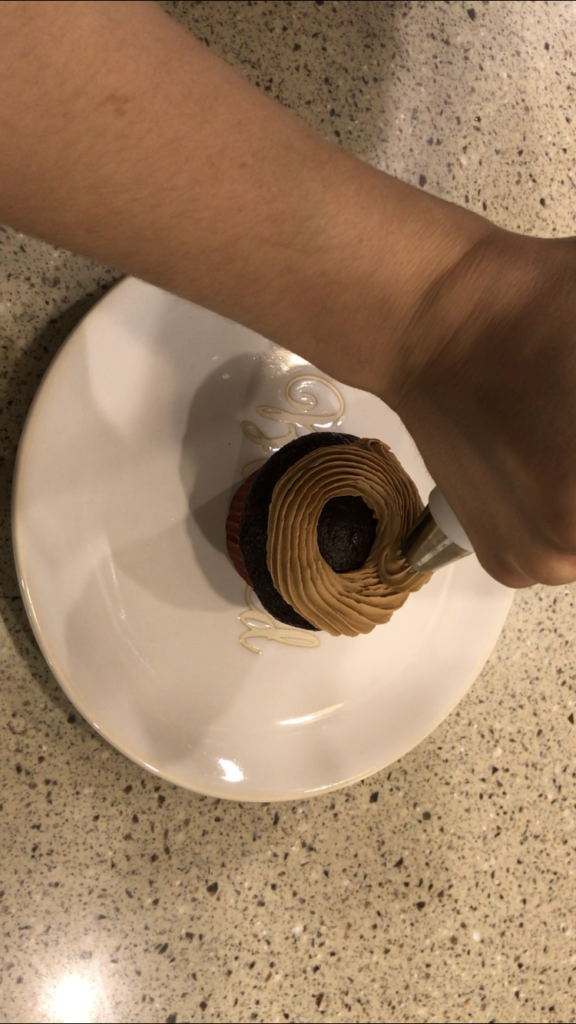
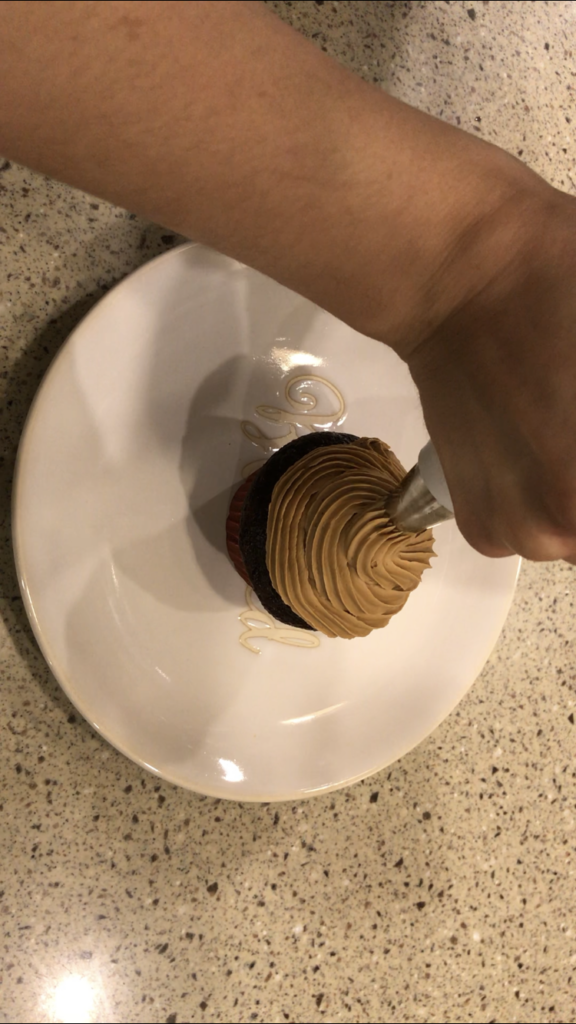
Pipe icing on the outer edge of the top of cupcake, continuously squeeze icing slowly while rotating around the cupcake in a circular motion, working your way from the outside to the center while overlapping just enough to build height in the middle.
7. Add cupcake toppers (optional) and that’s it!
For MORE detailed instructions, photos, & tips for success, on how to frost cupcakes like a pro, keep reading !
Detailed Instructions
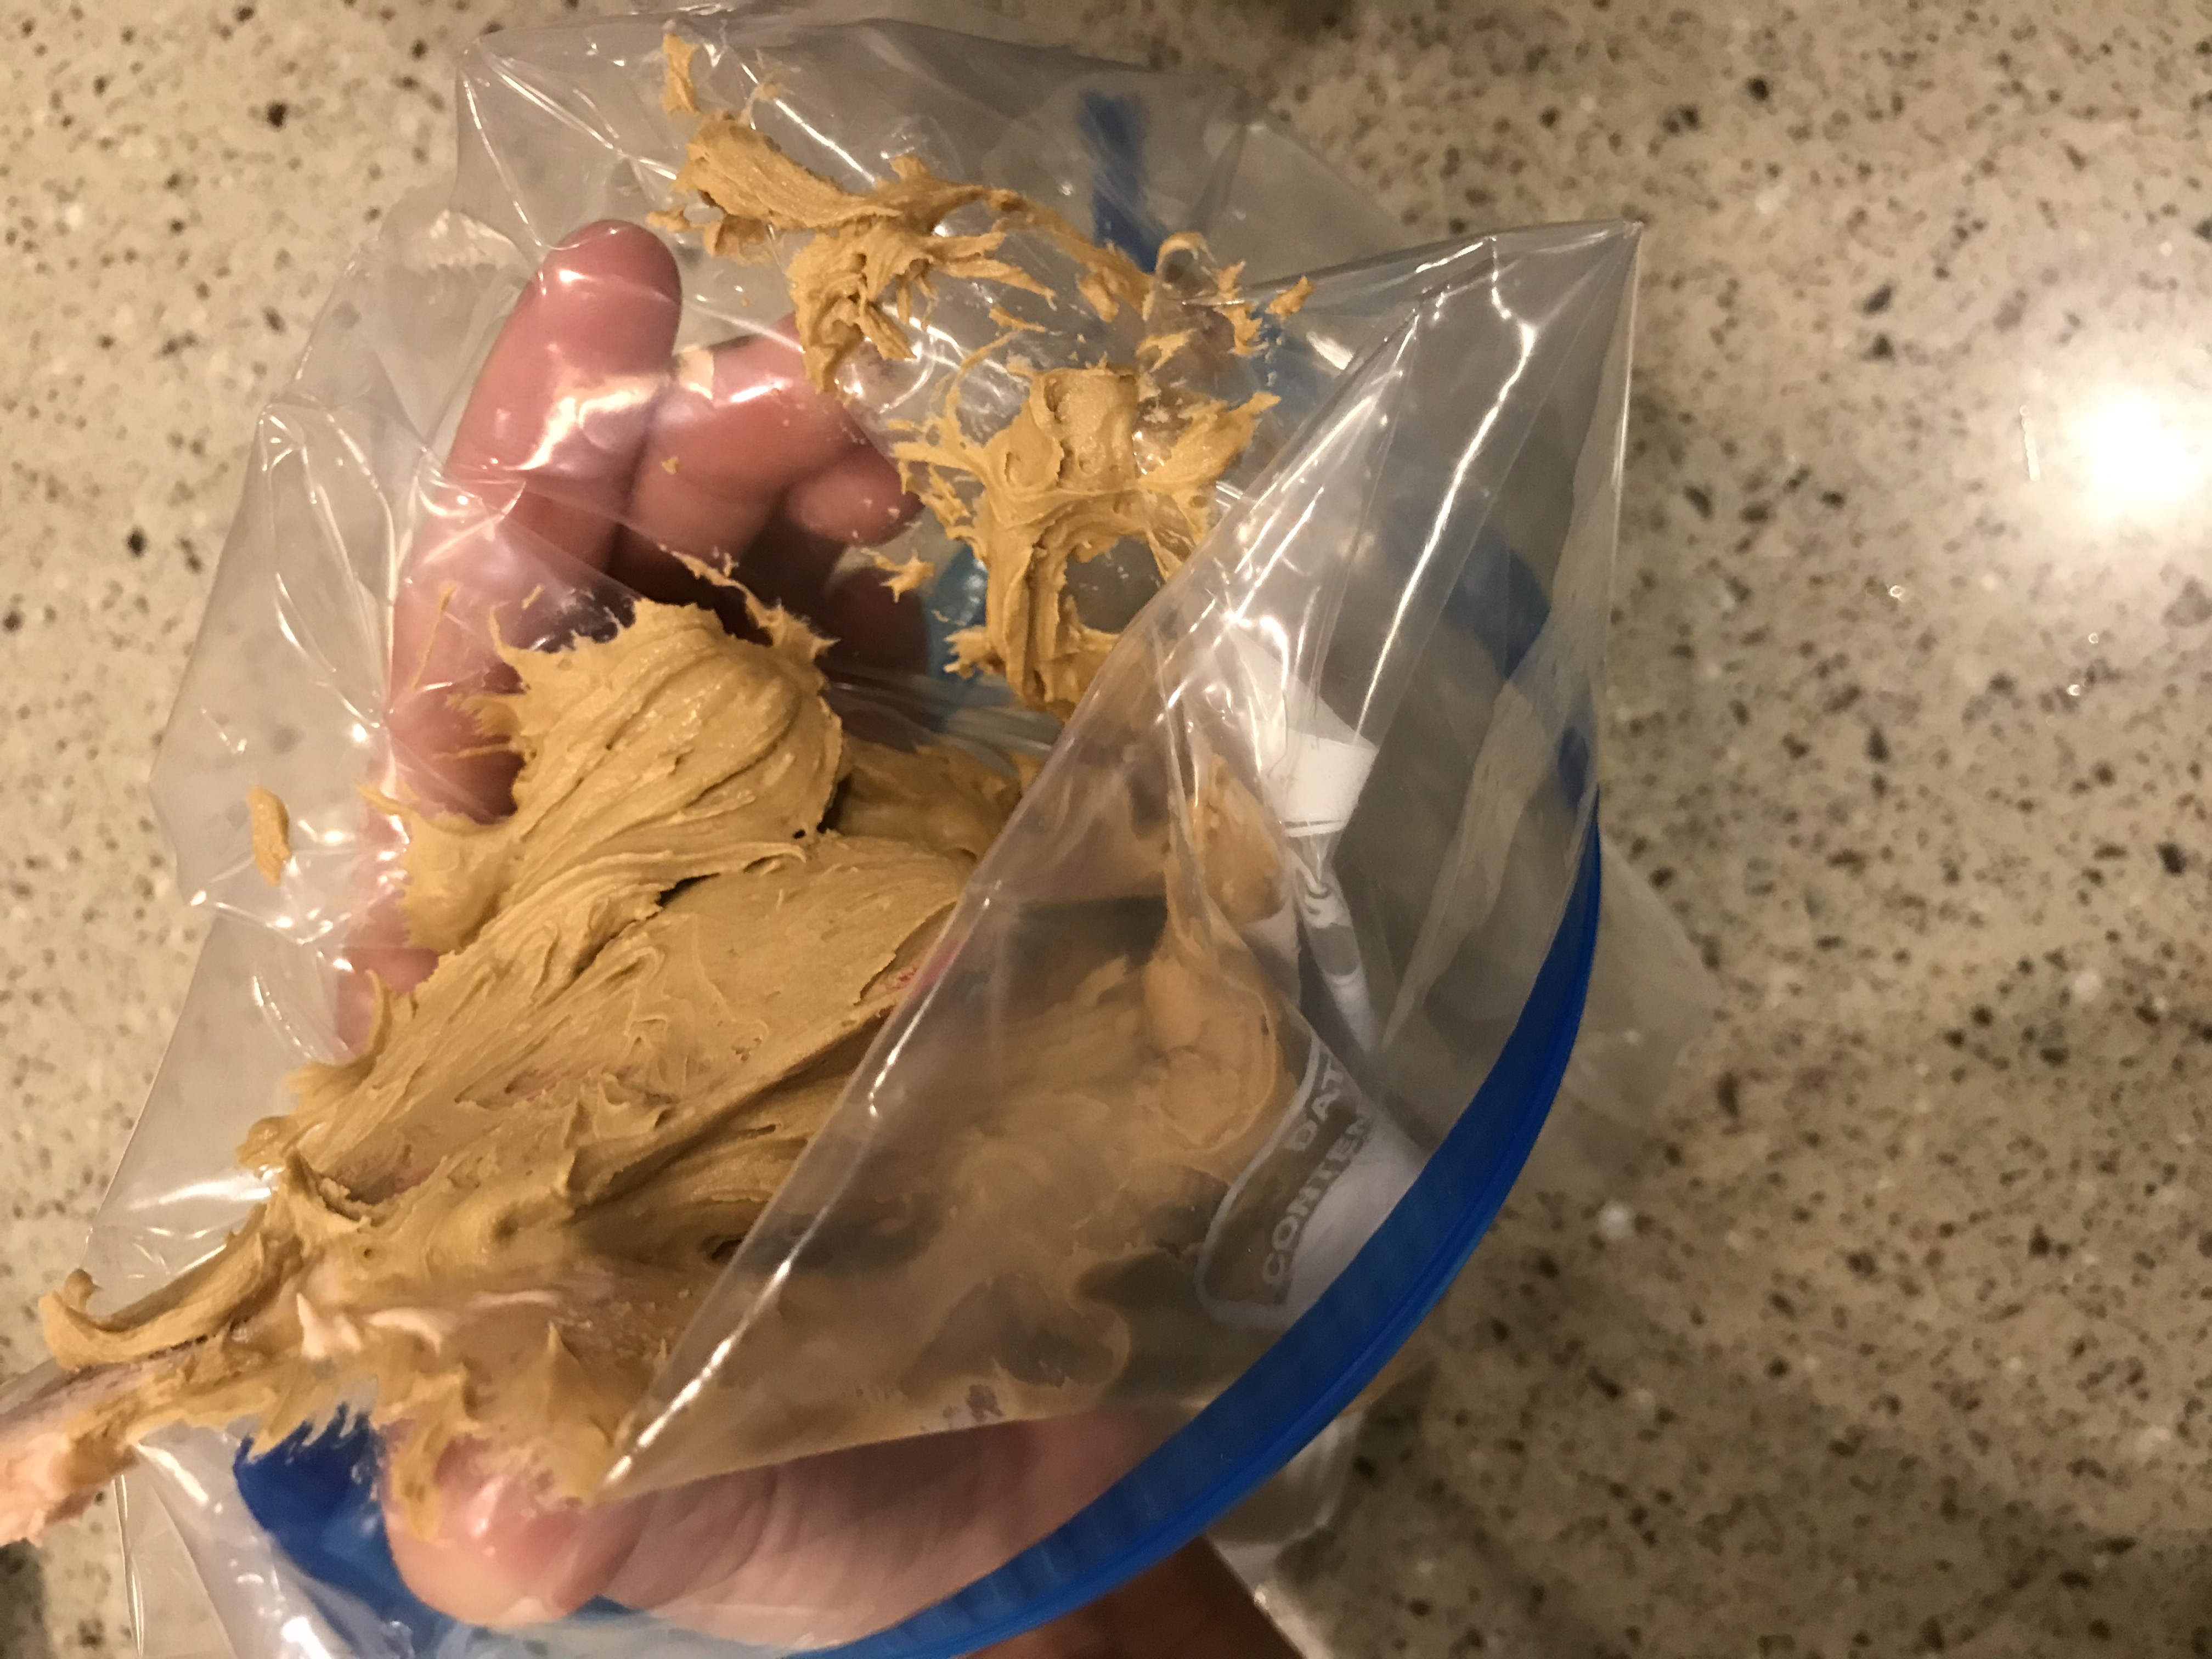
1. Prepare Icing bag. Place coupler into icing bag, add tip and screw together according to directions on package. You can use a gallon zip lock bag in place of icing bag.
*If using a gallon zip lock bag, cut one corner of the bag with scissors just large enough to fit plastic coupler snugly into hole. Continue on as with pastry bag.
2. Add icing to prepared bag. I recommend using a rubber spatula or butter knife for this part. Drape bag over your hand to prevent getting icing on the edges and outside of your bag. Fill bag about 3/4 full.
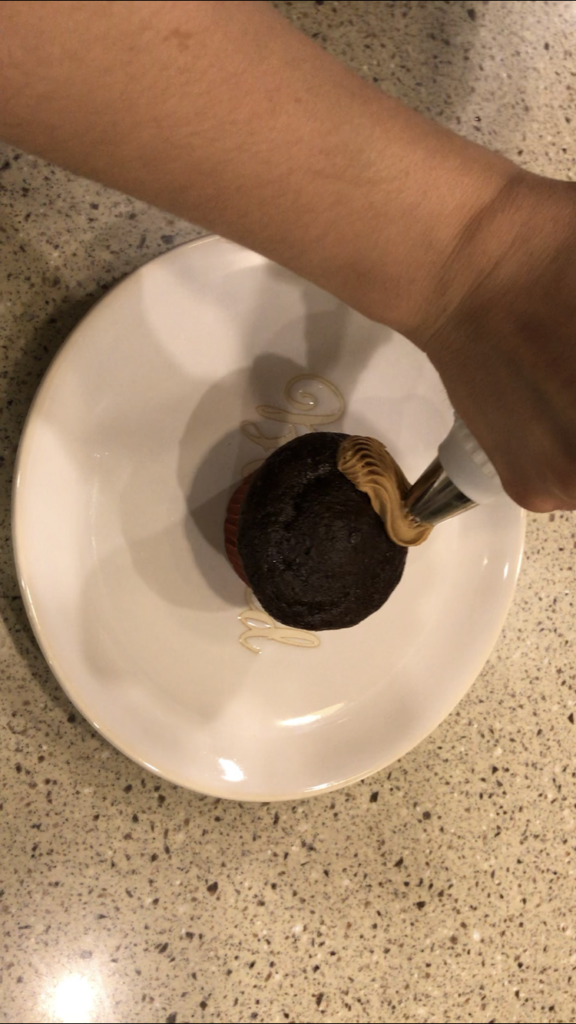
3. Remove excess air from top of bag ,AKA “burp your bag”. To do this, simply squeeze out as much air as possible from top of bag before closing off with a twist. Holding bag close at the twist, use your second hand to help support & squeeze out several inches of icing to remove any air bubbles trapped at the tip. Keep squeezing until your icing comes out smoothly with no air pockets. Now you are ready to frost those cupcakes!
4. To frost your cupcake Continue holding your icing bag closed at the twist, begin frosting your first cupcake by piping icing on the outer edge of the cupcake, continuously squeeze icing slowly while rotating around the outer edge of the cupcake in a circular motion working your way to the center. You will want to overlap icing just enough to build height all the way in to the center.
How To Add “Theme” To My Basic Frosted Cupcakes?
Frosting cupcakes like a pro is more then just adding icing!
Add Color
I like to start out with choosing matching or contrasting icing color & cupcake liners to match my specific theme or holiday.
If you want to color your own icing simply mix in a few drops or dabs of gel icing color. Start out slow and keep adding until you reach your desired color.
Use gel colors found in cake decorating section to prevent possible texture change and to achieve rich colors . I have used liquid food coloring in canned icing but make note that you do take a chance with the texture and darker colors will be hard to achieve.
Adding The Perfect Topper
Cupcake toppers come in endless options. Buy them, make them, repurposed them, but however you do it, a cute cupcake topper will add HUGE personality to your cupcake.
Here are a few of my favorite types of toppers.
1.Sprinkles
Sprinkles are cheap and have came a long way since my child hood days!
2.Fondant Figures
Like to play with play-dough ? Here’s your excuse lol. But really, fondant may require a little bit of Google research but the toppers you can make are so worth it! Check out my sons first birthday cupcakes I made on my first fondant adventure!
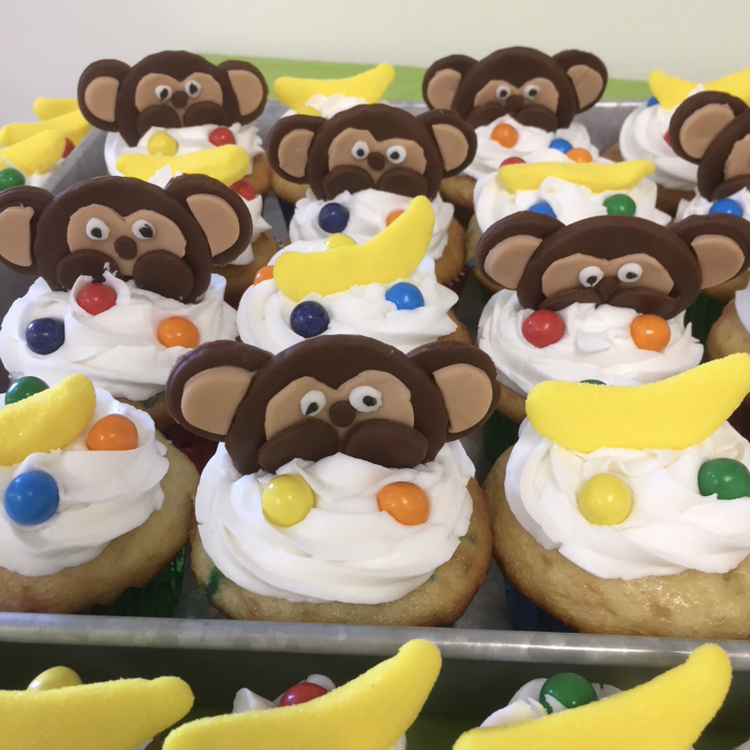
I made these little monkeys, with googles help, the very first time using fondant!
3.Chocolate figures
Pipe melted almond bark onto wax paper by cutting a tiny peep hole in a zip lock bag. Now you’ve got yourself a dainty little topper! I had so much fun making these!
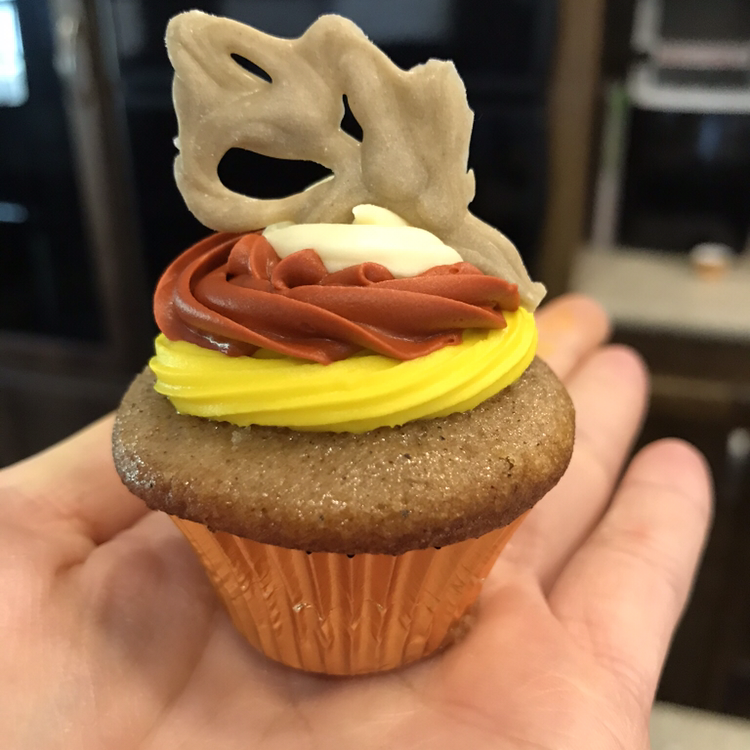
I piped these little fall leaf toppers out of almond bark using a Ziploc bag with the end barley snipped.
Pipe them on wax paper and let them dry!
4.Candies
Who doesn’t love picking candies off of cupcakes?
5.Little toys or figurines
Make sure they are big enough to not be mistaken as edible! This is a great option for children’s birthday parties! Think Hot Wheels, Barbie accessories, etc.
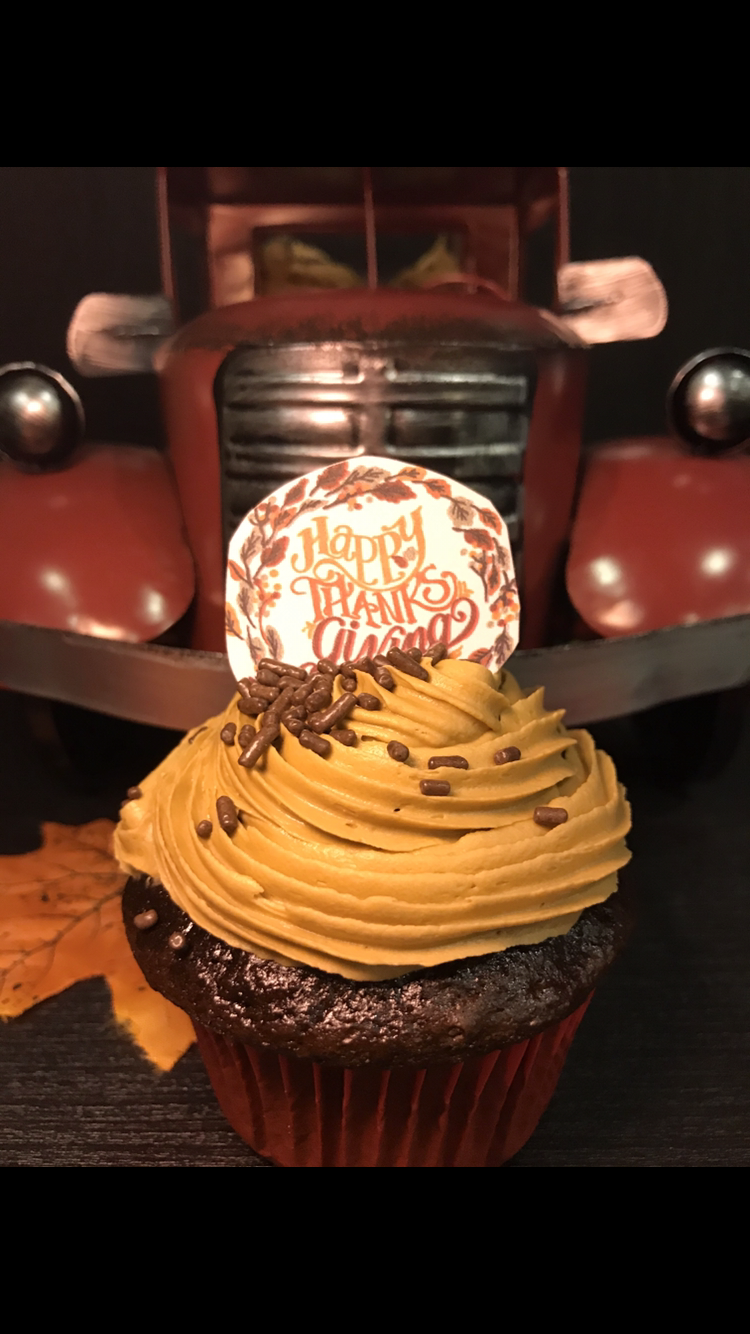
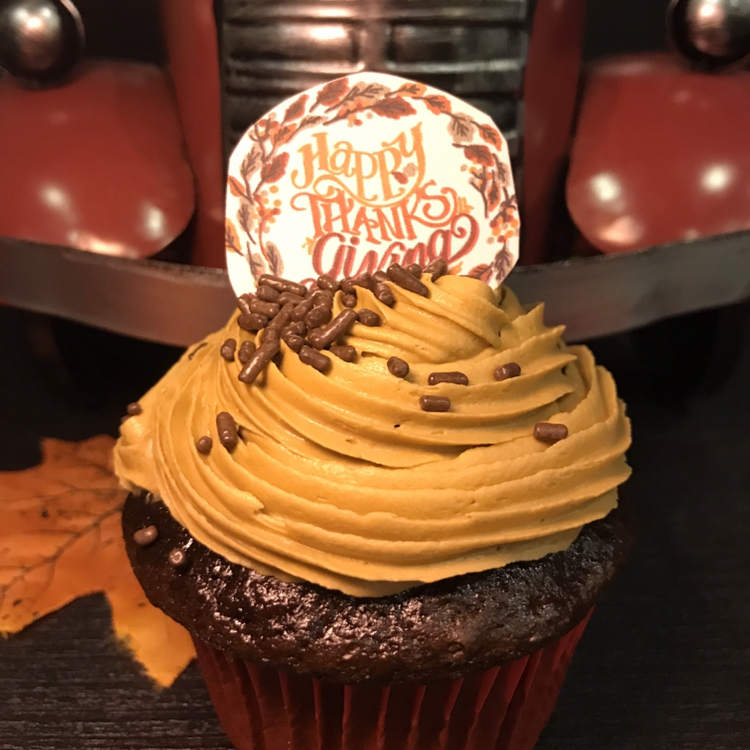
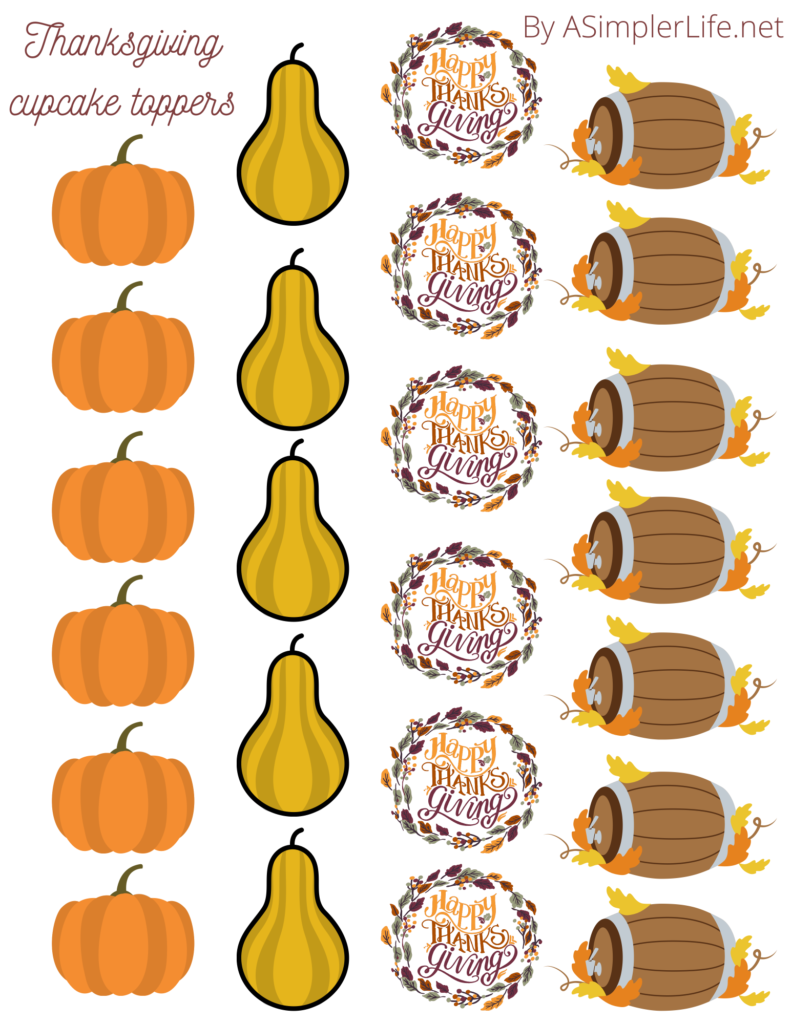
6. Traditional cupcake toppers
You can purchase these from many stores with the sprinkles etc. They are so cute and easy to use. You can also make your own Thanksgiving ones by printing my FREE printable HERE! All you need is a printer, a sheet of laminate ,scissors, and a few minutes.
- Print the sheet below.
- Laminate front and back of paper with self laminate (link below)
- Cut out pictures just outside of photo,leaving a laminate clear edge for best sealing. Don’t kill yourself over the details when cutting.
- Stick laminated toppers directly into cupcakes!


Tips For Success
*Try using the large star tip for a real professional “store bought” look verses the small star. This does use more icing but it looks amazing and makes frosting cupcakes a much quicker process.
*Try using Wilton’s decorating icing recipes for good, stable, icing that won’t slip. Keep reading for my personal favorite.
*Making icing can also save you a lot of money, if you don’t need the large amount the recipe makes, try freezing half of it in freezer bags. According to Wilton, their Icing freezes up to 6 weeks (I’ve found it to taste great for 6 months, though lol 😜).
*Don’t want to make icing?
Blend powdered sugar into canned icing to thicken it for better piping or you can purchase decorating icing by the tub at most local Walmart’s now.
*Hate icing clean up?
*The gallon size disposable zip lock bag is the piping bag for you!
*Don’t icing all the way to the edge, begin about 1/4 inch in leaving a little cup cake showing on the edges. This leaves room for icing to settle without slipping over the edges. It also allows people to see what flavor cake they are choosing & it just looks neat and professional.
*Stay away from white or pastel cupcake liners, their color seems to disappear after baking. Dark colors or foil liners look best.
*Bake your cupcakes ahead of time. Make sure they are completely cool before frosting. I prefer to cook mine the day before, cool, and cover, until ready to icing.
*Another option (my favorite) is to make them up to 3 months ahead, cool, and place carefully into gallon zip lock bags then freeze. Thaw at room temperature for a hr or two before frosting and about 3 hours before serving.
*Be sure to remove cupcakes from cupcake pan before frosting. I like to arrange mine on a platter or plate before decorating for easy maneuvering.
What cupcake recipe do I use?
I personally like to use generic box cake mix. It’s quick & easy, leaving me time to focus on the decorating.
There are a few ways to spruce up box mixes, here are a few to try!
- You can exchange the water in the recipe for milk , soda, or extra oil
- Exchange the oil listed for any other fat you enjoy cooking with such as melted/ cooled unsalted butter or coconut oil.
- Some people say to add a dab of sour cream to cake mixes
- I love to add chocolate chips to chocolate cake
What icing do I recommend For Frosting Cupcakes Like A Pro?
My favorite cupcake icing is Walmart bakery’s which they often sell by the tub. However, this can get a bit pricey so I often make my own from this Wilton recipe shown below. If you need a lot of icing, this can really save you some money!
A third alternative for quick jobs is small canned icing off the shelf. You will need to “stiffen” it by adding powdered sugar to get a good stiff frosting.
Easy Vanilla Buttercream Icing,By Wilton (original post linked below)
You will need
-1/2 cup solid vegetable shortening*
-1/2 cup (1 stick) unsalted butter, softened
-4 cups sifted powdered sugar (confectioners’ sugar)
-2 tablespoons milk or water
(I usually use more)
-1 teaspoon vanilla extract
(pure or imitation)
-food coloring or icing color (optional)
Directions
1. Mix butter and shortening on medium speed until light and fluffy.
2. Beat in the vanilla extract
3. Gradually add the powdered sugar, one cup at a time with mixer on lowest speed. Once sugar is somewhat incorporated, turn speed up to medium. Continue this process while scraping sides until all sugar is added. Frosting will be dry and stiff. (If icing becomes too stiff for your mixer, you can add a Tablespoon of milk, otherwise wait until the next step to add milk)
4. Gradually add 1 Tablespoon of of milk at a time until the desired consistency is reached while still mixing on medium speed. Icing should be light and fluffy but still stiff enough to hold very firm form.
5. Make sure all the ingredients are incorporated by scraping sides of the bowl once again.
6. Once you have the desired icing consistency & taste add desired food coloring in small amounts until you reach the color you want . (Use gel colors found in cake decorating section to prevent possible texture change and to achieve rich colors)
Frosting should be stored in an airtight container and can be frozen for up to 6 weeks.
Wiltons Troubleshooting Suggestions
• Air bubbles: To avoid creating air bubbles, make sure to use the paddle attachment instead of the whisk attachment on your electric stand mixer.
• Too stiff or too thin: If your frosting is too thin, add small amounts of powdered sugar until you reach the desired consistency. If too thick, add small amounts of liquid until the desired consistency is reached.
• Grainy consistency: Make sure your ingredients are all room temperature to avoid a grainy or gritty consistency.
• To preserve while in use: Depending on the weather and humidity, your buttercream may start to crust over. To avoid this, cover your frosting bowl with plastic wrap.
Link to original recipe hereEasy Vanilla Buttercream Frosting | Wilton
Don’t Disregard The Display !
Now that you know how to frost cupcakes like a pro, don’t forget to plan a cute way to display your cupcakes. Here are a few tips!
- Dollar stores have many cute food platters that work great.
- You could purchase or make your own cupcake stand out of household items.
- cover a piece of cardboard or ugly platter with foil. For a quick silver “platter”
- Google cupcake display ideas
- Set cupcakes directly on table in a pretty shape. A Heart, related number, or even Christmas tree would be cute!
- Set cupcakes directly on table and tuck some decor around them you won’t even be able to tell there is no platter present.
- Don’t forget to use your imagination! The options are endless when you are the creator. ❤️
Related Links
If you have amazon prime you can these items below well before thanksgiving! Want to try it? Here is a FREE trial! get in some Christmas shipping real fast with Amazon Prime’s TWO DAY shipping! plus many other benefits.
https://www.amazon.com/amazonprime
Large Wilton Icing Coupler I Use For Cupcakes https://amzn.to/3kZ3nYz
Brown Wilton Fondant I Used For Monkey Toppershttps://amzn.to/325oFwX
Self Laminate (no machine needed) for my printable cupcake toppers. Click on quantity 2piece for a lower price!https://amzn.to/30n4jhK
If you have enjoyed this post, please
like, subscribe. and share, below!