Simple Peanut butter cookies with low carb option!

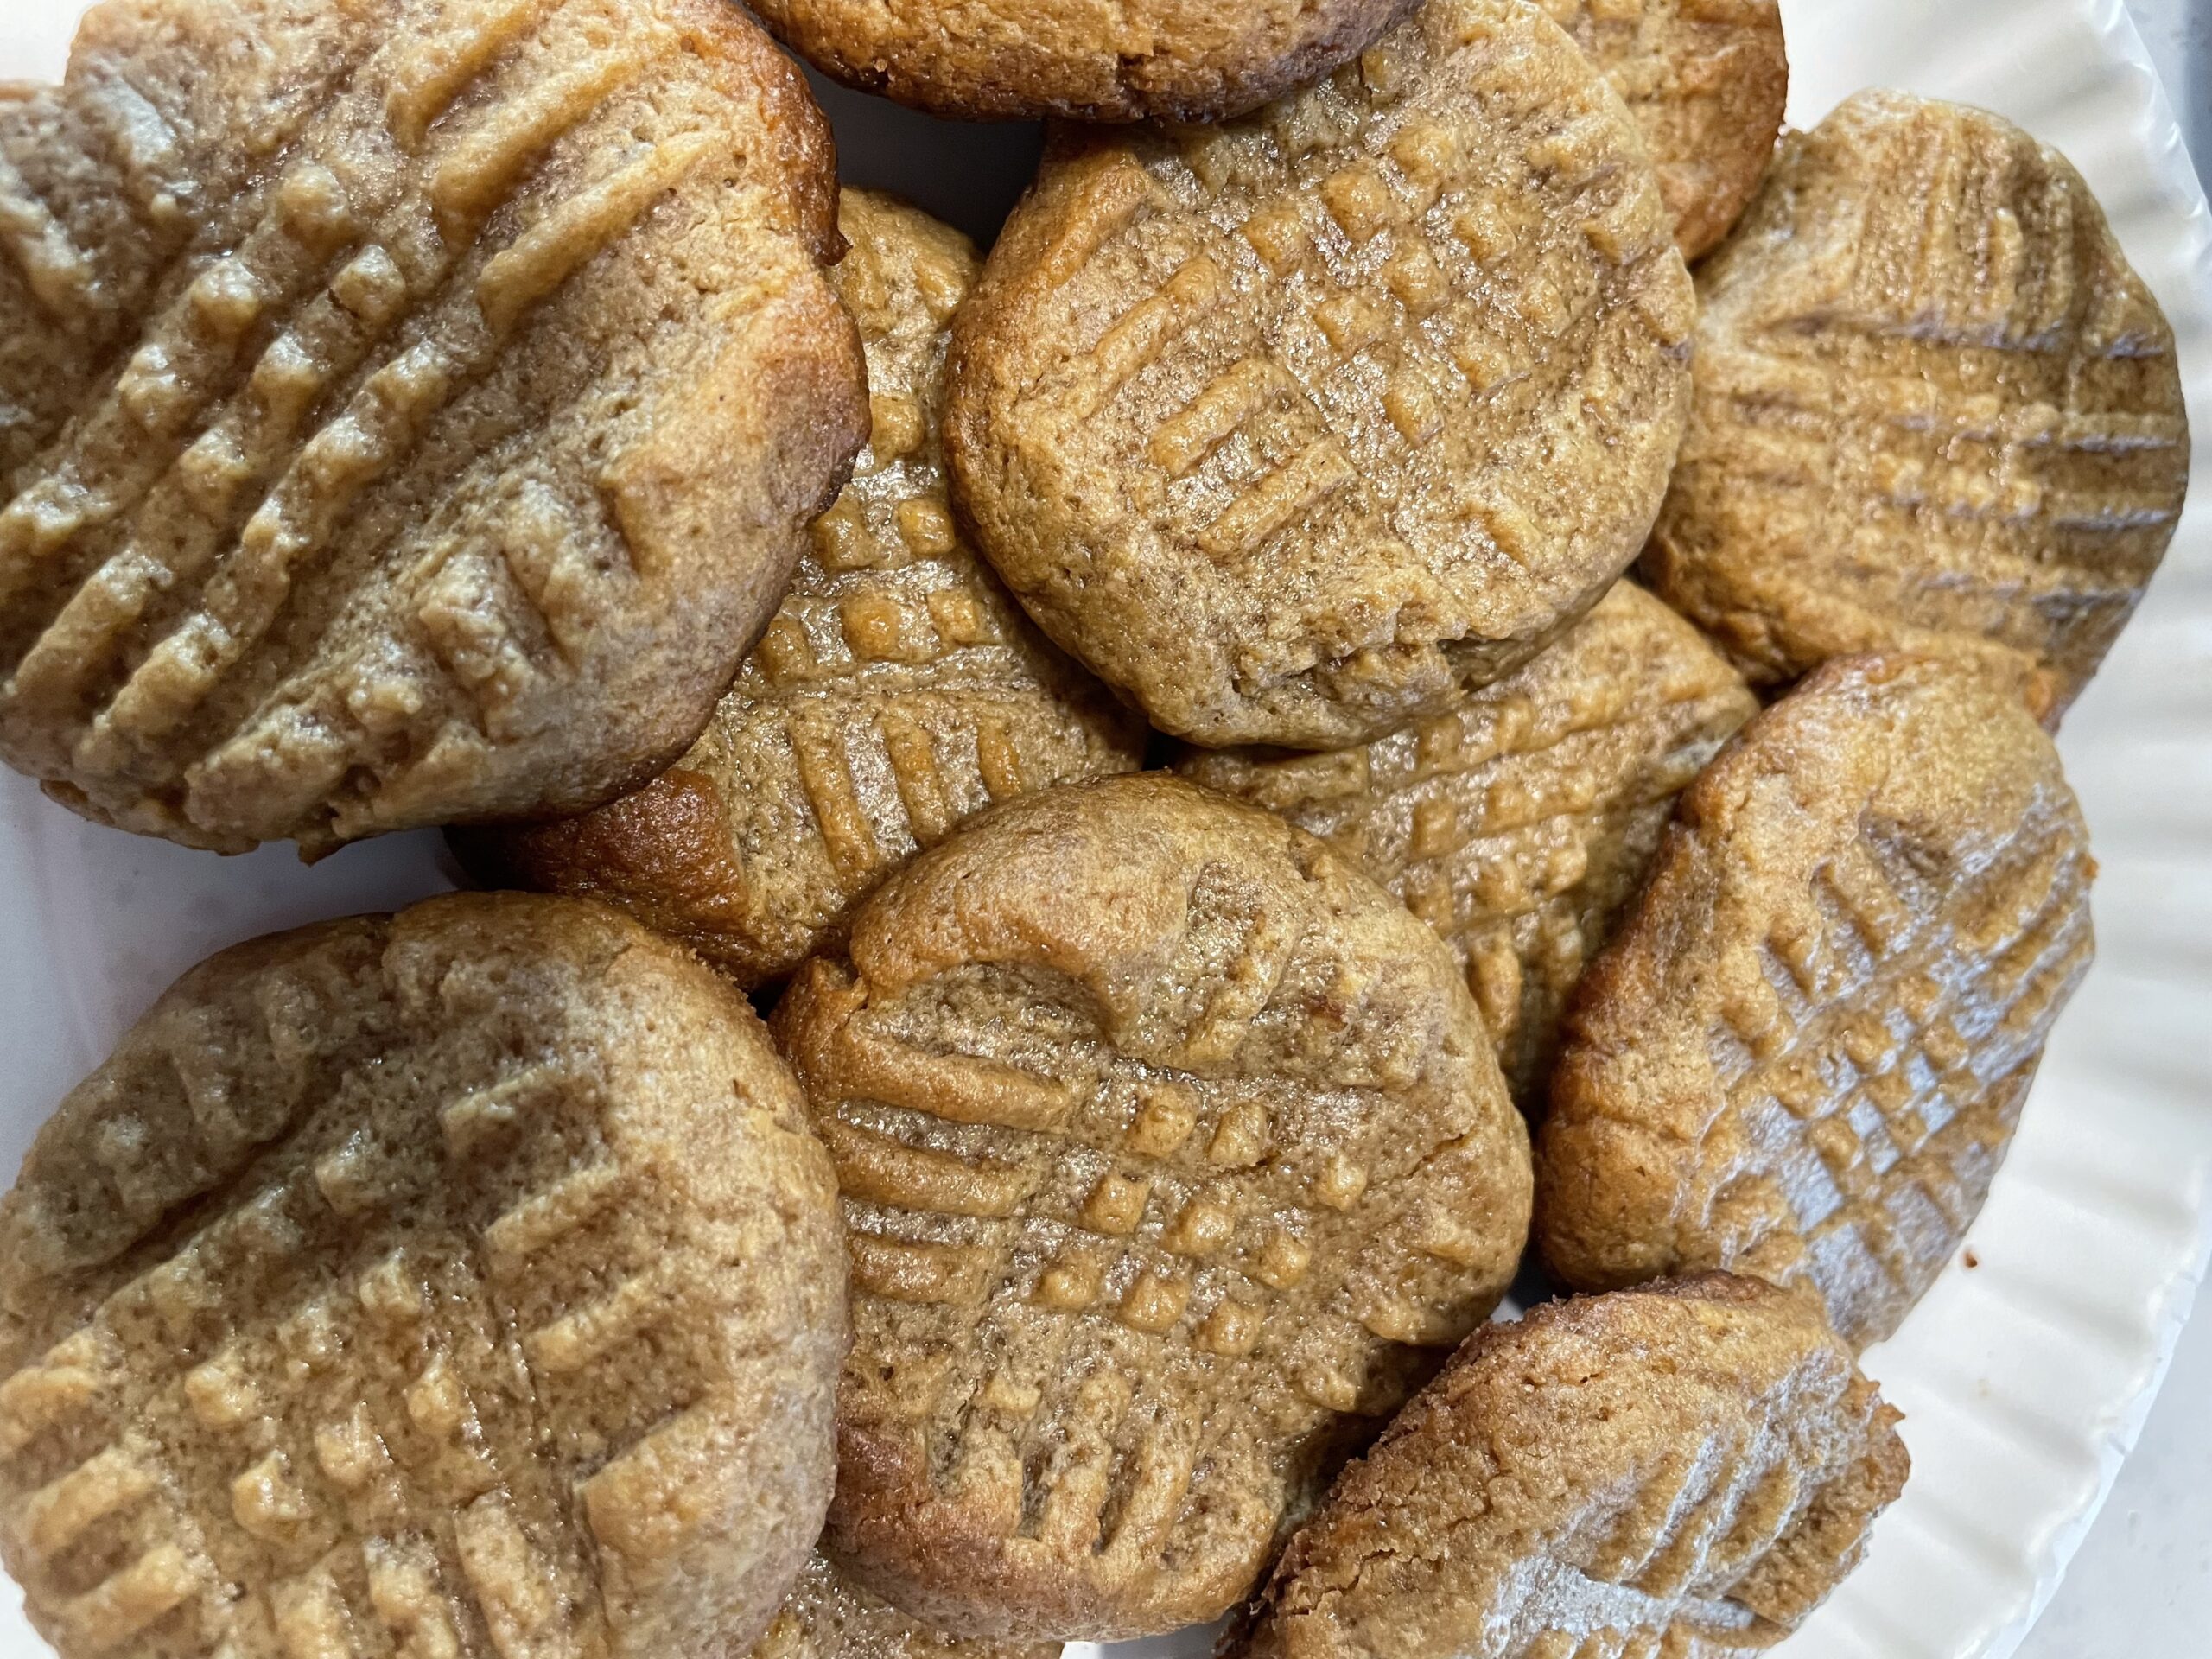
These super simple peanut butter cookies are SO easy & SO good!

With only 3 ingredients, that you probably have on hand.. you can whip up a batch of these in a matter of no time. Be sure to make extra of these simple peanut butter cookies for later! (PS they freeze well too!)

Did I mention the low carb option? Yes! Yes! Whoop! You can eat REAL peanut butter cookies, LOW CARB by substituting only one ingredient! They taste very similar to the original recipe with just a tad different texture (they are a bit softer) and a tad different taste. But seriously, my husband who detest all low carb foods 😂, he even likes them!

Now that you’re excited (or at least I am)😂. Let’s make some simple peanut butter cookies!

You will need

  • 1 cup peanut butter (I use great value creamy)
  • 1 large egg
  • 1 cup brown sugar

Substitute for low carb simple peanut butter cookies

  • Stevia brown sugar (you will use the Stevia 100 percent brown sugar substitute to replace your regular brown sugar. (Substitute in equal amounts.) All other ingredients remain the same.

How to make super simple peanut butter cookies

  • Dump ingredients in bowl (starting with egg to avoid losing egg shells)
  • Mix together with whisk, fork, or spoon until combined.
  • Scoop onto pre-greased or lined panned with heaping teaspoon full or roll each heaping teaspoon into a smooth ball for neater looking cookie. Should yield approximately 19 cookies.
  • Mash with flat side of fork twice crisscrossed, to make the well known “peanut butter cookie” markings
  • Bake! I bake my cookies around 400 until edges are starting to golden. (Usually 15min or so) BUT I have a RV oven with no top burners. Therefore, my cooking time and temperature may be MUCH different than yours! I would suggest starting at a temperature of 375 and watch for golden edges. If there not getting any where after 10min, consider increasing temperature. Don’t leave the cookies for long! They may get done much quicker in a regular household oven probably closer to 8-10min! Don’t forget to write down your oven time & temp for future references.
  • Allow cookies to cool on pan for 10min then carefully move to a cookie sheet for quicker cooling or leave on pan until completely cool. These cookies will break VERY easy while warm. Use a very thin spatula to move them and if one breaks, let cool longer.

NOTE- I like the taste of these cookies best cooled at room temperature.

Comment

I’d love to hear if you make these simple peanut butter cookies and how long it took your oven and at what temperature. Also, let me know if you tried the low carb version and what you think.

Nutrition Value

Yield- 19 cookies

Serving size- 1 cookie

Calories- 80 calories per cookie

Net carbs- 3.5 net carbs per cookie


In case you want to make different size cookies or your batch turns out different than mine, here is the “total calories & net carbs”!

Calories for ENTIRE batch of batter- 1,518

Net Carbs for ENTIRE batch of batter- 64.5

* Simply divide the total amount of calories (or net carbs) by the amount of cookies in your batch for the exact nutrition of your cookie!


Love this recipe? Consider subscribing to my blog! You will receive alerts to more post like this! Plus access to a entire page of FREE Printables (Adding new one regularly!)😜

Subscribe

YES! I Want to receive post alerts & password protected content as a “Subscribed Homemaker”!

We don’t spam! Read more in our privacy policy

How to make a low carb cheesy omelet

Today I want to share with you a recipe to make a delicious EASY low carb cheesy omelet!
you may be wondering …

Why should I learn to make A omelet when I like eggs just fine..

Here are just a few reasons you may want to stick around to try my low carb cheesy omelet recipe and consider adding it to your cook book 😜.

  •Omelets are very budget friendly 

  •Cheesy omelets are low carb 

  •Omelets get rid of the plain egg rut 

  •They can be very filling 

  •Omelets are very versatile 

  •Eggs are good for you

•They are just so yummy!

What you need to make this low carb cheesy omelet

2 large Eggs 

Jar of powdered parmesan cheese

1/3 – 1/2 cup Mozzarella cheese (shredded)

Parsley flakes (optional)

Frying oil of your choice (I used canola)

7 in skillet

Directions to make your low carb cheesy omelet

  1. Heat oil in a 7in skillet on medium to low heat until hot (I used non stick pan) You want just enough oil to cover your pan but not so deep that your omelet is soaking. Tip- add drops of oil as needed between omelets.
  2. While oil is heating, whisk 2 large eggs together in a bowl
  3. Completely cover whisked eggs with powdered Parmesan cheese then add just a touch of parsley flakes for color.
  4. Whisk all together well
  5. Pour egg & parmesan mixture into oiled/heated skillet
  6. Cook until egg is cooked on bottom and almost set on top (a tad runny) . If you wait until the top is thoroughly cooked, your omelet will break when folding but if the top has a lot of runny then your cheese will run out with the egg.
  7. Add desired amount of shredded mozzarella cheese to one side of the omelet and fold the other side over top of the cheese, in half with a rubber spatula.
  8. Continue to cook until the mozzarella cheese is melting and the top of the egg is complexity cooked. This should only be a minute or two. 
  9. Carefully remove cooked omelet from the pan by lifting the edge with a rubber spatula, then sliding a traditional spatula or tongs carefully under the omelet. 
  10. Serve alone or with “toppings”

(Yes there are 2 eggs under all that Parmesan 😂)

Topping ideas to serve with your low carb cheese omelet are…

•Salsa
•Sour Cream
•Guacamole
•Pico
•Hot Sauce
•White Gravy
• Or for my husband…ketchup 😂

They are so customizable!

These cheesy omelets have so much more flavor then you can imagine!  I really like the simplicity of the cheese flavor but keep in mind, these omelets can be customized so easily by adding things like cooked bacon, sausage, greens, onion, or you name it!   

Questions & Answers

Why is the outside of my omelet so brown? 

 The parmesan in the egg browns very prettily and taste amazing. It may look a little different then the omelet colors you are used too. 

Can I used different types of cheese?

  Of course! Just note, the more cheese you use, the more greasy the omelet may be. 

Do I have to use a 7 in skillet? 

Probably not but the 7in skillet fits the exact size of the omelet, therefore it produces a perfect shape and even thickness for the cheesy omelet. 

Can I use egg beaters instead of whole eggs?
Yes! Just be sure to use 2 large eggs worth. 

Can I freeze my omelets? 

 Sure can! I personally have not froze any (yet) but I definitely plan to by using the recommendation of other wonderful cooks! How to Make an Omelet Recipe | The Recipe Critic says you can freeze omelets up to 3 months! Reheating the omelets is super easy. Heat on microwave safe plate for 1-1.5 min and flip half way between. After that, heat in 30second increments until omelet is fully heated. 

Tips for makings your low carb cheesy omelet taste & serve amazing!

•Cut omelets in half to go farther or when serving children 

•Get creative with dips or toppings to appeal to different appetites 

•Pre cook all meats before folding into omelet

•Try serving omelets with an evening meal , where I’m from breakfast is always better of the evening.

•Get creative with dips or toppings to appeal to different appetites 

•Make sure oil is heated well before poring egg into pan. a good way to check is to sprinkle a drop if water on pan, if it sizzles its ready.

If your stove usually over heats things or if you are using a iron skillet, try lowering your heat to prevent burning your cheesy omelet.

Add a couple pieces of bacon on the side and a glass of almond milk for a filling low carb breakfast!


In closing

I hope you have enjoyed this recipe for a low carb cheesy omelet. feel free to check out some of my other recipe and cooking post linked here below and don’t forget to like and subscribe for regular post updates and special content! Happy Homemaking 😊

Subscribe

YES! I Want to receive post alerts & password protected content as a “Subscribed Homemaker”!

We don’t spam! Read more in our privacy policy

Best things to freeze

7 Dinner Tips

Chocolate gravy

Three ingredient apple crisp

My “sweet” diet coffee

My mom’s ORIGINIAL homemade encheladas

Quick & Easy 5 Minute Bacon Ranch Cheese Ball

5 minute cheese ball snow man

Is a 5 minute cheese ball possible with all of that shredding and chopping to do? Wait.. this recipe doesn’t have any shredding or chopping, it’s a mix only cheese ball! You heard it, a true 5 minute cheese ball with nothing but a bowl to clean up. ❤️

This quick & easy cheese ball is perfect solution to your holiday rush and for those ‘in between’ Christmas events that seem to sneak up on you.

Ingredients For Quick & Easy Bacon Ranch Cheese Ball

2 Packs Of (16 oz) Cream Cheese

One half-one whole (1oz) pack of ranch dressing powder mix (start with half of the pack then add more to taste)

1 pack (2.5 oz or similar) of real bacon bits

1 (16 oz) bag of cheddar cheese (I like sharp best)

5 minute cheese ball ingredients
Use two of the cream cheese shown above

Quick & Easy Preparation

Allow cream cheese to soften (optional but best)

Mix all ingredients in a bowl until evenly mixed.

Shape cheese ball into a smooth ball

Wrap in plastic wrap

Store in refrigerator

Serve with Ritz style crackers! So yummy 😋

FAQ

How long will my cheese ball stay good?

A long time! Check the dates on your cream cheese and shredded cheese before you make it to give you a better idea . Keep in mind, the ingredients you are using usually last a good while in the refrigerator. Just be sure to wrap the cheese ball good after each use to keep air off of it. I’ve yet to have this cheese ball go bad on me and I’ve had one up to 2-3 weeks in my fridge!

How many crackers should I bye ?

I usually purchase 2 boxes of generic “Ritz” crackers to take along with my cheese ball. Yes, I often bring some home but you will still serve them with the leftover cheese ball anyway.

Can I substitute the bacon bits?

Yes! I like to use bacon bits for convenience (no shredding etc) and I like the “bacon ranch” thing . But any kind of meat would work. Just remember that changing ingredients may affect the “stay good” date.

Can I use generic products to make this cheese ball?

5 Minute Cheese Ball Tips For Success

Use disposable rubber gloves to skip the gooey mess! You can also substitute for sandwiches bags, or plastic disposable gloves, they are just a little more tricky to keep on. If you really love making cheese balls, “invest” in a reusable pair of rubber gloves that can be used for cheese ball, meat loaf and anything else you might dig your hands into in your kitchen.

Display your cheese ball on a cute platter with crackers around it to add attractiveness.

Shape your cheese ball into a adorable little snowman with a few extras from the veggie tray.

Do not store your left over crackers in the refrigerator , this makes them soft. Put them in a ziplock baggie before wrapping your cheese ball for the fridge.

Serve your cheese ball pre spread on crackers by making cheese ball cracker sandwiches.

In Closing

If you have enjoyed reading this recipe and would like to see more like it, please Like, subscribe, and share below!

If you have made a cheese ball similar to this one, feel free to comment below on it !

Merry Christmas!